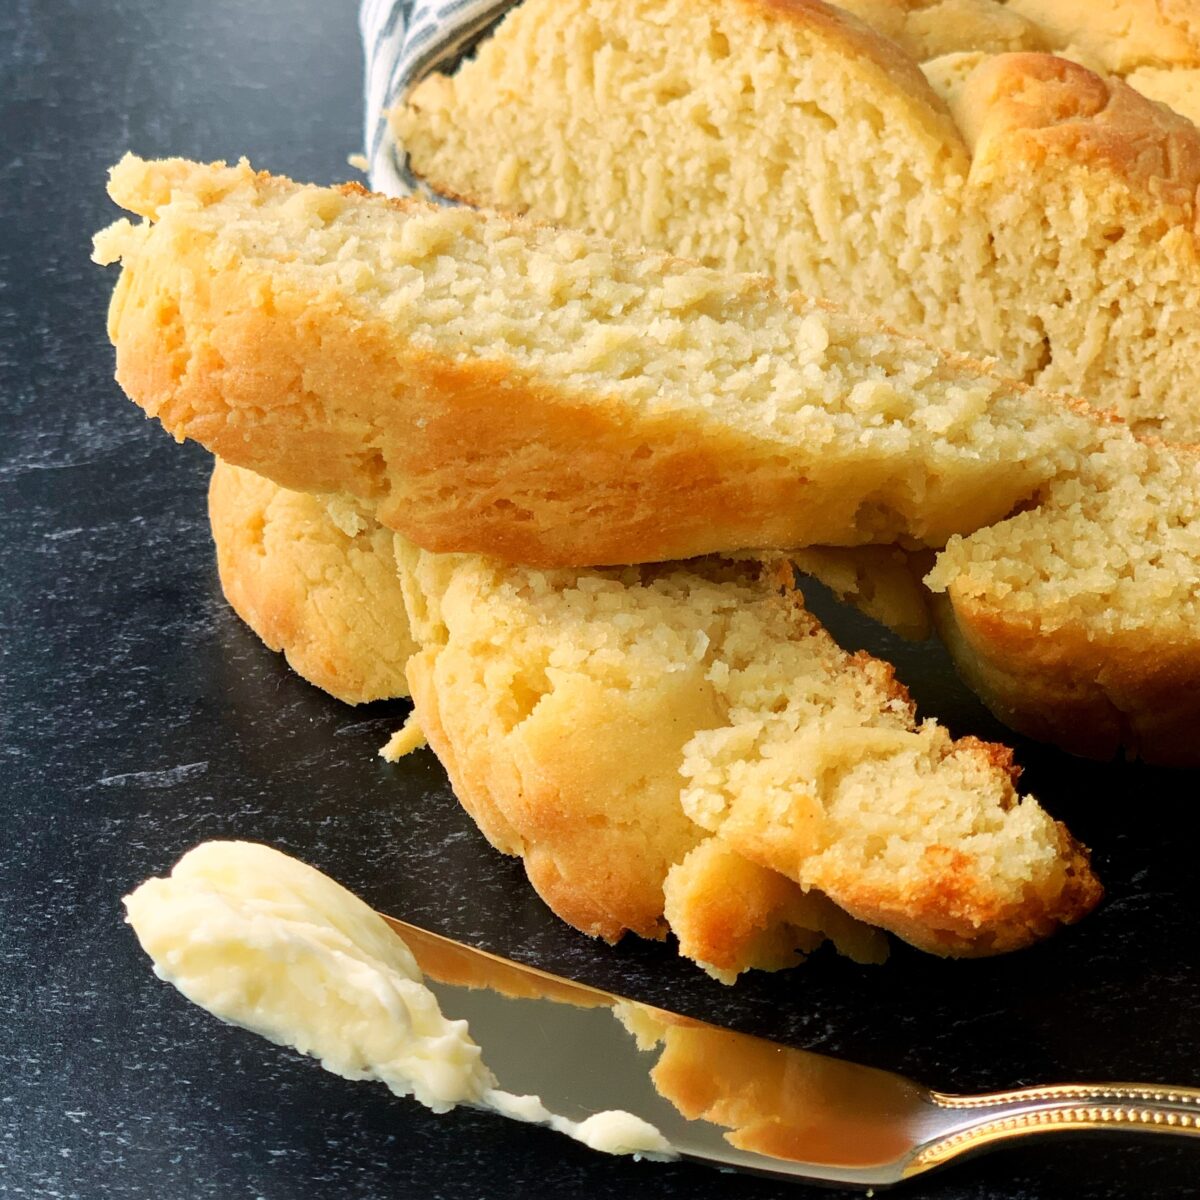
Gluten Free Plait Bread is a delicious alternative to traditional Guyanese plait bread. With a similar flavor and texture, this gluten free bread is perfect for sopping up pepperpot this holiday season.
Gluten Free Plait Bread
If you are looking for a gluten free alternative to the plait bread we know and love, this is it!
This gluten free bread has been a real labor of love, with many trials and errors. The final results is a buttery bread with the perfect tender crumb. Have any bread lover take one bite and I bet they wouldn’t be able to tell it’s gluten-free!
- Gluten Free Plait Bread
- Why You’ll Love This Gluten Free Plait Bread Recipe
- Ingredients for Gluten Free Plait Bread
- How to Make Gluten Free Plait Bread
- Braiding the gluten free dough
- Look at that beautiful texture
- Storage
- Tips for the Best Gluten Free Plait Bread
- Frequently Asked Questions
- Gluten Free Plait Bread
But if you don’t have an issue eating gluten and want to make traditional plait bread, here is a great wheat-based plait bread recipe.
Why You’ll Love This Gluten Free Plait Bread Recipe
- The Best Gluten Free Bread: It has taken about two years for me to get here. I’ve tried many combinations of gluten free flours and while the results have been good, nothing would hold the braid/plait I wanted to achieve to mimic Guyanese plait bread, until now!
- Versatile: This tastes amazing on its own but also pairs well with a variety of saucy Guyanese dishes.
- Very Few Additives and Preservatives: While making an effort to meet dietary needs, we often compromise in other ways. Luckily, this recipe has limited additives and preservatives but still tastes really great. This has been a quest of mine for so long and I am happy to be here!
Ingredients for Gluten Free Plait Bread
Wth the exception of the gluten free flours, the ingredient list is typical for most homemade bread recipes.
- Gluten Free Flours: I use a combination of King Arthur’s measure for measure gluten free flour and potato flour. I added some potato flour to this measure for measure flour to get the dense texture of Guyanese home made bread perfect for sopping up pepperpot gravy. I found that the other gluten free bread flours produced a doughy and heavier bread than what I wanted. But this combination seems to be the key to many flour blends that mimic wheat products. It does not have the grainy consistency of most gluten-free breads and cakes.
- Salt: Salt not only adds flavor but also has preservative properties that can help extend the shelf life of bread by slowing down the staling process.
- Butter: The fat content in butter helps tenderize the crumb of the bread, giving it a softer texture. It also contributes to a finer and more delicate crumb structure.
- Dry active yeast: This leavening agent causes the dough to rise. Ensure you use a gluten-free yeast.
- Warm water: The water should be 110°F. Warm water activates the yeast, promoting faster yeast fermentation.
- Brown sugar: this activates the yeast, sweetens the bread, and contributes to the browning of the crust through the Maillard reaction.
- Warm milk: This enriches the dough, for a softer and more flavorful crumb.
- Eggs: Adding eggs enriches the bread, adding flavor and moisture.
- Baking powder: This leavening agent contributes to the texture, ensuring the dough rises properly.
See recipe card for quantities.
How to Make Gluten Free Plait Bread
The right mix of flour
Dissolve sugar in warm water, then add yeast and allow to activate. Then add measure for measure gluten free flour and potato flour to the bowl of your stand mixer and add salt. Mix in 1/4 cup of butter using your paddle attachment until a crumbly texture forms
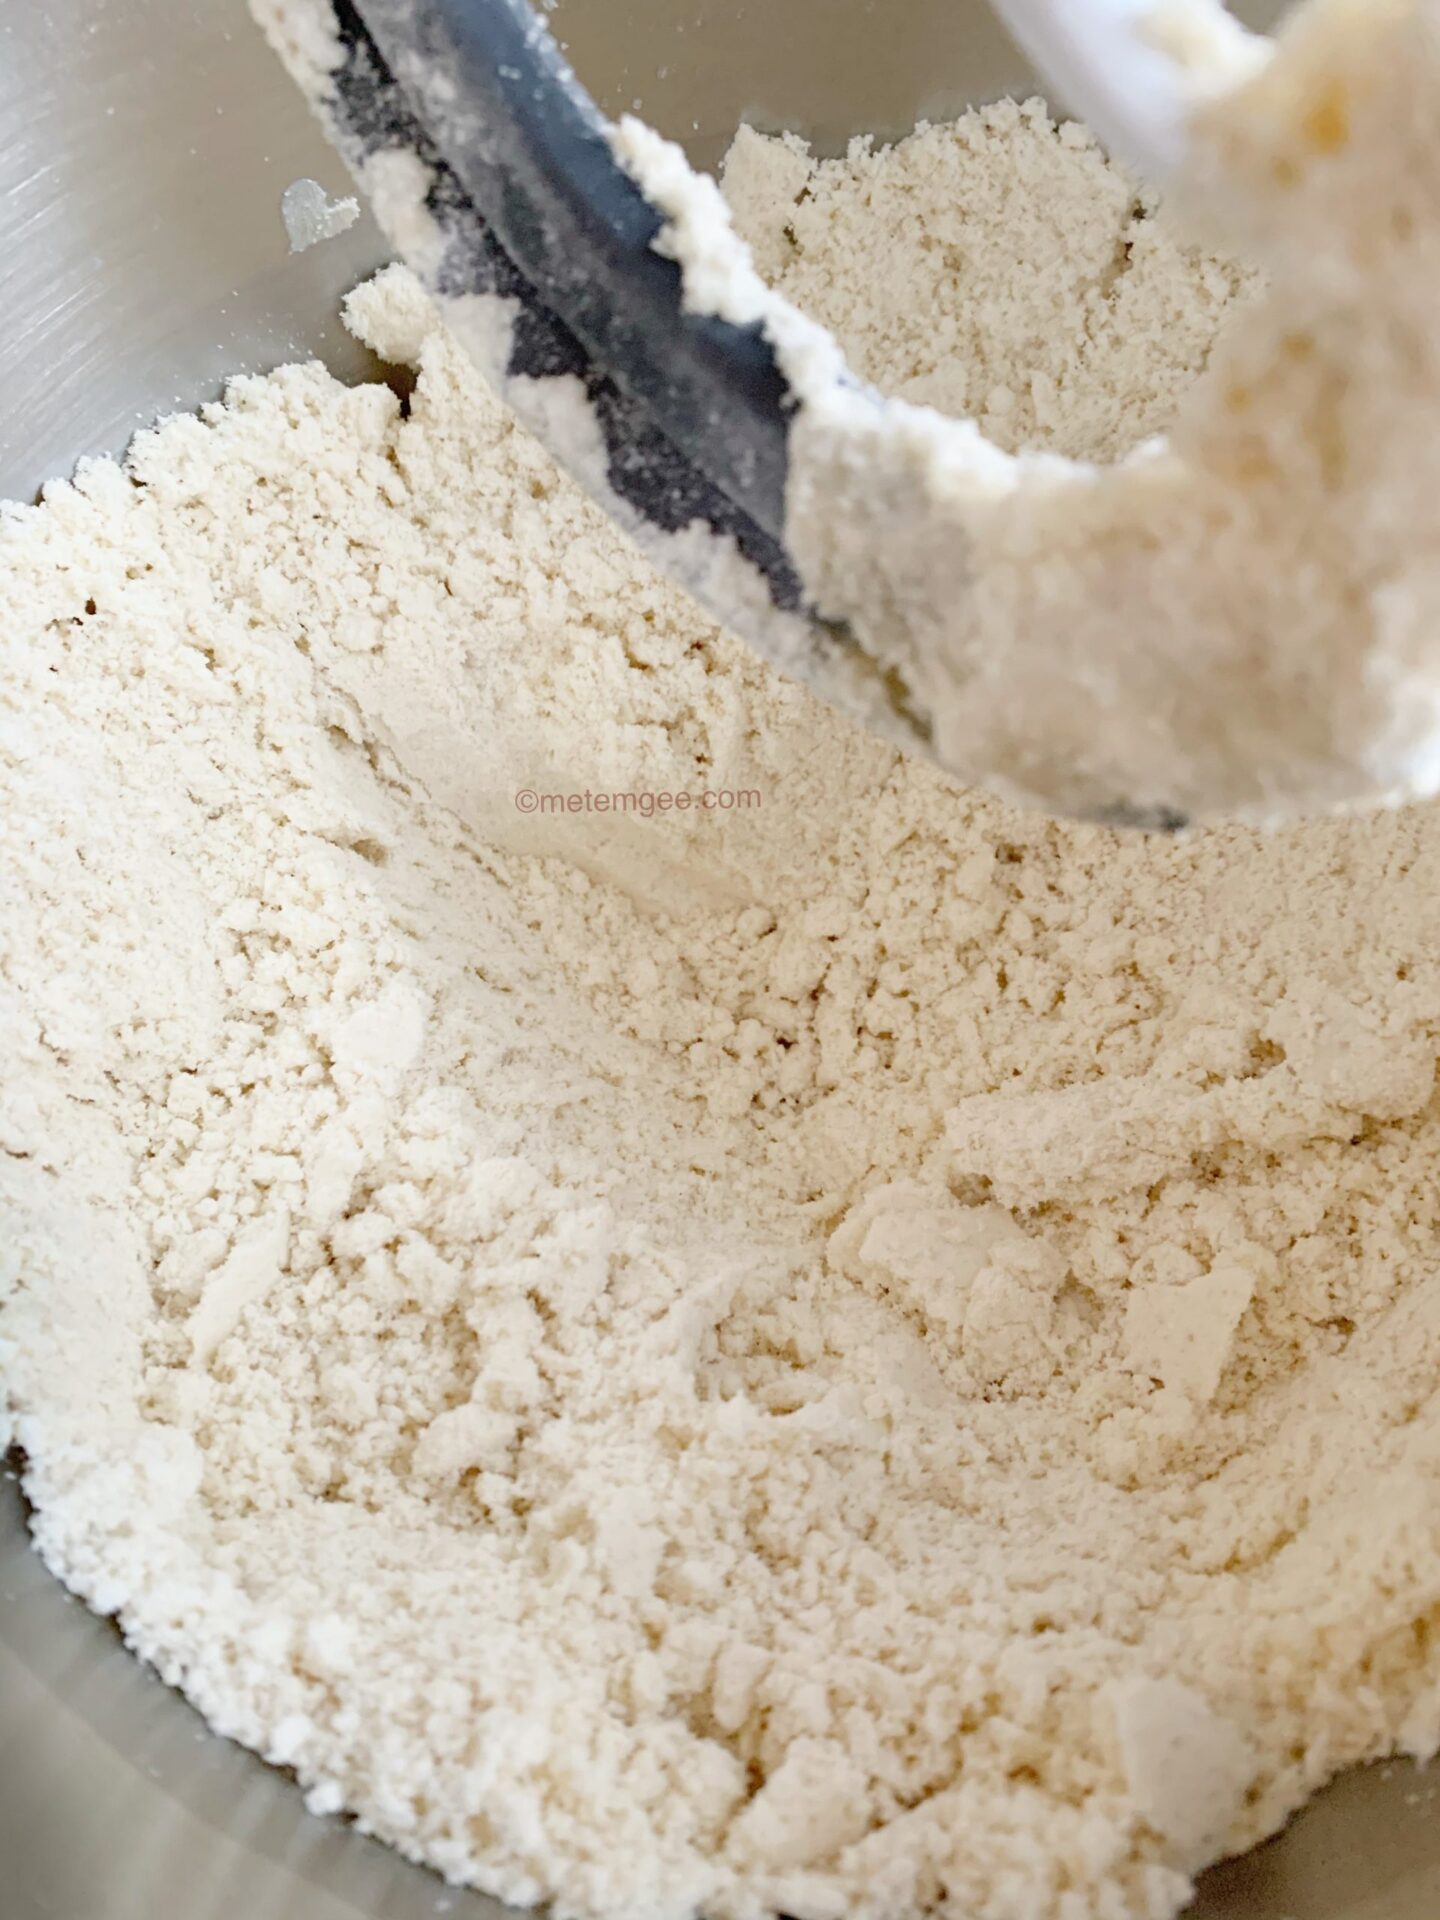
Blending the flour together with the butter came together quickly using my paddle attachment, but I’ve also done it in a bowl using a fork or my fingertips. Use the method that you are most comfortable with because all produce similar results.
The right consistency in the gluten free dough
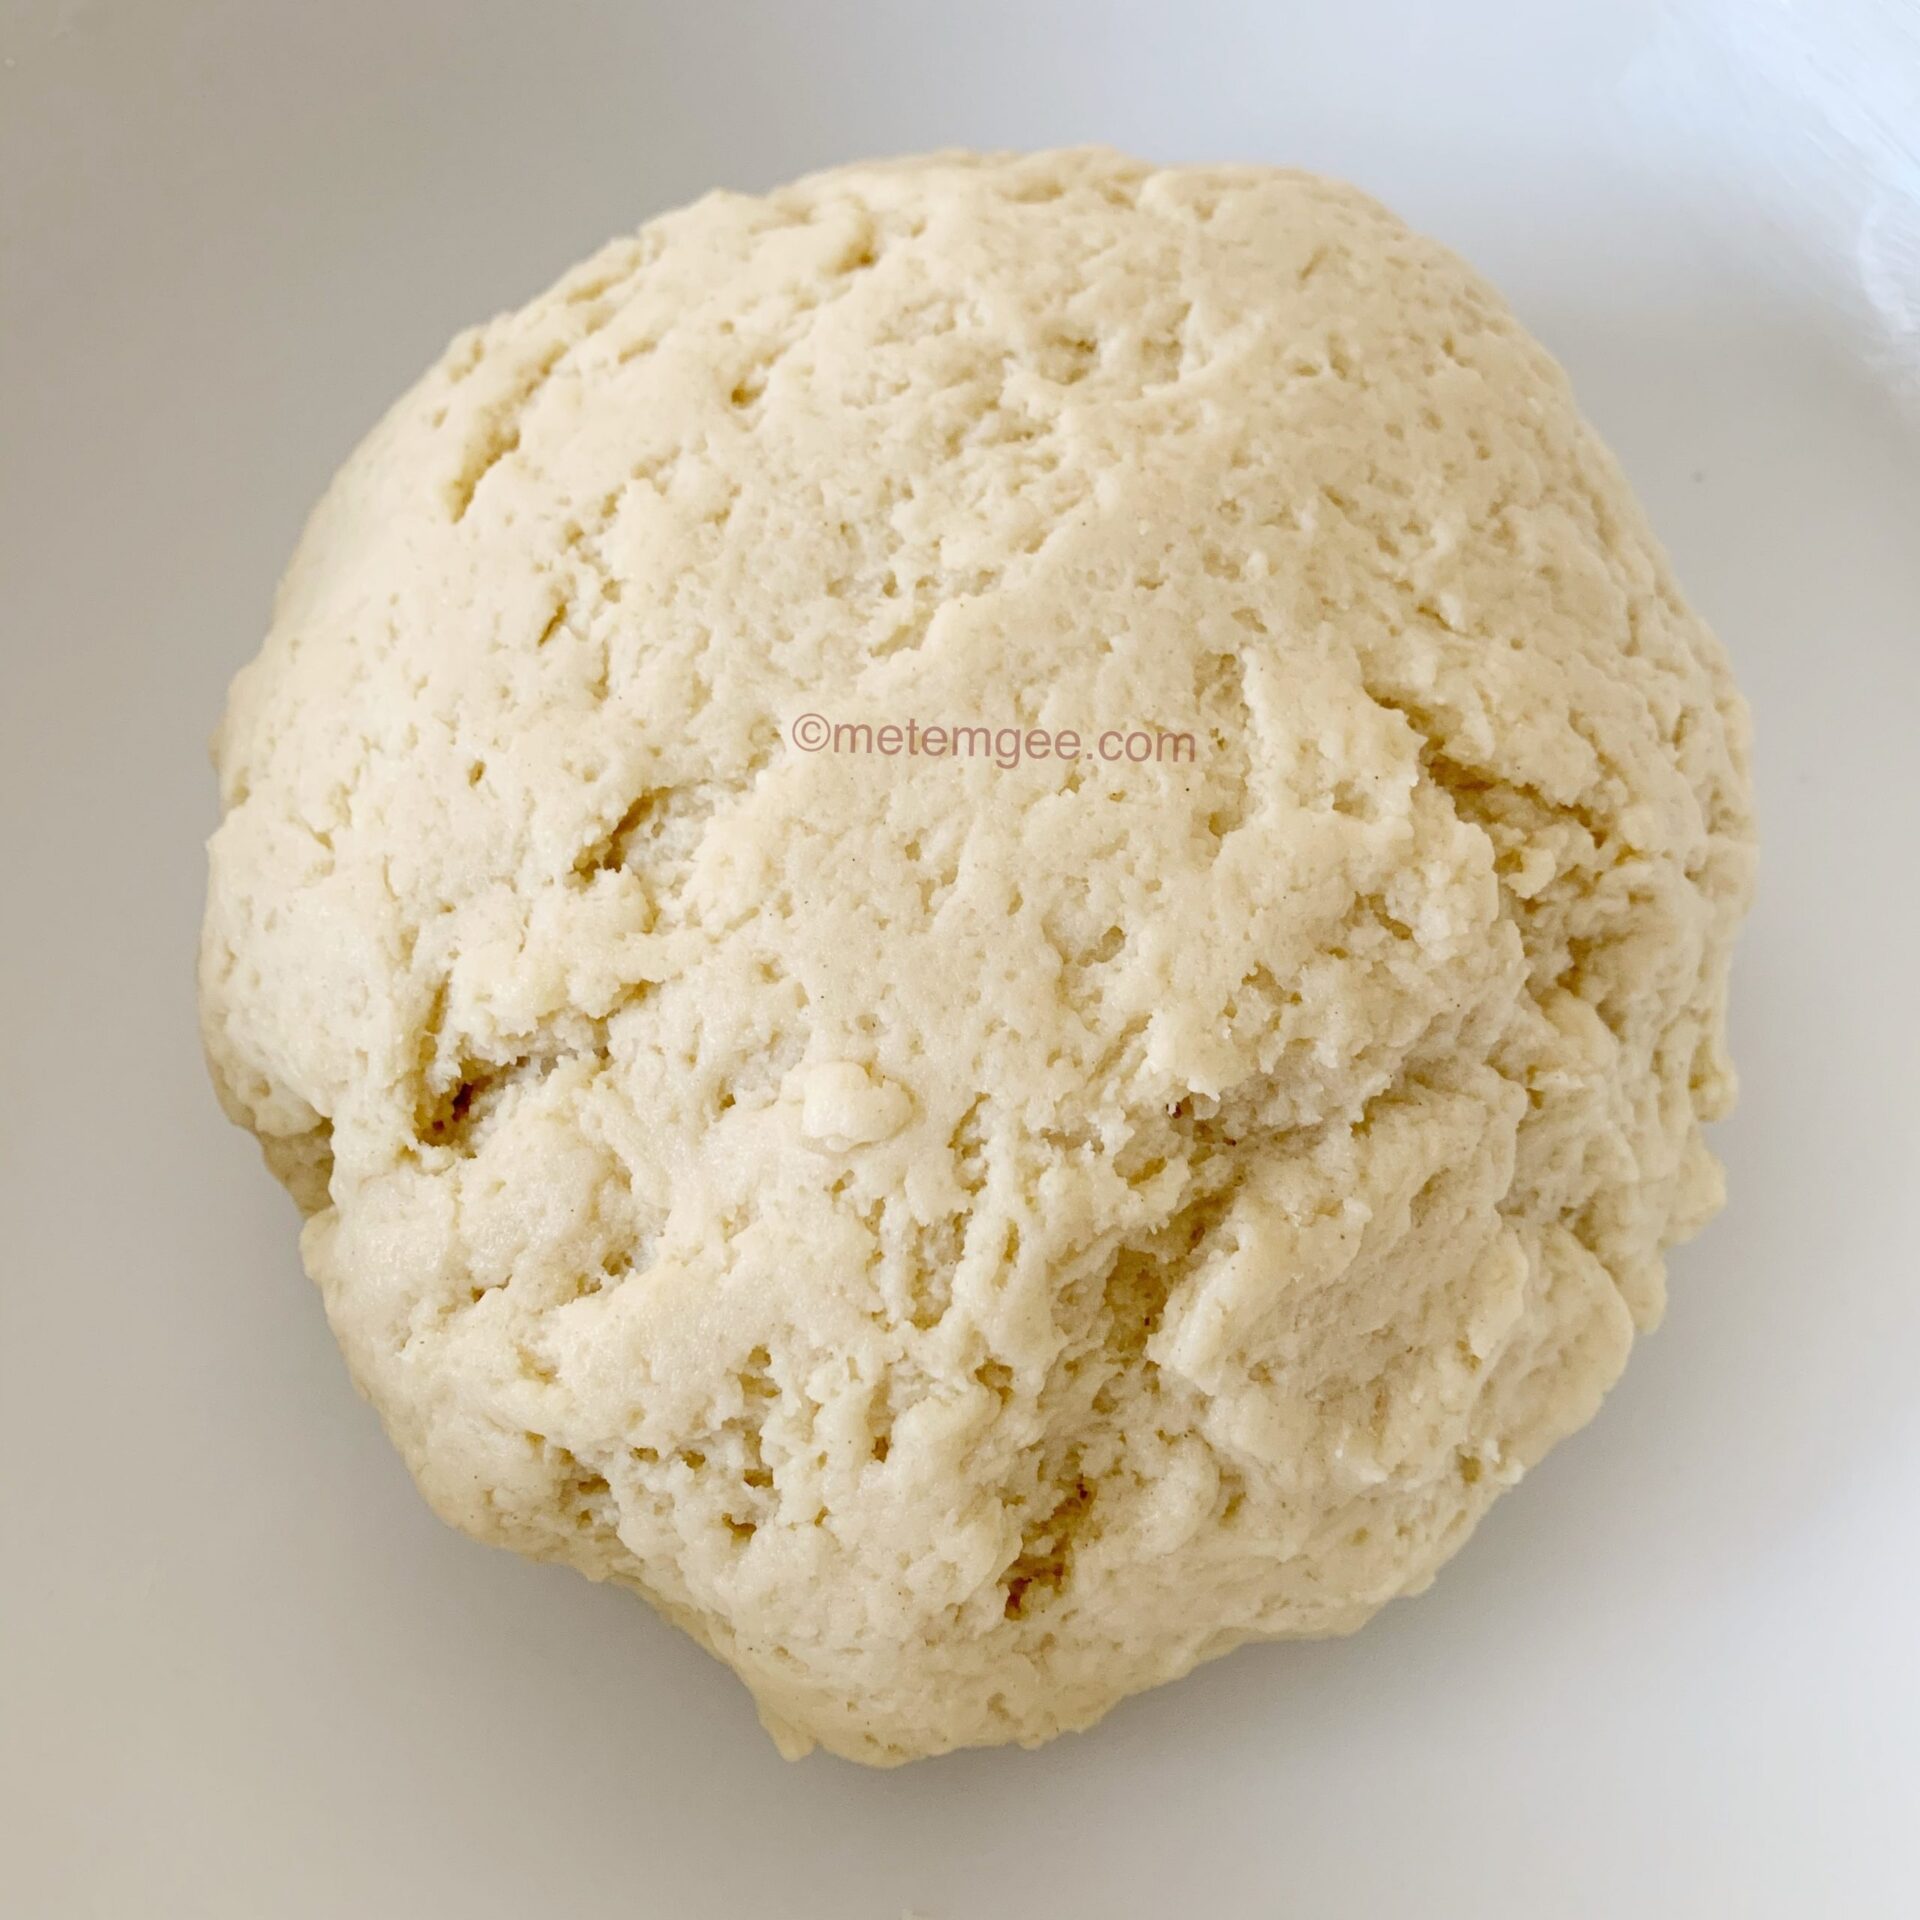
Most sandwich type gluten free bread recipes I’ve seen on the internet have a dough that is more like a batter. That makes it tremendously difficult to form the bread into a braid or plait. For this recipe, the dough is soft and spongy. It is slightly sticky but not to the point where you can’t work it. Add some oil to your fingertips if it is too sticky to work and of course, you can always dust it with some of the measure for measure gluten free flour.
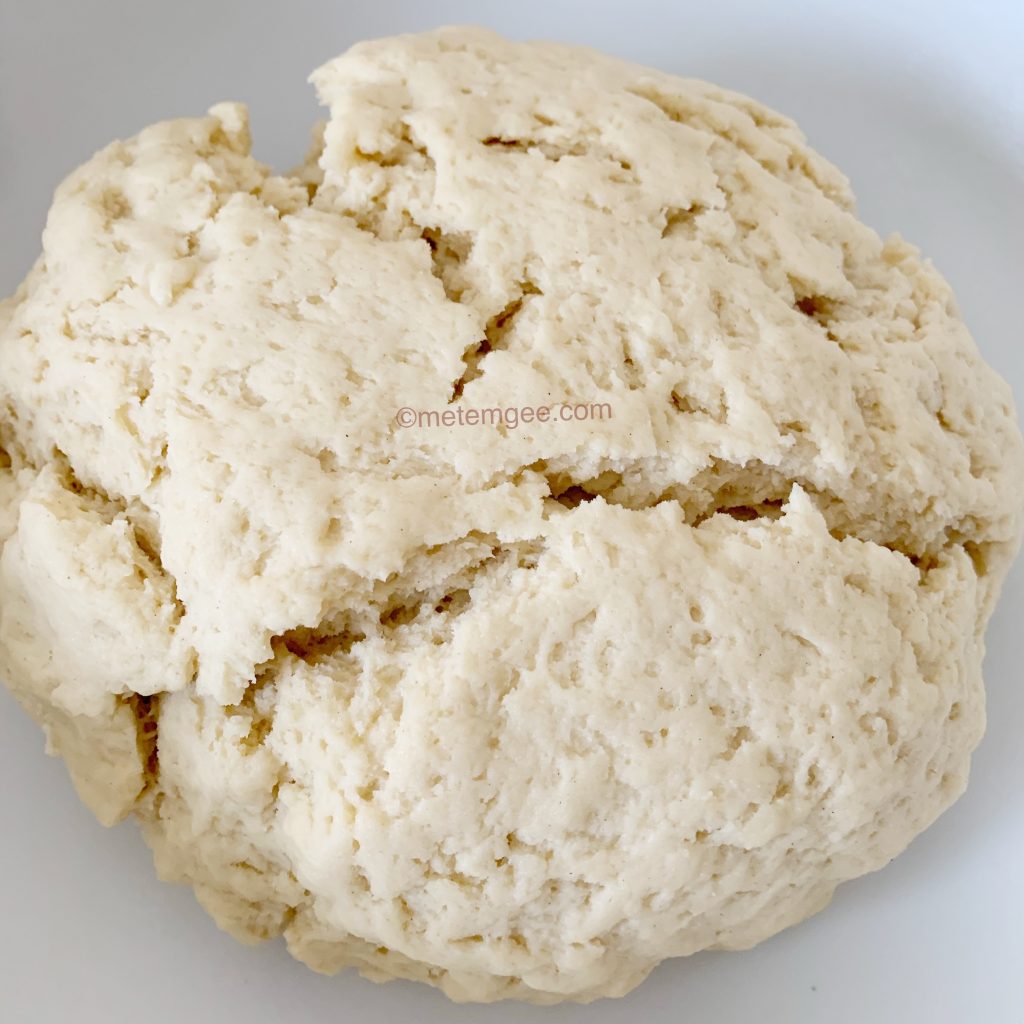
After letting the dough rise for 45 minutes, it expands and sometimes it cracks a little. This is normal. I’ve made this gluten free plait bread quite a few times and every time it cracks. But don’t worry we will pull it back together when we are forming it into the braided loaf.
Braiding the gluten free dough
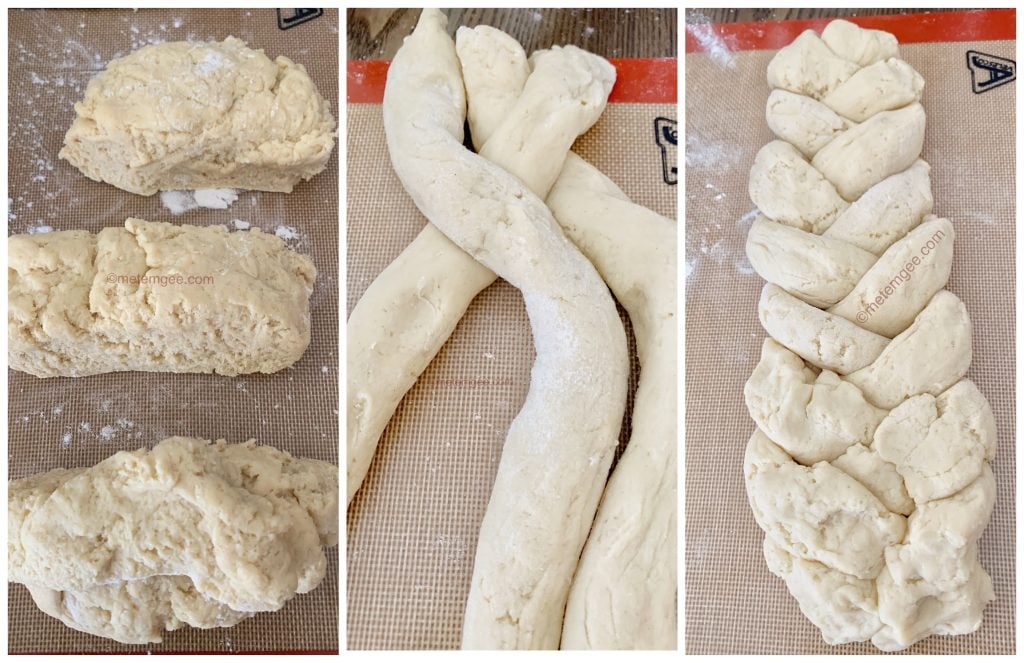
The dough is very soft and must be handled with care. Instead of using my regular pastry board, I am using a silicone baking mat and a light dusting of gluten free flour. When braiding I simply crisscrossed the three strands of dough until it was braided from end to end. Then I gently lifted the dough onto a greased baking sheet. It is important to let the dough rest and rise for another 45 minutes before baking for the best results.
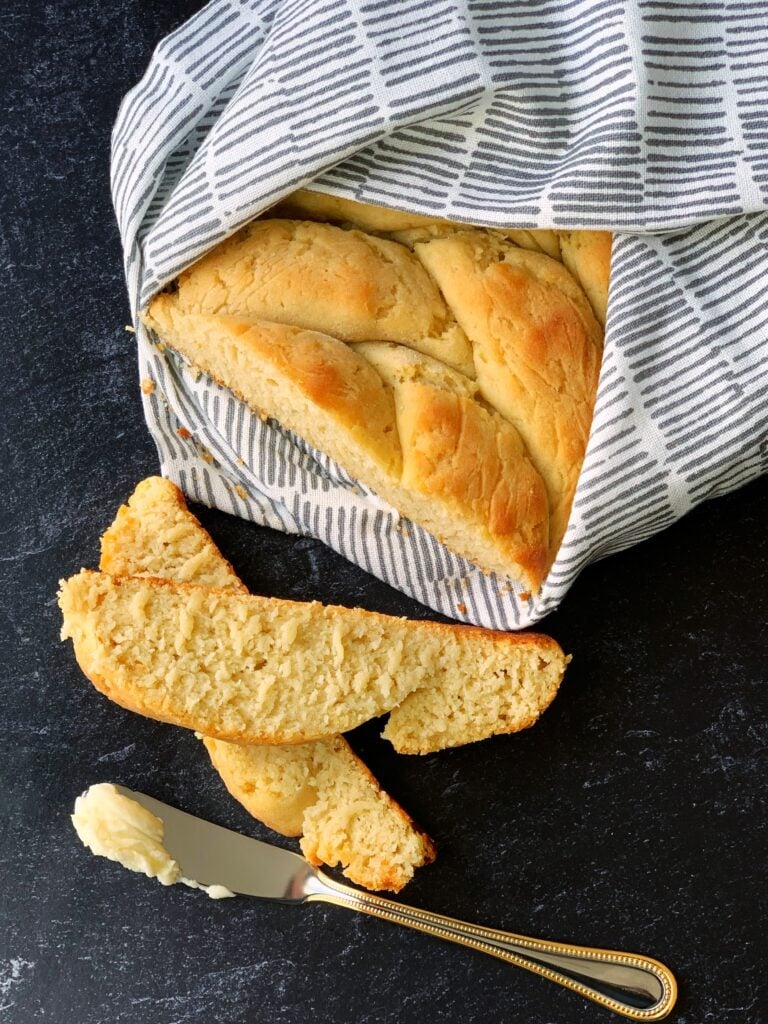
This gluten free plait bread is best served warm
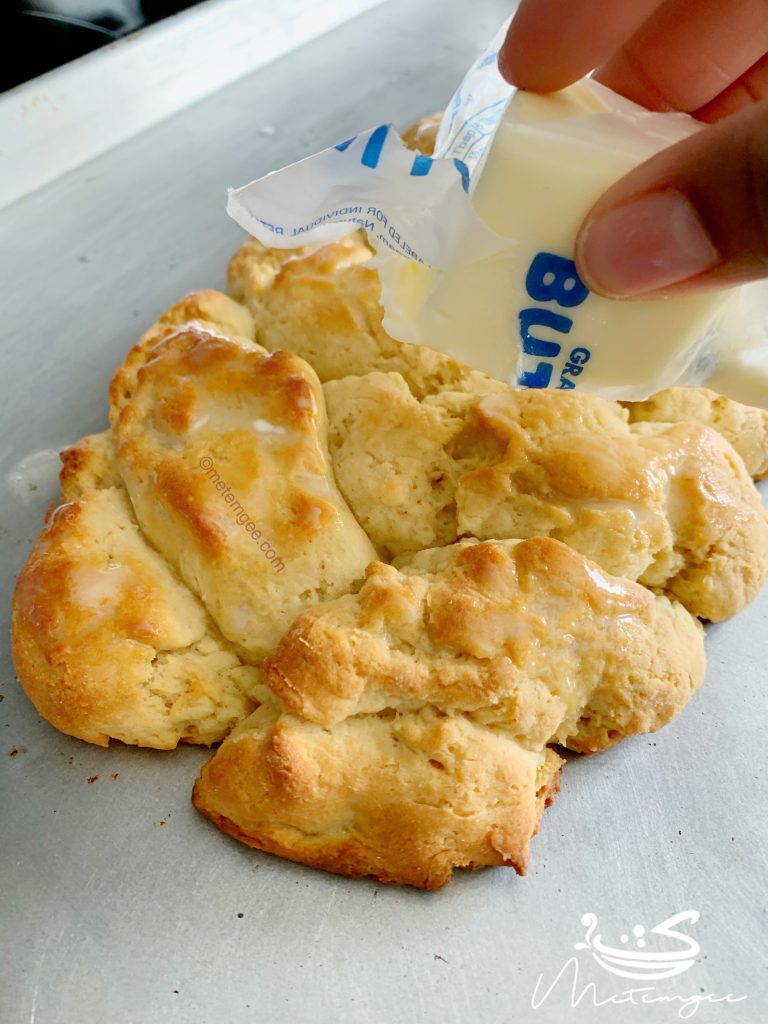
When the gluten free plait bread is done baking, I remove it from the oven and immediately brush it with butter. Then cover it and let it cool down just a bit.
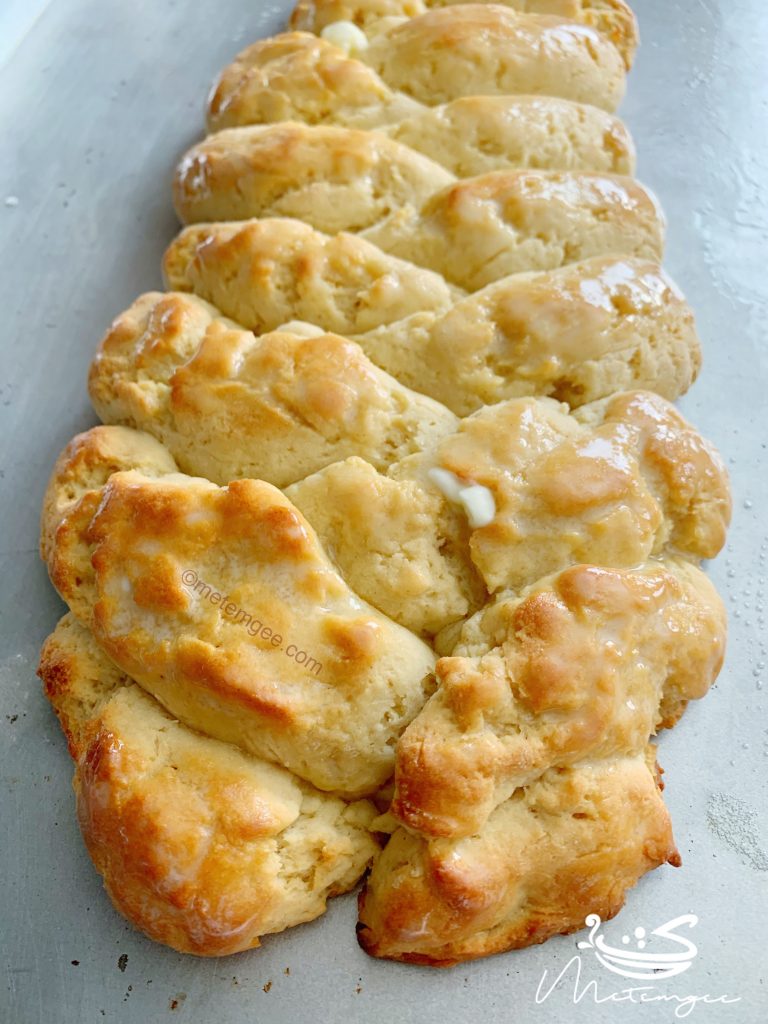
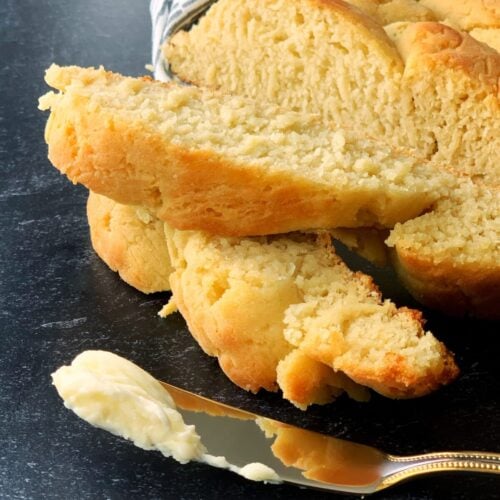
The bread has a slightly rough exterior because the gluten free dough was not a smooth dough. I’ve tried many different methods to try to smooth the dough and always end up with the same results. It’s not the most perfect or prettiest dough but it is yummy!
Look at that beautiful texture
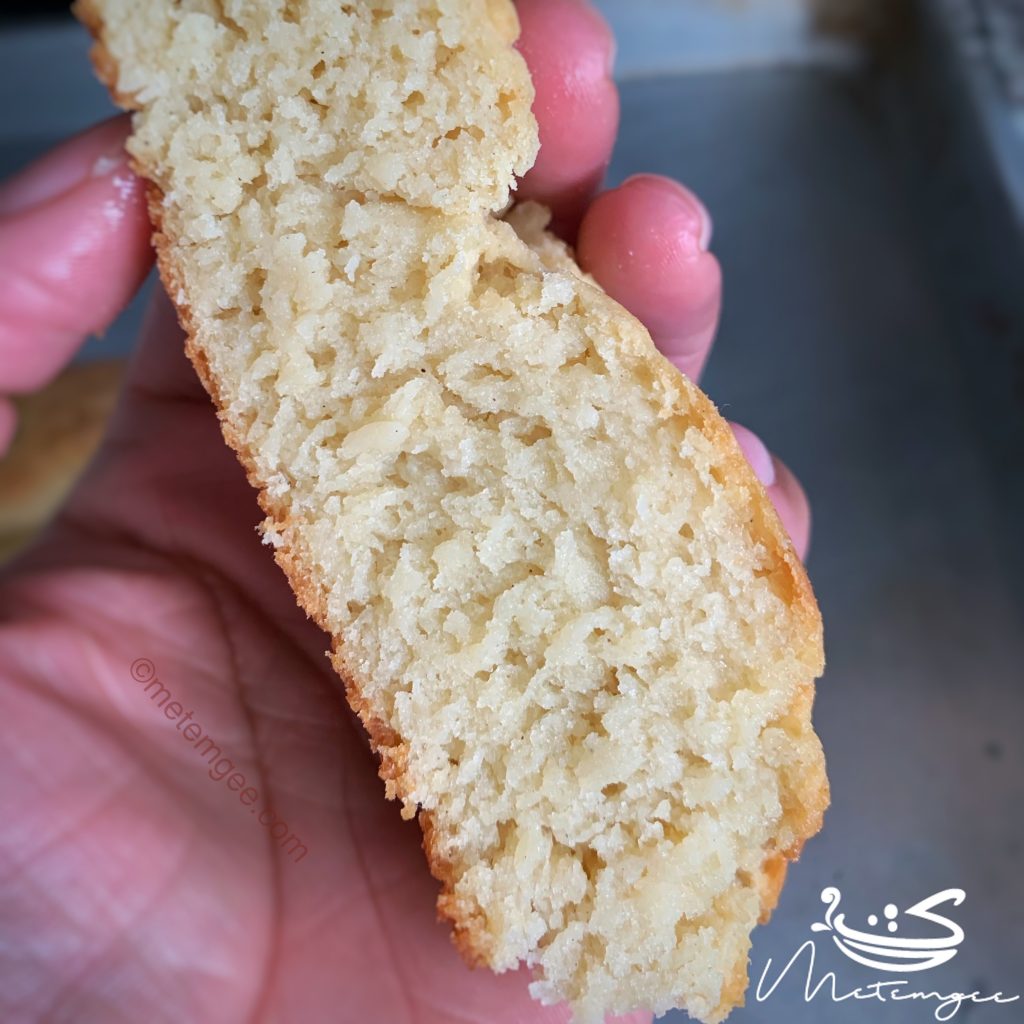
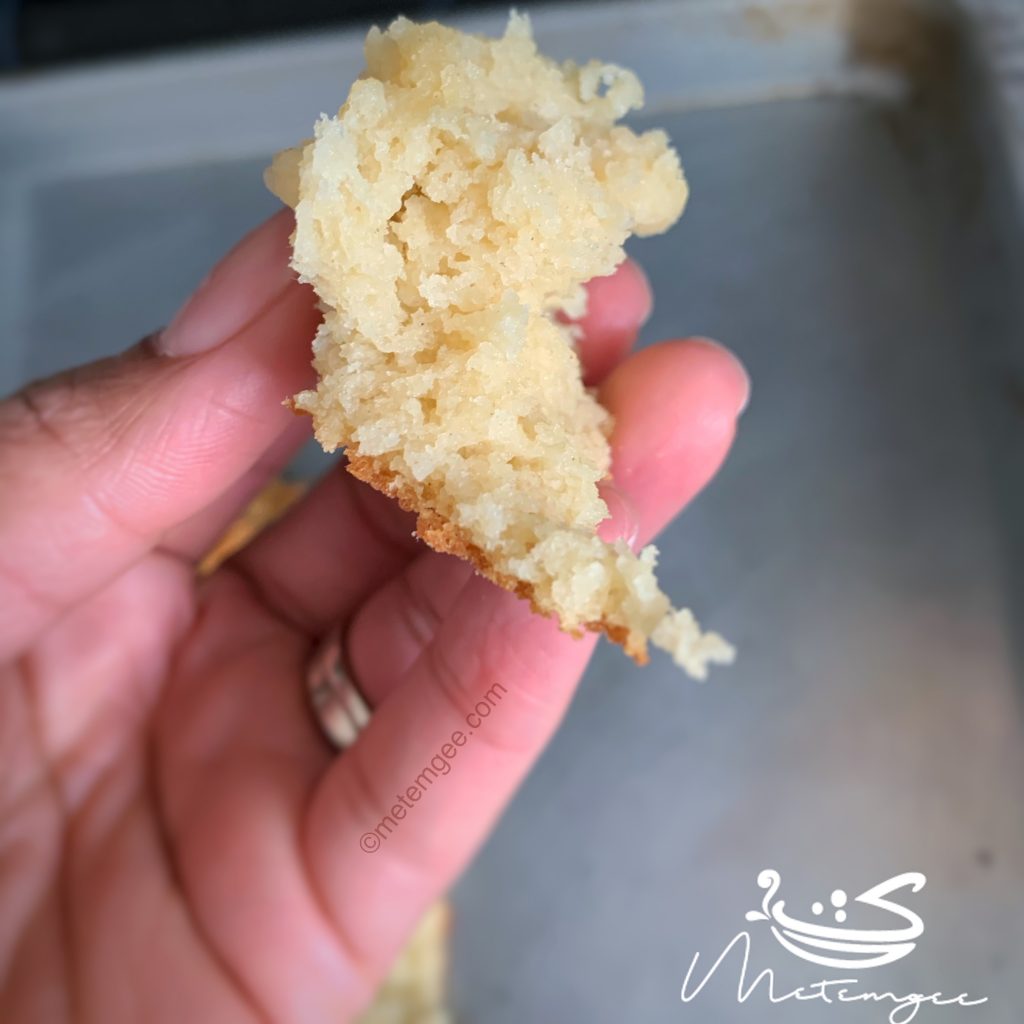
The texture of the dough is soft, but dense. It has a nice crumble and the folds of the plait are perfect for pulling apart to sop up pepperpot. I had a piece fresh out of the oven with butter and it was heaven.
Storage
If you have leftover bread, reheat it in the microwave or toast it before serving.
Tips for the Best Gluten Free Plait Bread
- Use a rubber spatula to scrape the dough from your mixing bowl if it is too sticky.
- I recommend using a silicone mat to work the dough when braiding. If you don’t have one, liberally dust your surface with gluten free flour.
- This is not a quick bread and really takes time to come together. It is important to let the dough rest and rise for another 45 minutes before baking for the best results.
- Serve this bread while it is still warm from the oven. The first time I made this bread, I let it cool all the way before slicing and trying it and I noticed it became a bit stiff.
- Put freshly baked bread in a large ziplock bag or bread bag before it cools completely to keep it moist.
Frequently Asked Questions
Most breads are not wheat-based and not gluten-free but there are alternatives like corn tortillas, rice cakes, and certain flatbreads or roti.
Unlike traditional plait bread, this gluten free variation includes milk and eggs. So it is an enriched bread just like challah (which traditionally includes eggs). However, challah bread is a traditional Jewish bread and plait bread is Guyanese so they are not the same thing, although there are visual similarities.
This recipe includes eggs because it adds moisture to the dough. Moisture provides elasticity, which mimics the texture of traditional wheat-based bread.

Gluten Free Plait Bread
Equipment
- Stand Mixer
- Mixing Bowl
- Baking Sheet
Ingredients
- 3 cups of King Arthur measure for measure gluten free flour
- 1 cup of potato flour
- 1/4 teaspoon salt
- 1/4 cup butter plus 1 tablespoon
- 1 tablespoon of gluten free dry active yeast
- 1 cup of warm water 110 °F
- 1/4 cup brown sugar
- 3/4 cup warm milk
- 3 eggs
- 2 teaspoon baking powder
Instructions
- Dissolve sugar in warm water, then add yeast and allow to activate.
- Add measure for measure gluten free flour and potato flour to the bowl of your stand mixer then add salt.
- Mix in 1/4 cup of butter using your paddle attachment until a crumbly texture forms.
- Next, add eggs and milk to fermented yeast and mix together well.
- Turn mixer on lowest speed, then pour in yeast, milk and eggs mixture.
- Continue to mix until all of the dry and wet ingredients combine to form a soft dough
- Remove from mixing bowl and place in a greased bowl.
- Cover and let rise for 45 minutes to an hour
- After dough has risen, divide into 3 equal pieces and form into 1 foot to 1.5 feet logs.
- Braid logs together to form a plaited loaf.
- Place loaf on a greased baking sheet, cover and let rise for another 45 minutes to 1 hour.
- Preheat oven to 350°F.
- Bake plaited loaf for 25-30 minutes.
- Remove from the oven and brush with 1 tablespoon of butter.
- Serve warm.
Notes
Nutrition
The information listed in the recipe card is an estimate provided by an online nutrition tool. The tool evaluates ingredient names and amounts then makes calculations based on the number of servings listed for the recipe. It is provided as a general guideline and not as a precise calculation. For precise nutrition information please feel free to add the ingredients to your preferred nutrition calculator or consult a doctor or licensed nutritionist.


 Gluten Free Doubles
 Gluten Free Guyanese Pholourie
 Gluten Free Parsad
 Ground Beef Chow Mein (Whole30, Paleo)
Farial B Says
I made this recipe on Christmas day so I could enjoy my father in law’s pepperpot and I was so happy…I’ve never worked with yeast before nor have I ever made a bread or made a cake from scratch and this recipe is perfect!It’s easy to follow, and honestly who would’ve ever thought you could make a whole bread without getting too technical? No stand mixer or fancy attachments necessary. Simply follow the recipe as is and you’re good to go. I used cassava flour as a substitute for the potato flour and it worked really well. I agree with Althea, it’s best served warm…and the bread is a little dense it’s not like your typical plait bread. But if you’ve had anything gluten free you already know how it is! You can get really close but it’s never exactly the same. This is the perfect fix to satisfy that craving without having to sacrifice your physical health. You don’t have to worry about missing out when you can just BYOB…bring yuh own bread! Also, let me just say finding Althea’s page has been a huge blessing for me…recently changing my diet around made me feel a little sad because my first thought was, what about the guyanese food!? She presents everything in a way that makes it approachable, and honestly it’s nice to know I have options as well and don’t completely have to miss out. Thanks so much Althea.
Nneka Says
Have you ever used this recipe to make Anise seed rolls? I have a pot of pepper pot that is crying out for that yumminess. Any thoughts on the amount of seeds vs anise essence?
Althea Brown Says
I/2 teaspoon of the seen. I would boil it in a pot with water until it gets dark and use that water to bloom your yeast.
Nneka George Says
SO Good! Just made this with anise seeds. I was trying to approximate the hard dough bread which is a little sweeter and denser. I did not see the instructions for proofing in the oven so I did not get the rise that I have gotten when I have done the regular flour varieties. Still tasty. The crust was just right. The texture inside was quite nice. This recipe however was such a stomach-happy gluten-free treat!