

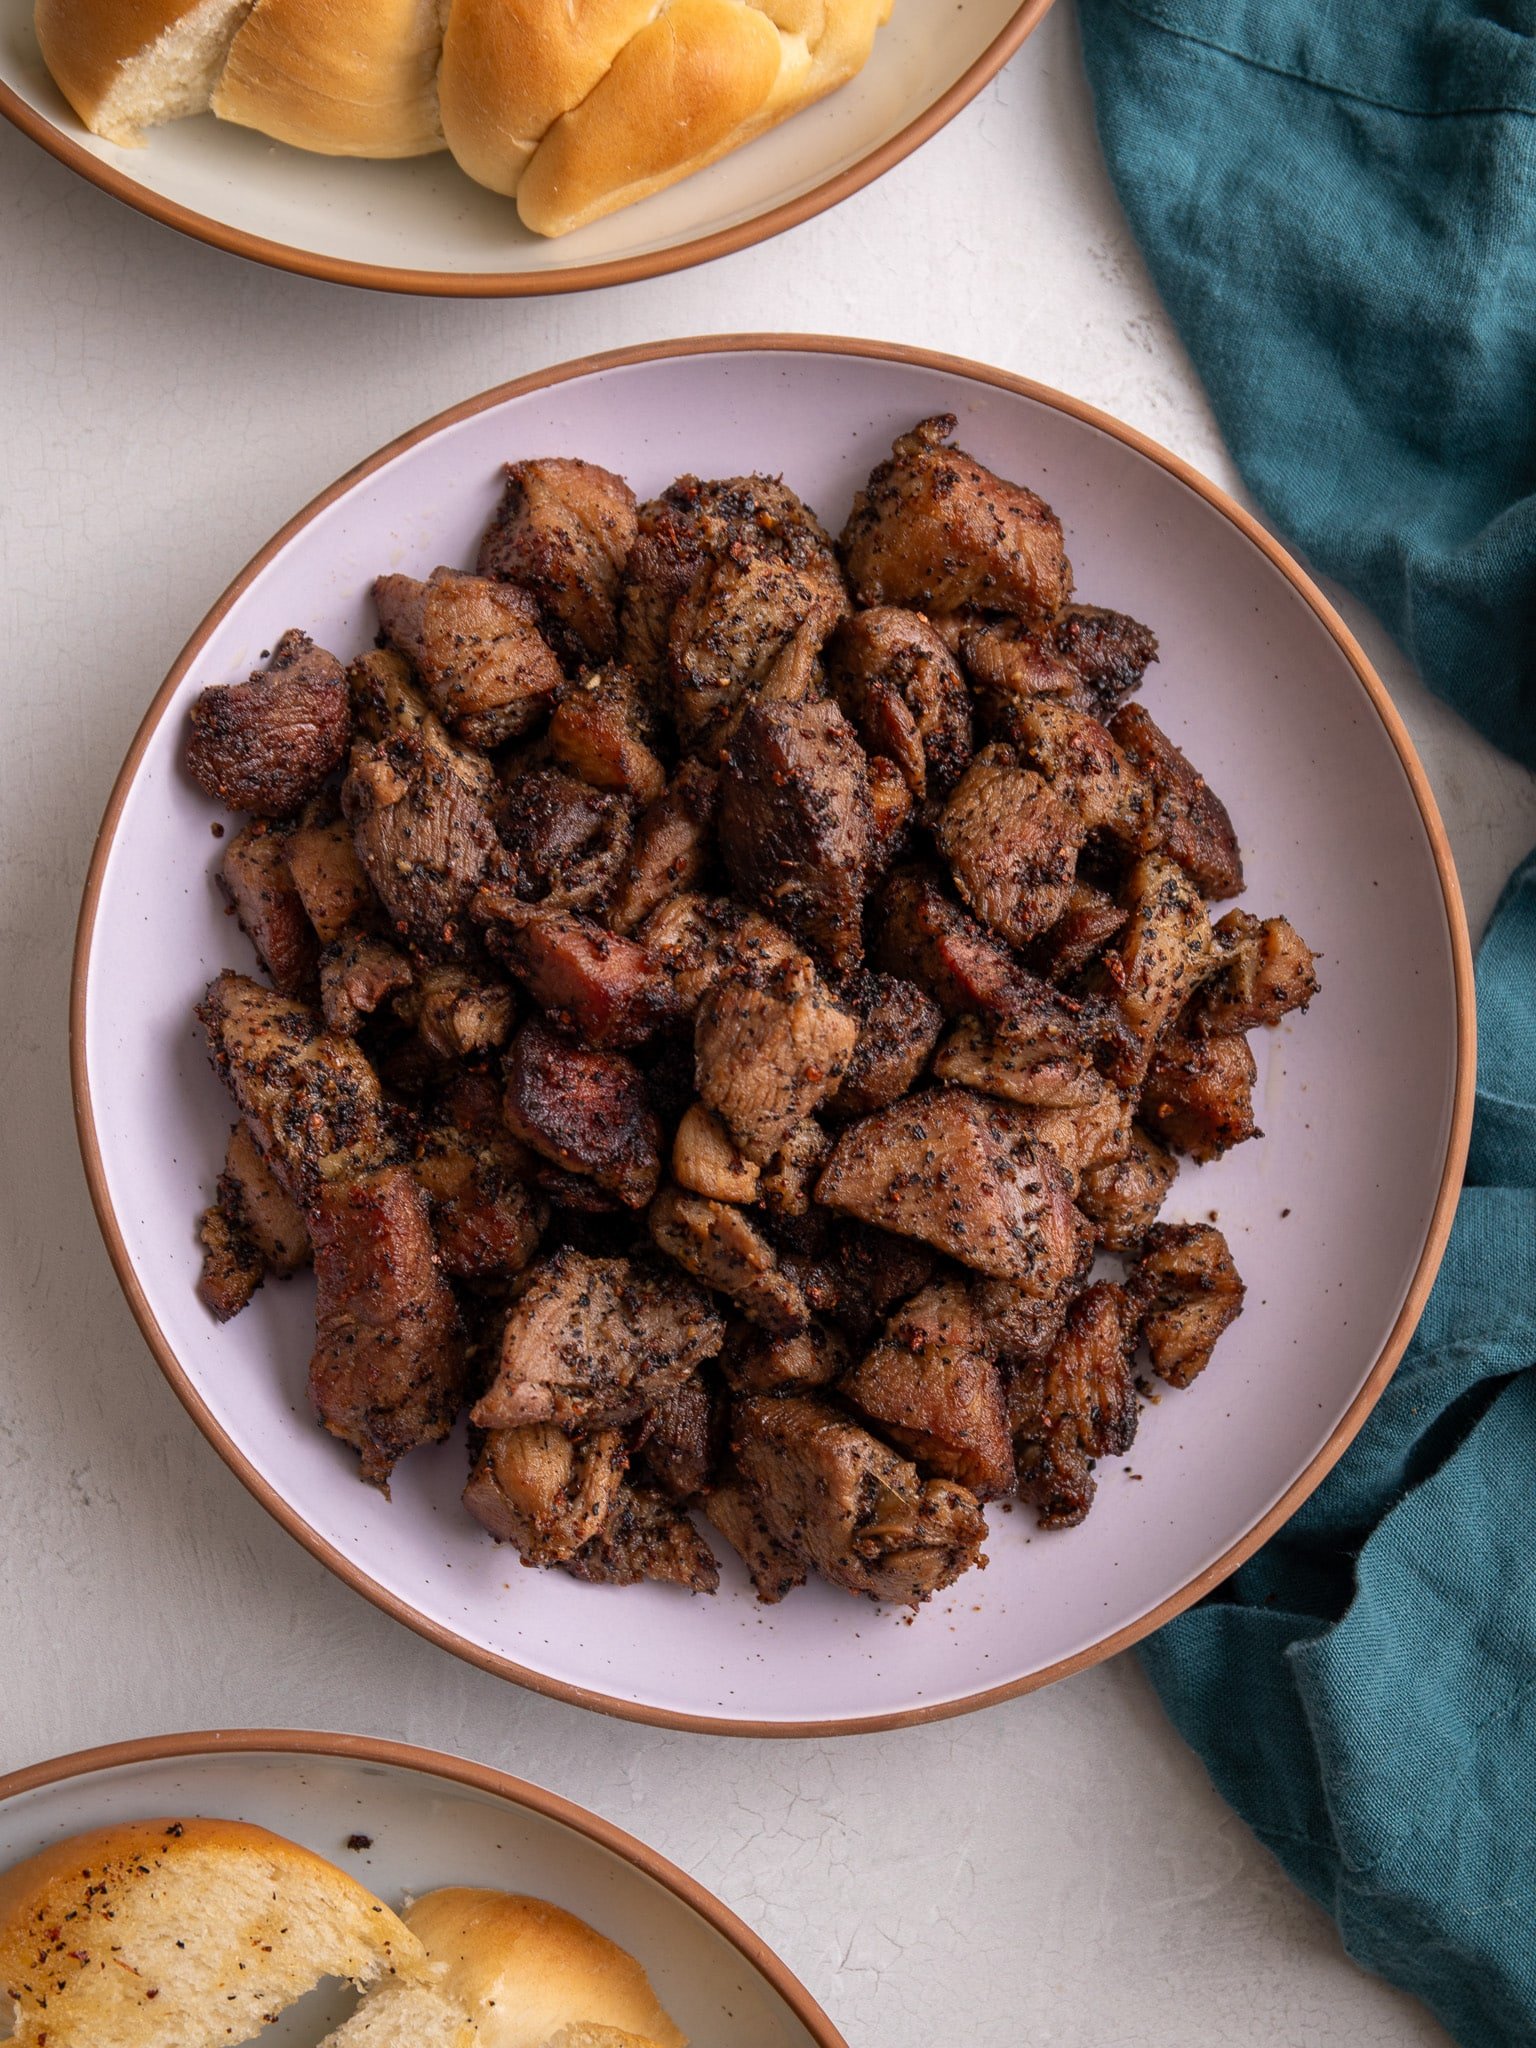
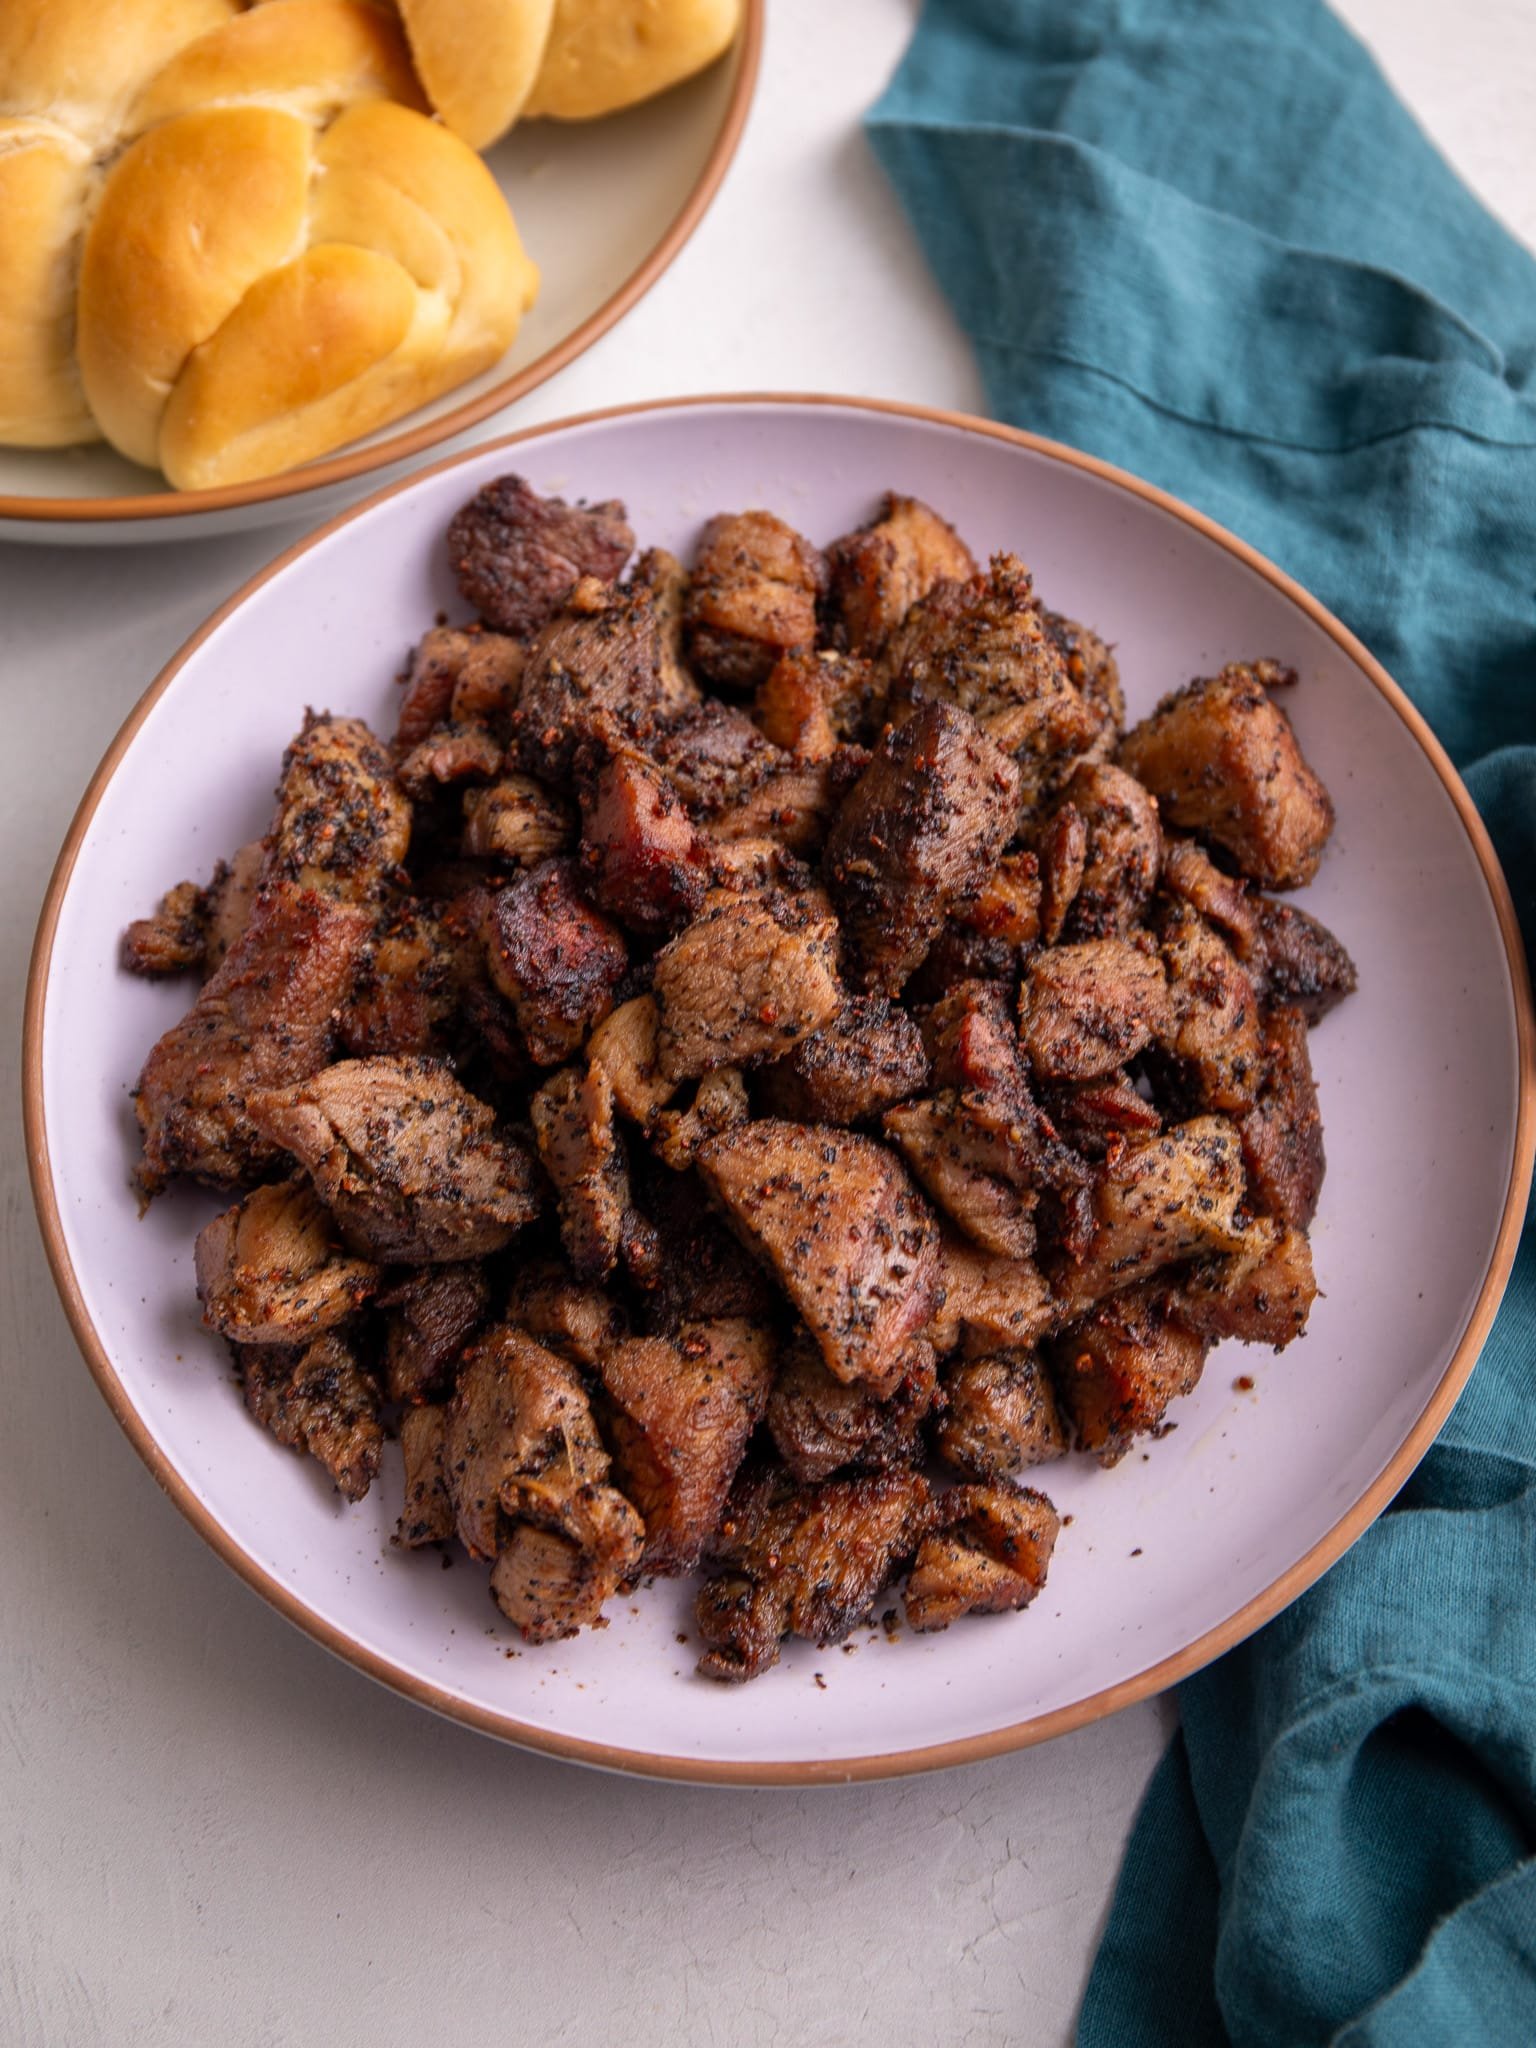
Guyanese Garlic Pork is a tangy, garlicky dish made with marinated pork that is sautéed with garlic, thyme, and pepper, until savory and tender. Pickle the pork for 3-4 days during the holidays so you can enjoy it on Christmas day, as is Guyanese tradition.
Guyanese Garlic Pork
This Guyanese Garlic Pork recipe is from my dear Aunty Rita. Aunty Rita is my great-aunt and my oldest living relative. We connect about almost anything, but our favorite thing to talk about is food and recipes. As time passes, I feel the overwhelming need to capture her recipes and stories about traditions. This is her recipe exactly as it was given to me, with measurements and instructions included. And I am honored to pass it on to you!
I didn’t grow up eating garlic park for Christmas dinner. I grew up in a Seventh Day Adventist home so we were not pork eaters. My dad made delicious garlic beef. He used thin slices of beef to replace the pork in the traditional recipe and fried it up to a delicious tasty dish that we ate with Guyanese plait bread on Boxing Day (the day after Christmas).
- Guyanese Garlic Pork
- Why You’ll Love This Guyanese Garlic Pork Recipe
- Origins of Garlic Pork
- Ingredients for Guyanese Garlic Pork
- Choosing the right Garlic
- Preparing the Garlic
- How to Make Guyanese Garlic Pork
- Variations to Guyanese Garlic Pork
- Storage
- Tips for the Best Guyanese Garlic Pork
- Frequently Asked Questions
- Aunty Rita’s Guyanese Garlic Pork
Why You’ll Love This Guyanese Garlic Pork Recipe
- Easy: This is one of those set-it-and-forget-it recipes. Chop and season the pork, set in a jar for a few days, and then sauté!
- Flavorful: Chunks of pork are marinated for 3-4 days in a pickle of garlic, thyme and pepper then sautéed into a tangy and garlicky dish. The meat tenderizes in the vinegar solution so both the texture and taste are incredible!
- Versatile: This recipe includes 3 different cooking methods and alternate meat options.
Origins of Garlic Pork
Guyanese Garlic Pork has Portuguese origins brought to Guyana by the Portuguese who came from the island of Madeira as indentured workers. It is very similar to the Madeiran Carne Vinha D’Alhos. While we don’t put wine in our garlic pork, their method of pickling the pork for 4 days and then cooking is very similar to this our dish. It is also no surprise that it is served exclusively with plait bread, which also comes from our Portuguese ancestors.
Ingredients for Guyanese Garlic Pork
This recipe is simple but packed with fresh flavor from plenty of garlic and herbs.
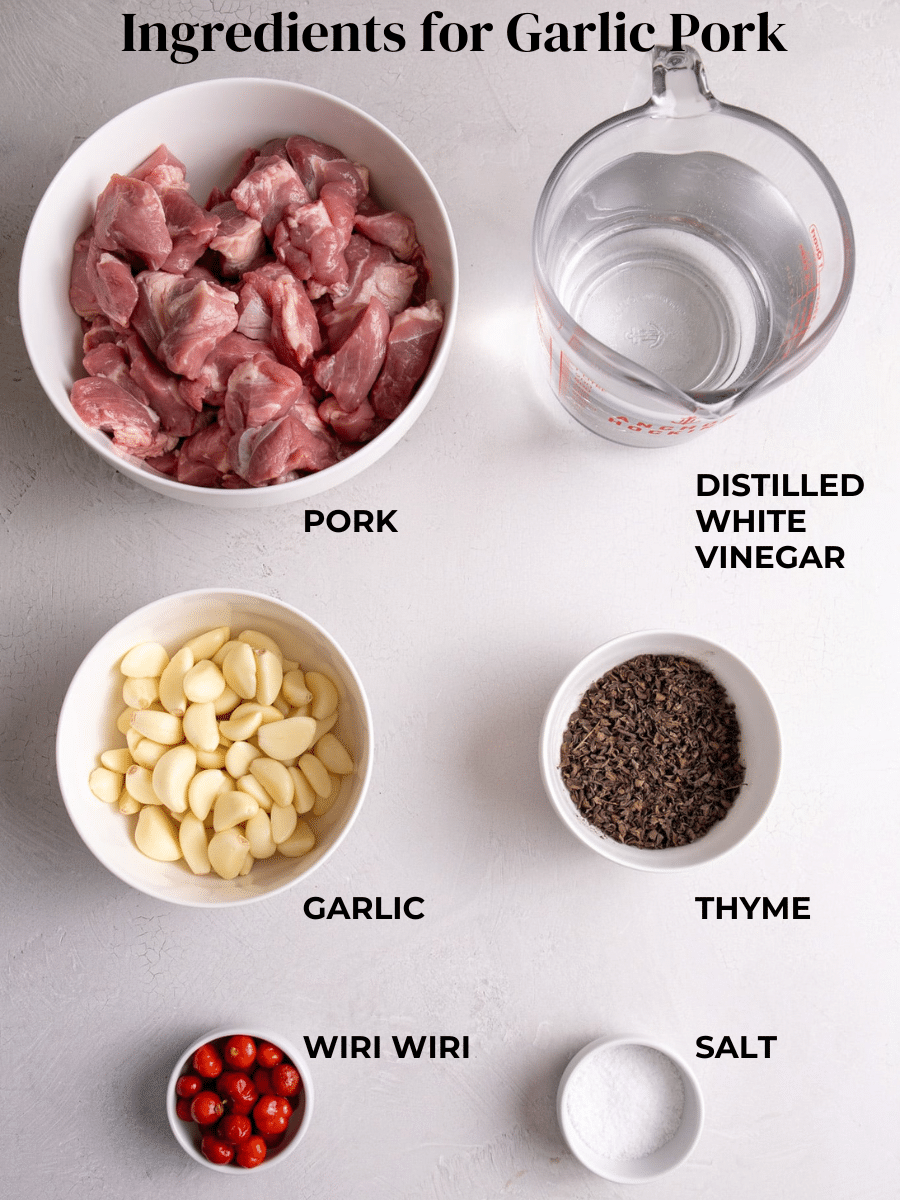
- Pork: Use a fatty part of the pork for the best flavor. I suggest pork shoulder or loin with visible fat. Cut it into 1 1/2 to 2-inch cubes.
- Fresh Garlic: Garlic is the star of this dish and you will need lots of it. See below for more details.
- Guyanese Thyme (also called Portuguese thyme): You may use either dry or fresh thyme. If you are living in the United States you can buy dried Guyanese thyme from Kasaito.com
- Vinegar: Traditionally we use white distilled vinegar, but I’ve also used red wine vinegar.
- Wiri wiri peppers: Can be substituted with scotch bonnet or habanero peppers
See recipe card for quantities.
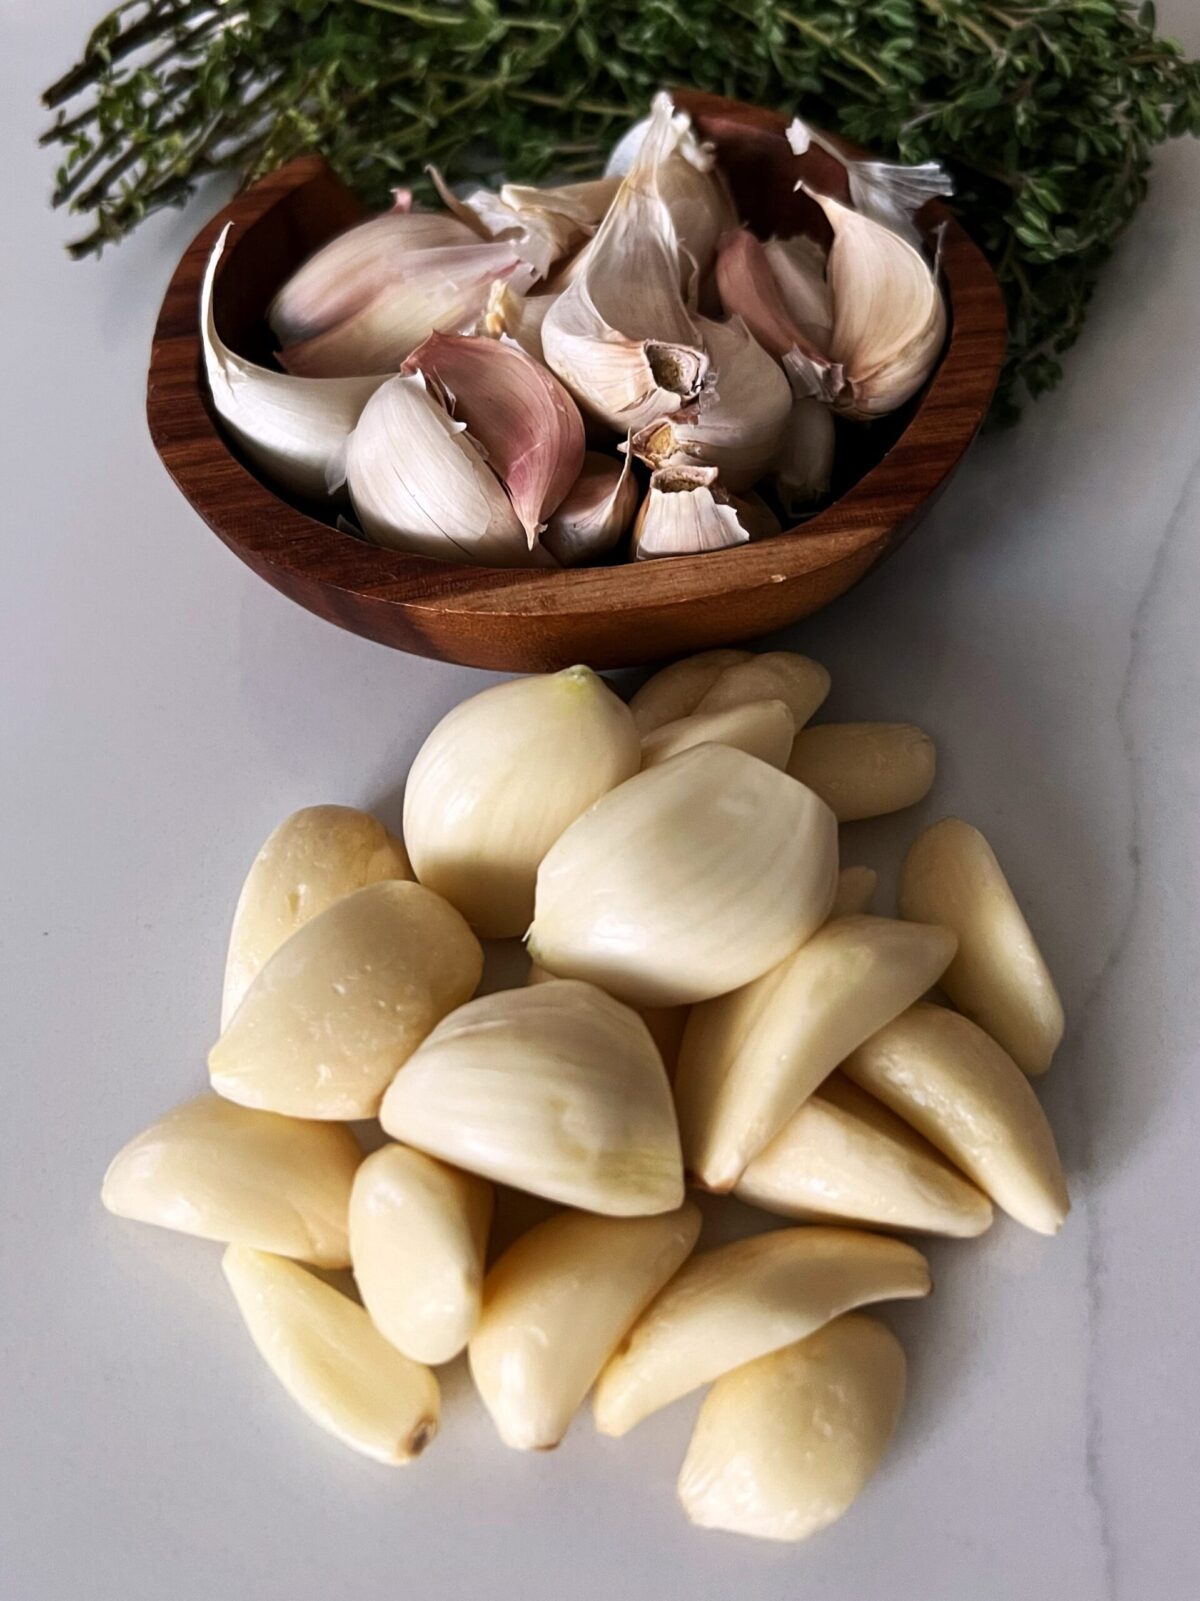
Choosing the right Garlic
Garlic is a key ingredient in garlic pork. Choosing the right garlic is also important. You will need fresh firm garlic. If you get garlic that is already peeled please ensure that it is fresh and not glassy looking. Also, inspect the garlic to ensure it is not starting to go bad. Trim off any bits that don’t look good.
Preparing the Garlic
I use a food processor to mince my garlic, pepper, and thyme into a smooth paste but you can also use a blender with a little bit of vinegar. You can also keep fresh thyme or the stems and not blend it. Guyanese or Portuguese thyme is best for this recipe.
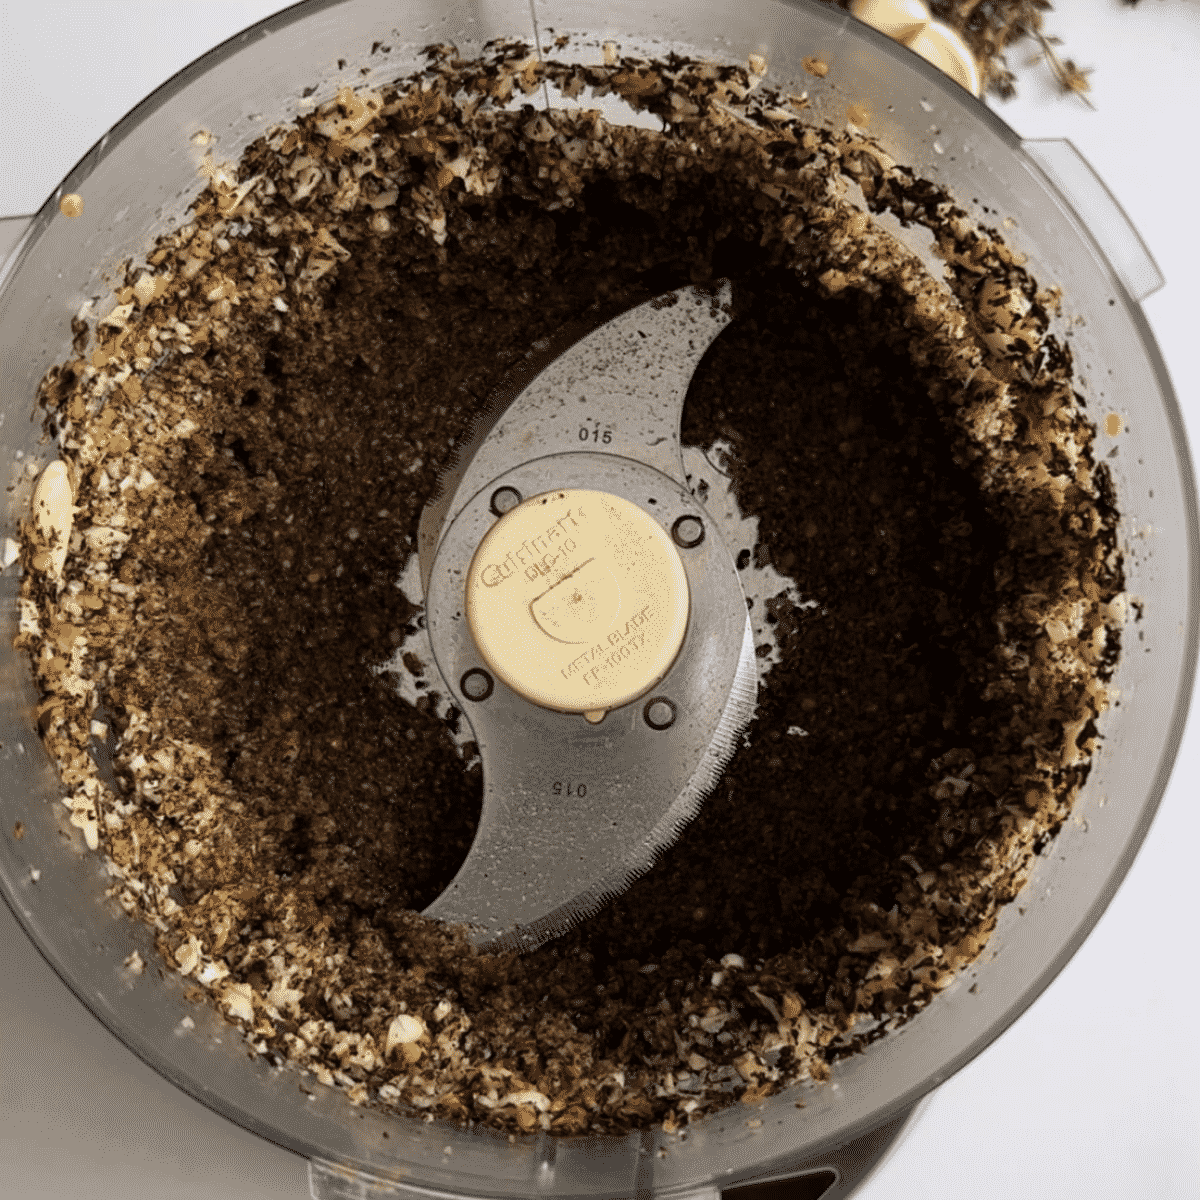
While recipe testing for this post, I also smashed, chopped, and simply cut the garlic bulbs in half instead of peeling and chopping. The version with the blended garlic, pepper, and thyme yielded the best results.
How to Make Guyanese Garlic Pork
Season & Marinate the Pork
Add your peeled garlic, thyme (I’m using dried Guyanese thyme here) and wiri wiri peppers to a food processor and blend it into a smooth paste. Then add all of the seasoning paste to the prepped pork.
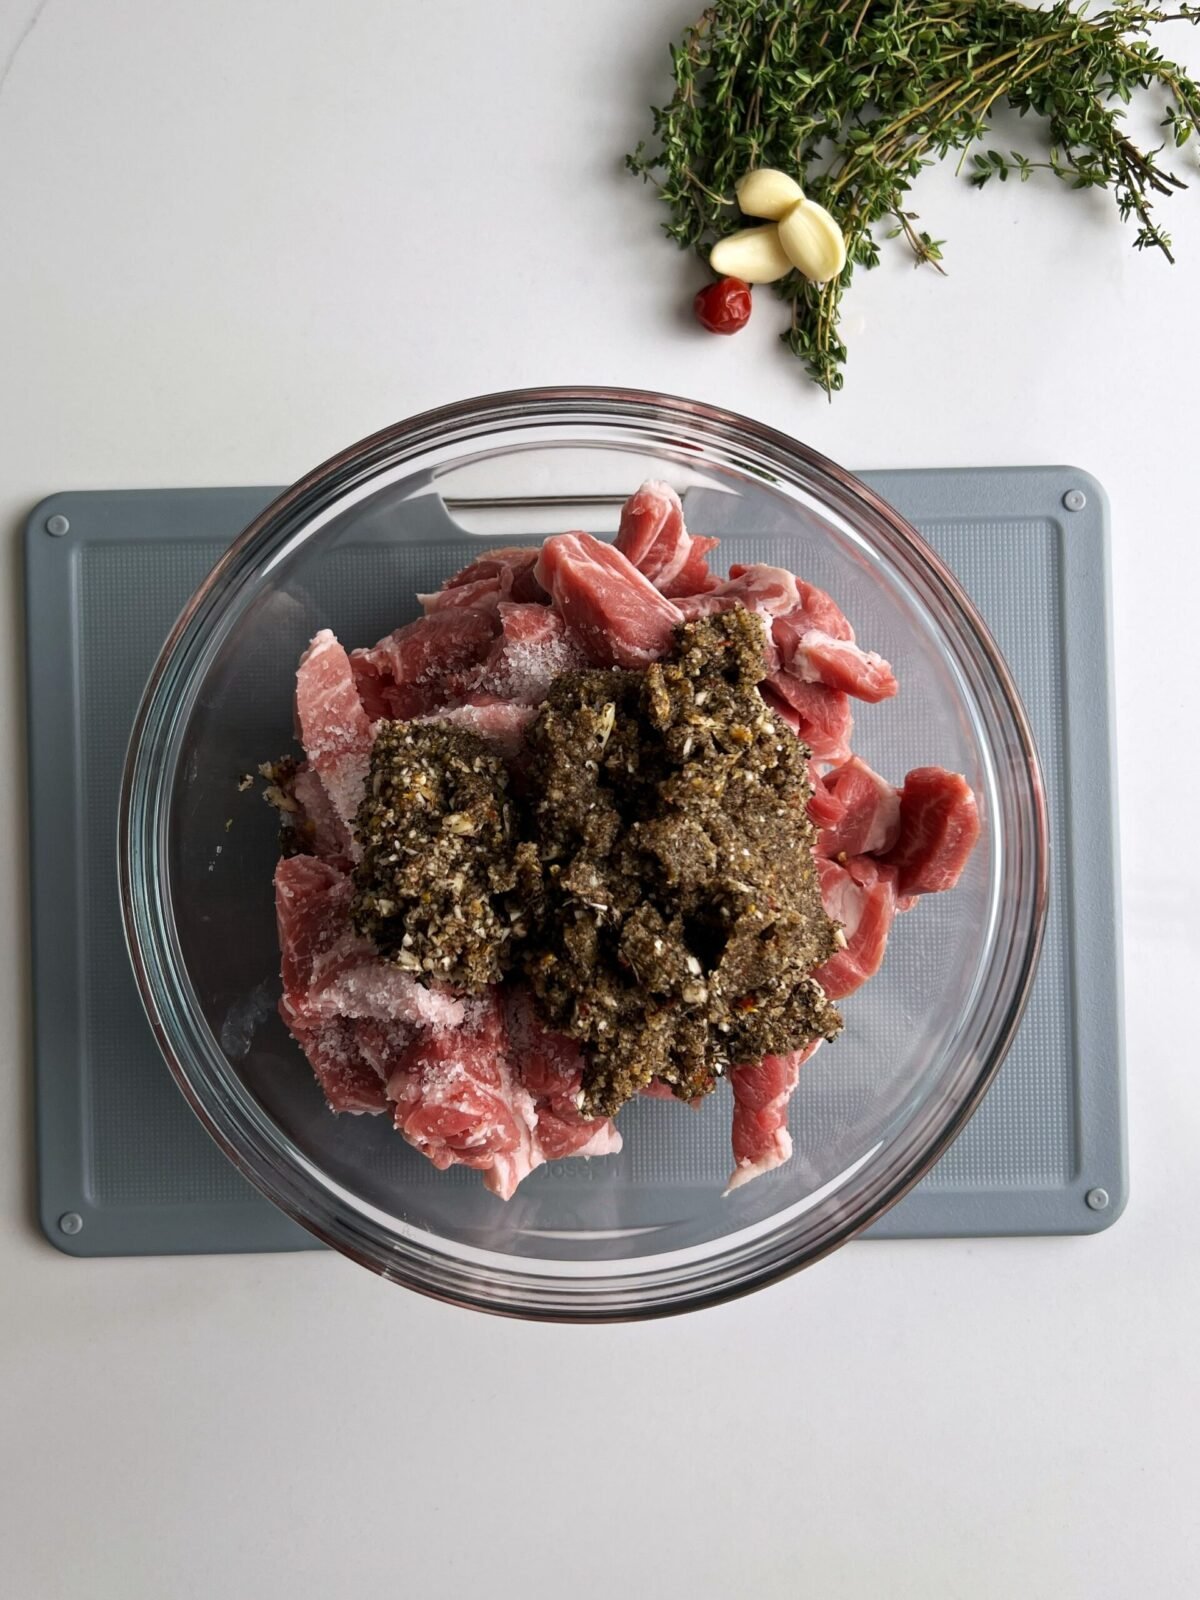
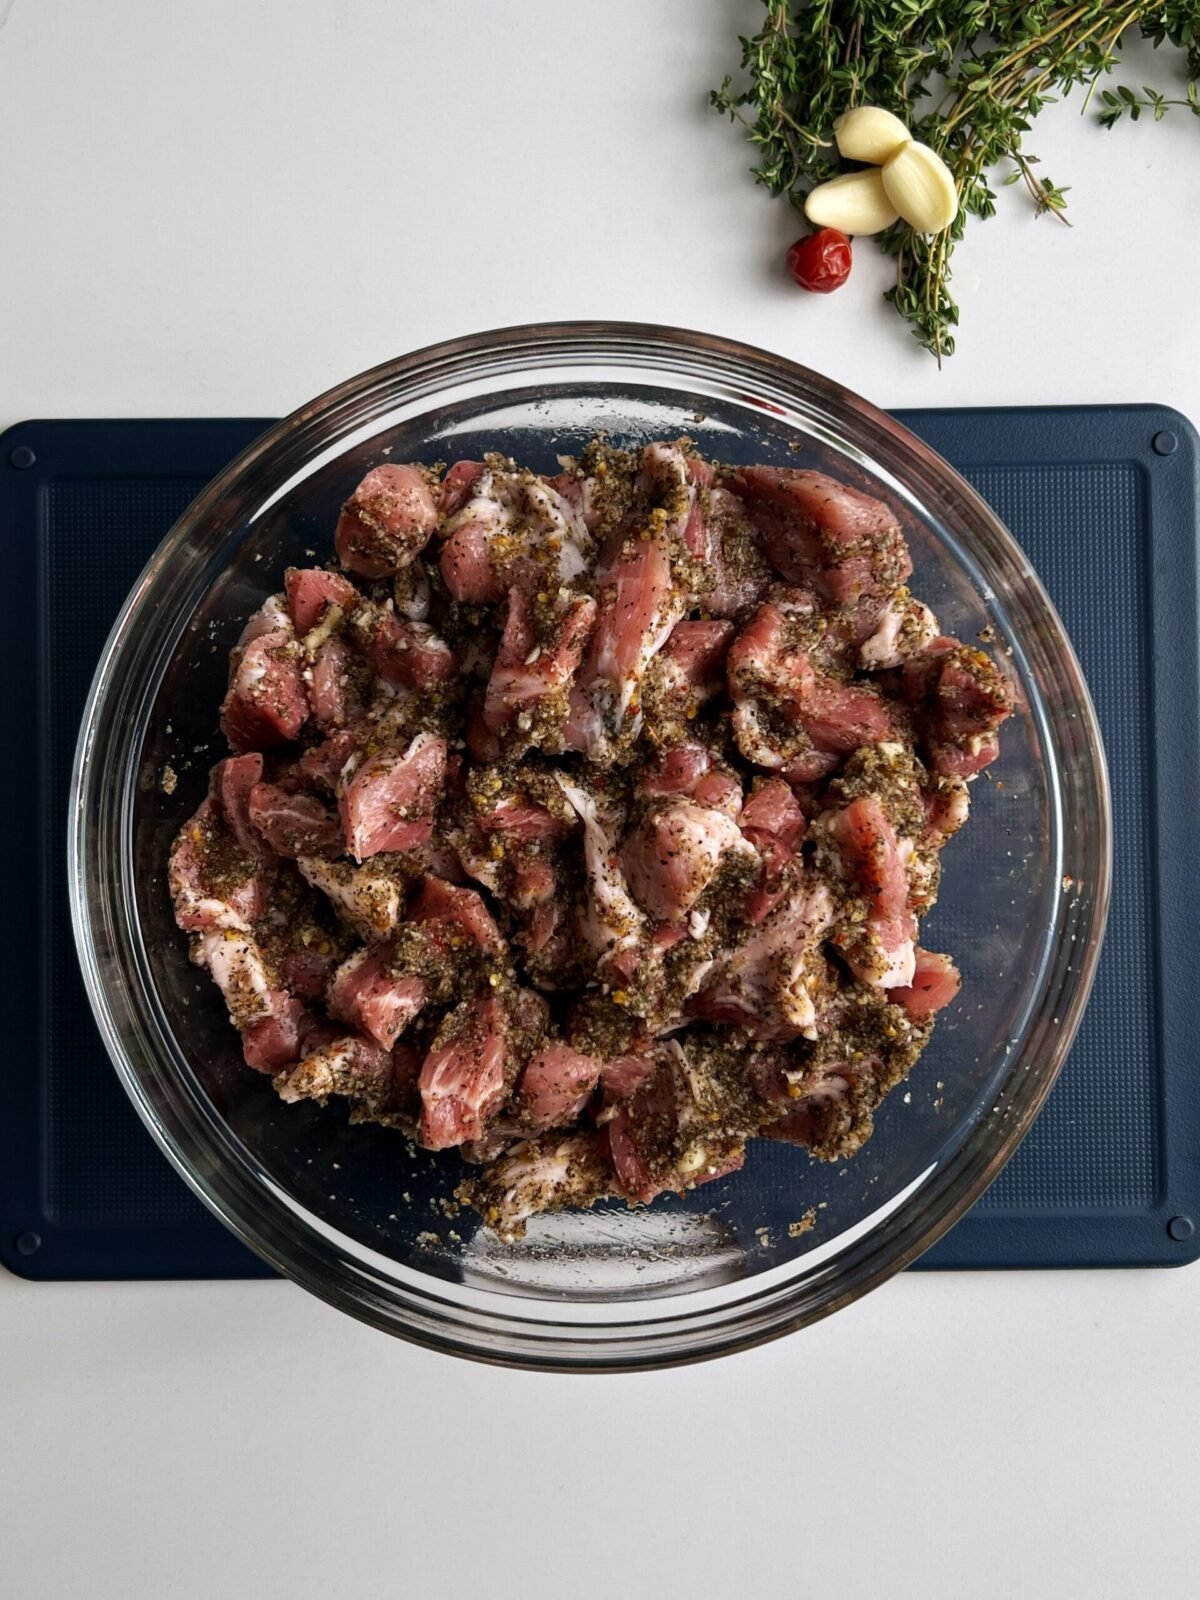
Then mix to combine and set aside. Sometimes I let this marinate for 30 minutes before adding the vinegar. Next add the pork to a sterilized jar, then add all of the vinegar.


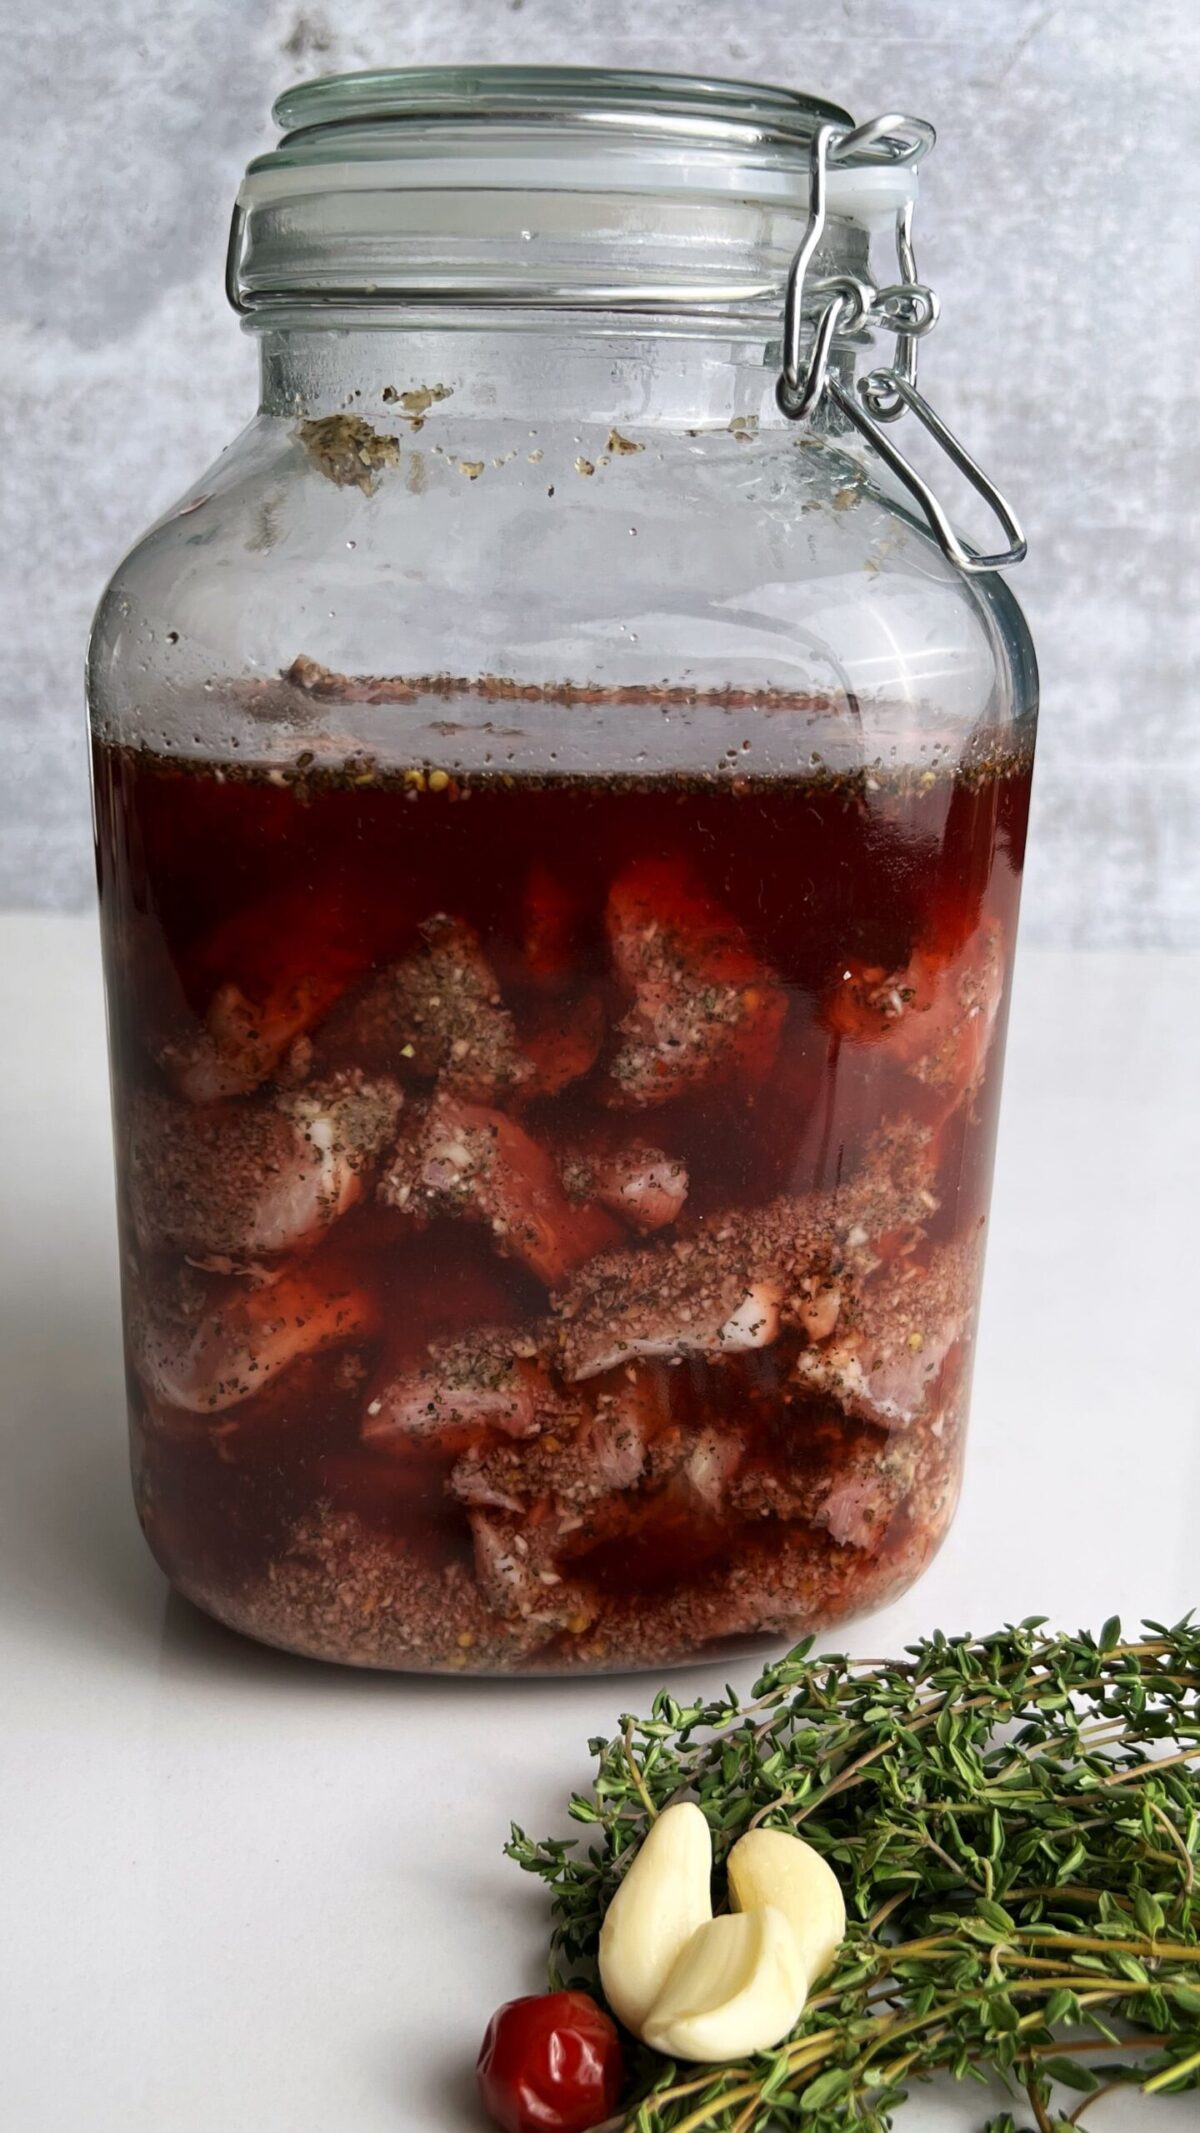
Alternatively, add salt to the pork, blend the garlic and pepper together, and leave the fresh thyme and stems intact, then layer in your jar (as shown above). I loved the look of the layering process but honestly, it is not necessary.
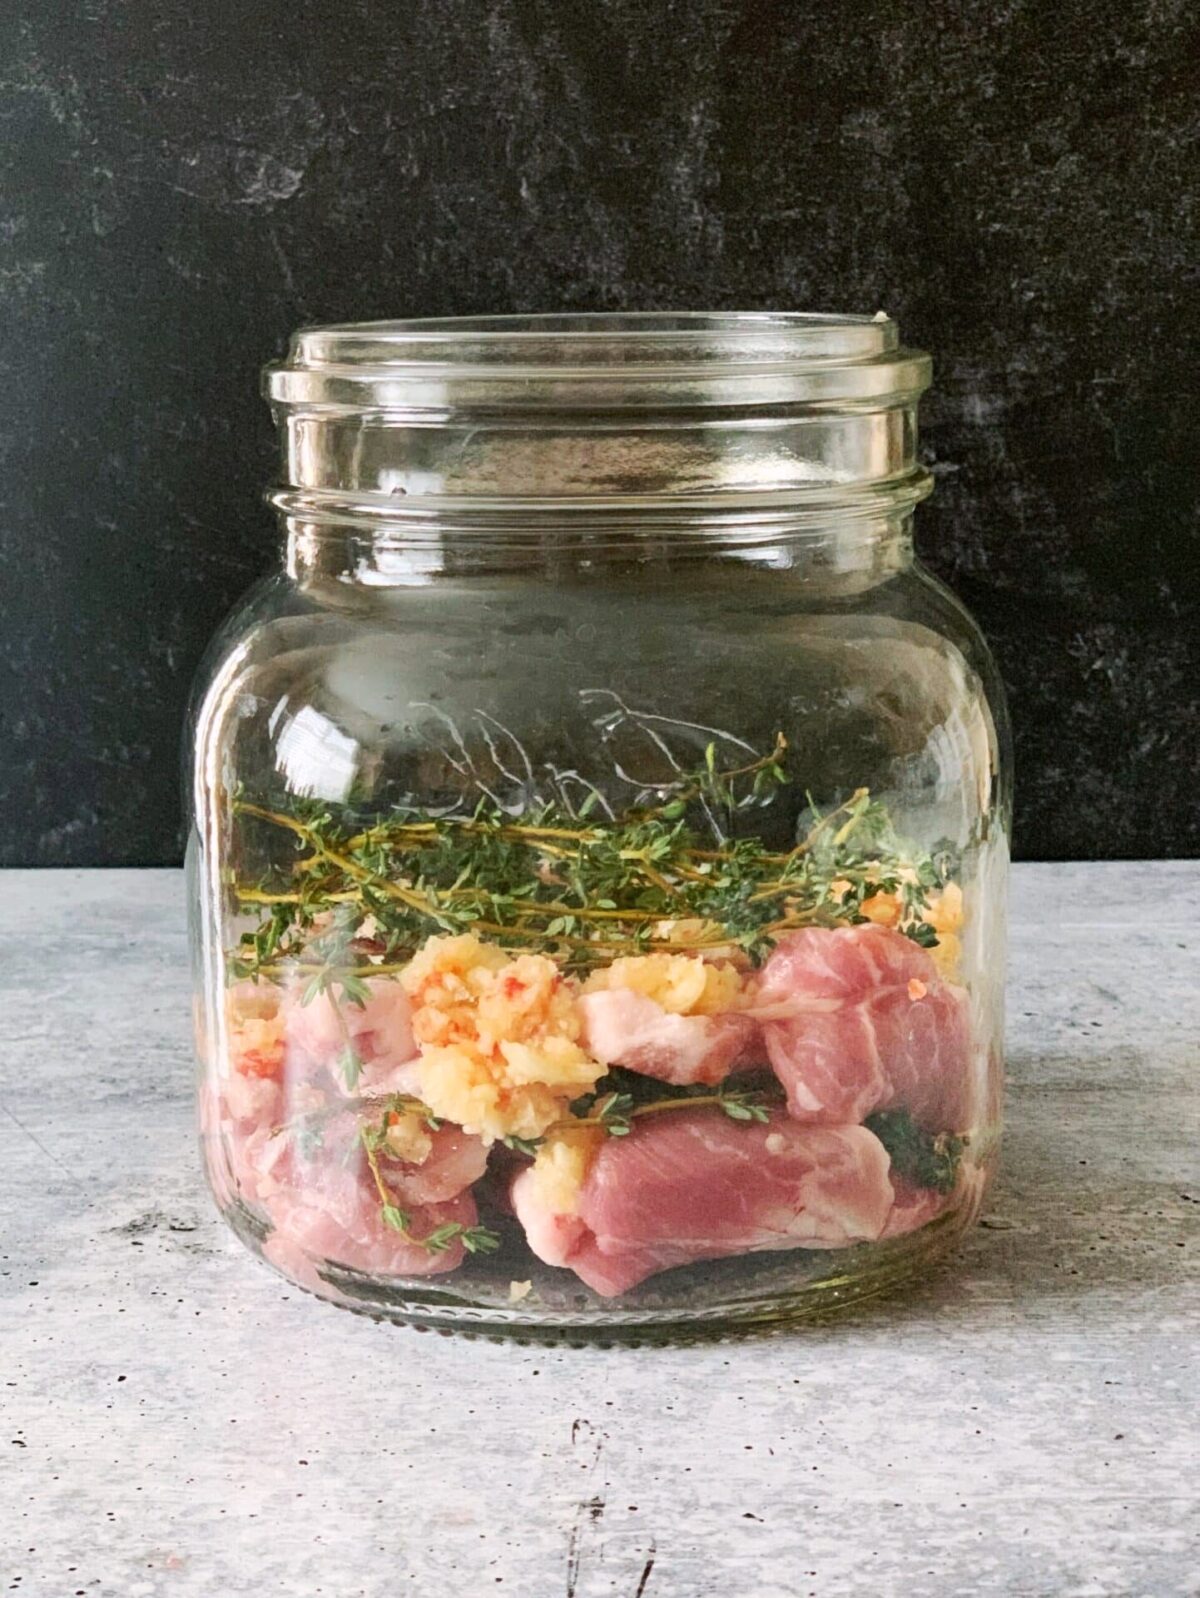
To layer the pork and seasoning, start with some vinegar, then a layer of meat, then the seasoning and thyme, then repeat until all the meat and seasoning are in your jar. Give it a little stir then seal up the jar and let it marinate for 3-4 days or until the pork turns white.
Cooking the Garlic Pork on the Stove Top
After 3-4 days when the pork is ready, you may drain off the pickling liquids keeping the garlic and thyme. You can do this with a sieve or colander. Some people also just like to keep the pork pickling and cook small portions as needed. Just be careful to use a clean sterilized utensil every time you take from the jar so that it does not get contaminated.
When cooking you don’t need any additional oil or fat. If you are cooking it all at once just add the marinated pork to a large heavy bottom pot on medium heat and cook until all the liquid cooks down and it starts to cook in its own fat.
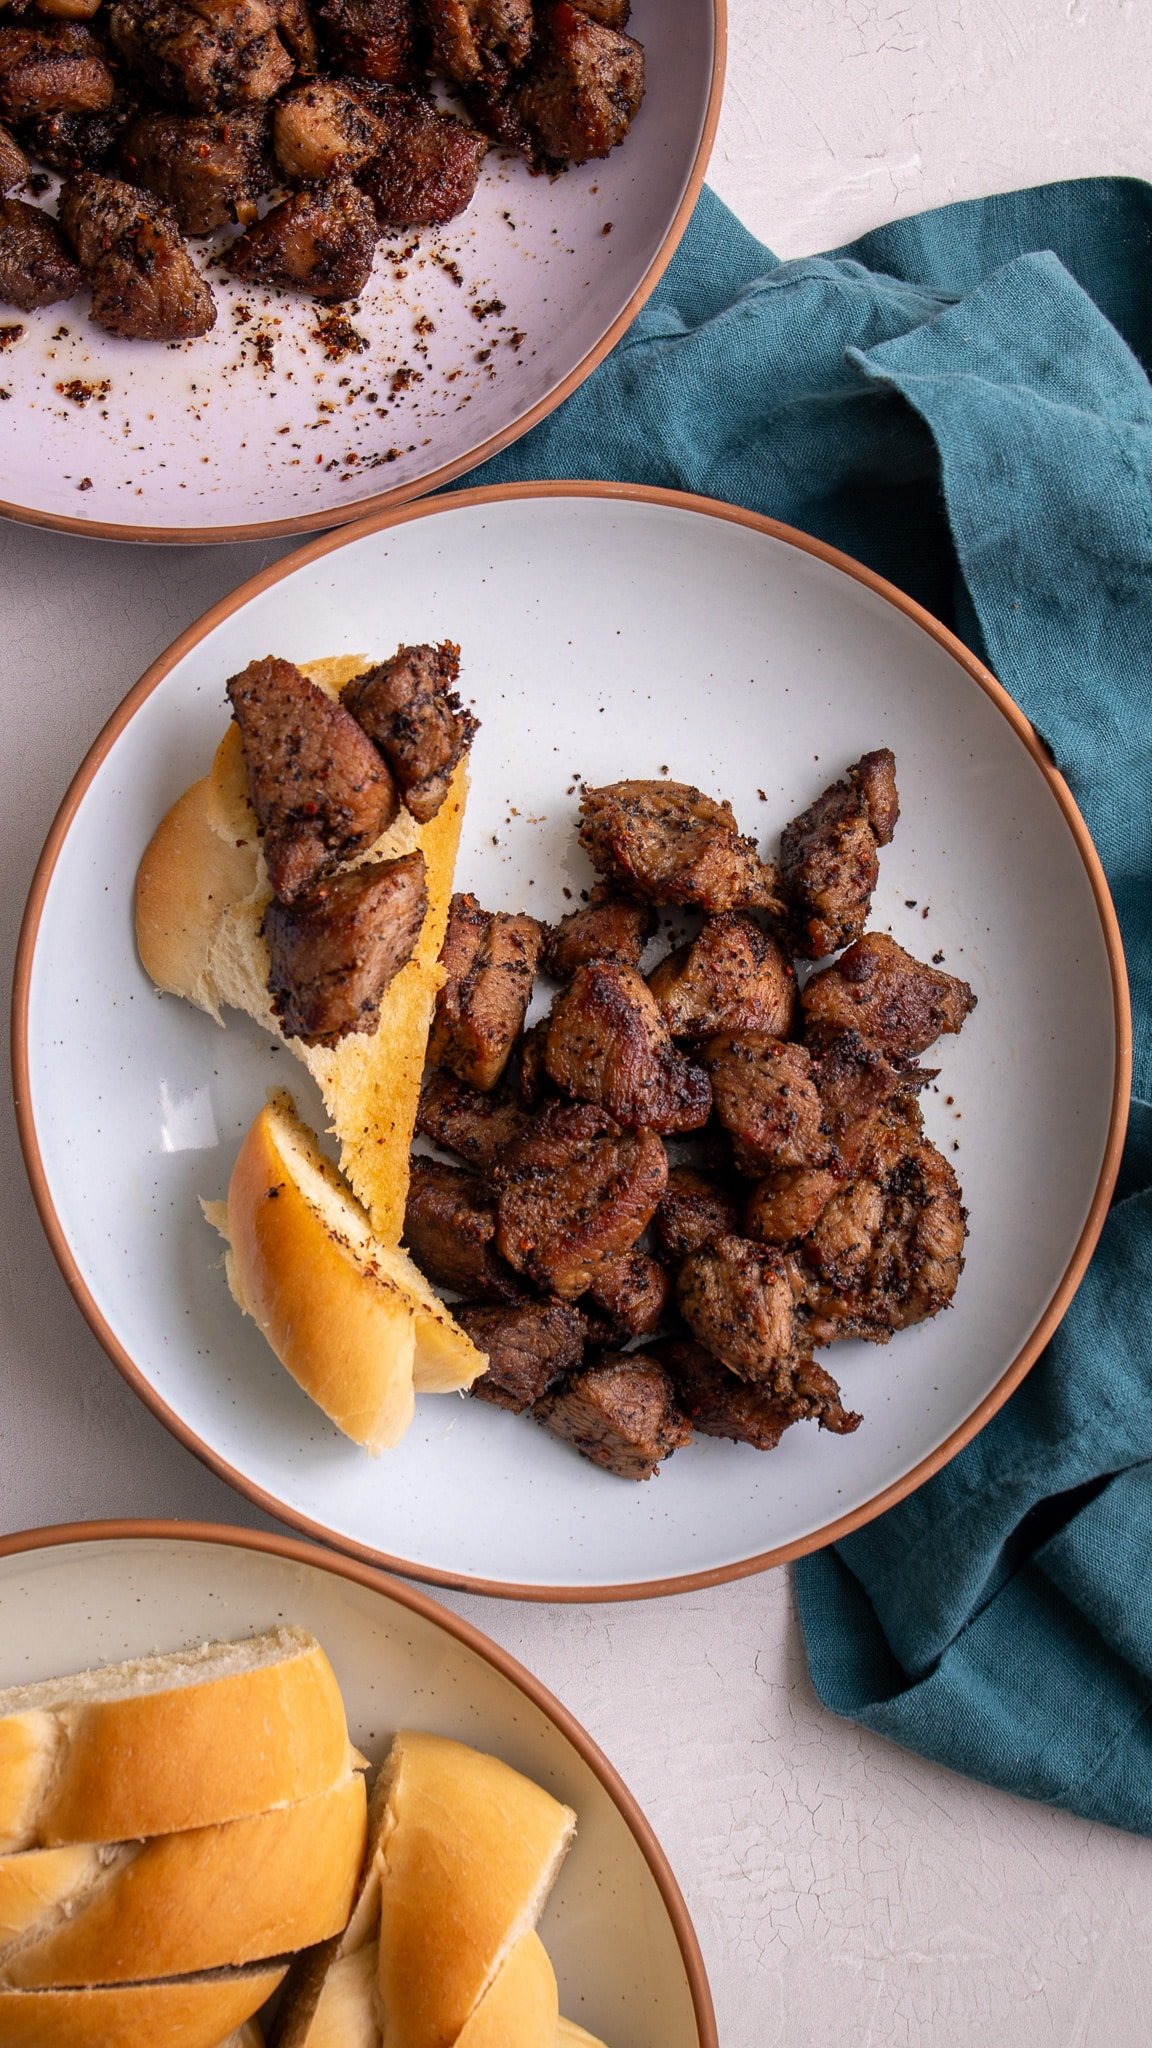
I love having a good char on the garlic pork so once it started frying in its fat, I let it sauté until it was really brown. If you are cooking it in small portions just add the pickled pork to a hot frying pan and cook until the liquid cooks off and it starts to brown. But be careful because it may spill and splatter. I used a splatter guard in order to prevent burns.
Cooking the Garlic Pork in the Oven
Alternatively you can cook your garlic pork in the oven. Drain the liquid from the pickled pork, then spread out in a single layer on a sheet pan. I sprayed the sheet pan with a bit of cooking spray first to prevent sticking. Then set your broiler to 500 °F and broil for 20 minutes or until the liquid cooks off and the pork is golden brown.
Cooking the Garlic Pork in the Air Fryer
Add your garlic pork (drained from all liquids) in a single layer in your air fryer and air fry at 450°F for 10 minutes or until it has a nice roasted color. This method of cooking the pork is so easy, you won’t regret it.
Variations to Guyanese Garlic Pork
- Guyanese Garlic Beef or Garlic Chicken: This recipe works really well with chicken or beef. Using the same measurements I substituted the pork in this recipe for ribeye steak with a great marble. I did the same with some fatty chicken thighs. The results were really great and tasty. The chicken tasted closest to the pork but the beef was equally delicious. For the chicken or beef I pickled for no more than 3 days or the meat will become mushy.
- Garlic Mushrooms: I created a separate recipe post for garlic mushrooms as the ingredients vary. You can find that recipe here.
- Use red wine vinegar: A few years ago I substituted the white distilled vinegar in this recipe for red wine vinegar. I was channelling the Madeiran recipe that influenced Guyanese Garlic Pork (Carne Vinha d’alhos). I have to admit this added a depth of flavor and slight sweetness to the recipe and is my favorite vinegar to use.
Storage
Store leftover cooked pork in an airtight container in the fridge and consume it within 4 days. To reheat, microwave.
Tips for the Best Guyanese Garlic Pork
Choosing the Right Jar
I highly recommend using a glass jar with a tight seal, for this recipe (like the mason jar shown above). You also need a large enough jar for the pork to be completely submerged in the pickling liquids, with a bit of space left between the liquid and the top of the jar. Do not overstuff the jar. The pork should be floating in the jar after you add all of the vinegar.
Sterilize Everything before Making the Garlic Pork
The first time I made this dish, my aunt told me to sterilize the jars and utensils by boiling them in hot water and being careful not to contaminate them. So I did that in a large stock pot and carefully use tongs to hold everything. I followed the instructions in this article on how to sterilize jars for canning.
This time around I sterilized everything with vinegar and used sterile gloves when putting it all together. I simply poured a little vinegar over everything before I started, it was so much easier than boiling everything, but do what works for you.
Frequently Asked Questions
Garlic pork is made with a fatty cut of pork, 1/2 pound of garlic, wiri wiri wiri peppers and Guyanese thyme. It is set in a solution of salt and either red wine vinegar or white vinegar.
Guyanese garlic pork can be pickled for 3-7 days.
It is served with aniseed bread. The sweetness of the bread pairs perfectly with the acidity of the pork.
Garlic pork can sit on the counter at room temperature during the pickling process. This is because we are using straight vinegar and not a diluted vinegar solution. But if you are worried, feel free to refrigerate your Guyanese pork during the 3-5 days of pickling.
Aunty Rita’s Guyanese Garlic Pork
Equipment
- Food processor or blender
- Large Glass Jar sterilized
- Sieve or Colander
- Heavy Bottom Pot or Frying Pan
Ingredients
- 3 lbs Pork shoulder or loin with visible fat (cut into 1 1/2 to 2 inch cubes)
- 1/2 lb garlic (peeled)
- 1/4 cup wiri wiri pepper (or 2 habanero peppers)
- 1 cup fresh thyme preferably Guyanese/Portuguese thyme
- 1 tablespoon salt
- 4 1/2 cups white distilled vinegar (or try it with red wine vinegar)
Instructions
Sterilize jar and all of the utensils before you begin. See note below for tips on sterilizing
- Wash the cubed pork with 1/2 cup of vinegar diluted with water. Drain any excess water and sprinkle with 1 tablespoon of salt, then mix together well and set aside. Alternatively you can add the salt to the marinade.
- Remove as much of the thyme from the stems (if using fresh thyme, but do not throw away the stems)
- To a food processor add the peeled garlic, thyme leaves and peppers (you may remove some of the seeds and veins from the peppers for less heat), then process until smooth. You may also add these ingredients to a blender and blend with about 1/2 cup of vinegar
Making the Guyanese Garlic Pork
- In a sterilized large glass jar add 1/2 cup of vinegar, followed by a layer of the pork, then a layer of the seasoning and a few of the thyme stems, then top it off with another 1/2 cup of vinegar.
- Repeat the layering of vinegar, meat and seasoning until everything is in the jar then top it off with the remaining vinegar.
- Alternatively you can add the seasoning to the pork and mix together well, then add 1/2 cup of vinegar to the jar, then some pork, then some vinegar and repeat until all the seasoned pork and vinegar are in the jar.
- Ensure that all of the meat and seasoning is completely submerged in the vinegar and that there is enough space in the jar to accommodate all of the ingredients and liquids.
- Store in a cool dry place (typically your kitchen counter) and let it sit for 3-5 days (or 7 days at most)
Cooking the Guyanese Garlic Pork all at once:
- When you are ready to cook the garlic pork, drain all of the vinegar from the pickled pork. This can be done with a sieve or colander. You may also remove the thyme stems at this point.
- Then bring a heavy bottom pot up to temperature on medium heat and add the marinated (pickled) garlic pork.
- Cook until all the liquids cook down and the pork starts to sizzle in its own fat.
- Continue to cook until pork is golden brown, stirring often to avoid burning but being careful not to break the pork cubes apart.
Cooking small portions of Garlic Pork at a time:
- Add a small frying pan to medium heat and bring up to temperature. Then remove a small portion of the pickled pork from the jar and pat dry with paper towels.
- Add the garlic pork to the frying pan and cook until all the liquid cooks off and the pork begins to "fry" in its own fat. continue to cook until golden brown, then remove from the heat.
Cooking Garlic Pork in the oven
- Drain the pork from the pickling liquids. Then spray a baking sheet with cooking spray and add the pickled pork to the baking sheet.
- Broil at 500°F for 20 minutes or until all the liquid cooks off and the pork is golden brown.
- Serve your garlic pork with Guyanese plait bread, preferably anise seed plait bread.
Notes
- You may substitute the pork in this recipe for chicken thighs or beef. For beef choose a cut that has some fat and marble. Check out the variations section in this post for more.
- Use red wine vinegar. I highly recommend swapping out the white distilled vinegar in this recipe for red wine vinegar. It is not the traditional way but in my humble opinion it’s the tastiest.
- Sterilizing the Jar and Utensils:
- You can sterilize your jars and utensils using sterilizing tips used for canning and pickling. See article here.
- You can pour some white vinegar over the utensils and swished around inside the jar, then use sterile gloves to handle everything.
Nutrition
The information listed in the recipe card is an estimate provided by an online nutrition tool. The tool evaluates ingredient names and amounts then makes calculations based on the number of servings listed for the recipe. It is provided as a general guideline and not as a precise calculation. For precise nutrition information please feel free to add the ingredients to your preferred nutrition calculator or consult a doctor or licensed nutritionist.
 Sardines and Crackers
 Guyanese Kitchri
 Guyanese Milk Peera
 5 Must Try Guyanese Foods
Donna Johnson Says
Thank you so much! Right in time for Christmas❣️ My mother passed in 2005 and was our traditional Christmas breakfast! Thank you! I am surprising my family who will be visiting from Maryland❤️❤️ Thank you????
Kaiana aka TheInsiderBeauty Says
This is such a detailed recipe. I tried my hand for the first time at making garlic pork last Christmas and I loved it. Will definitely be trying your recipe this year. Thank you!