

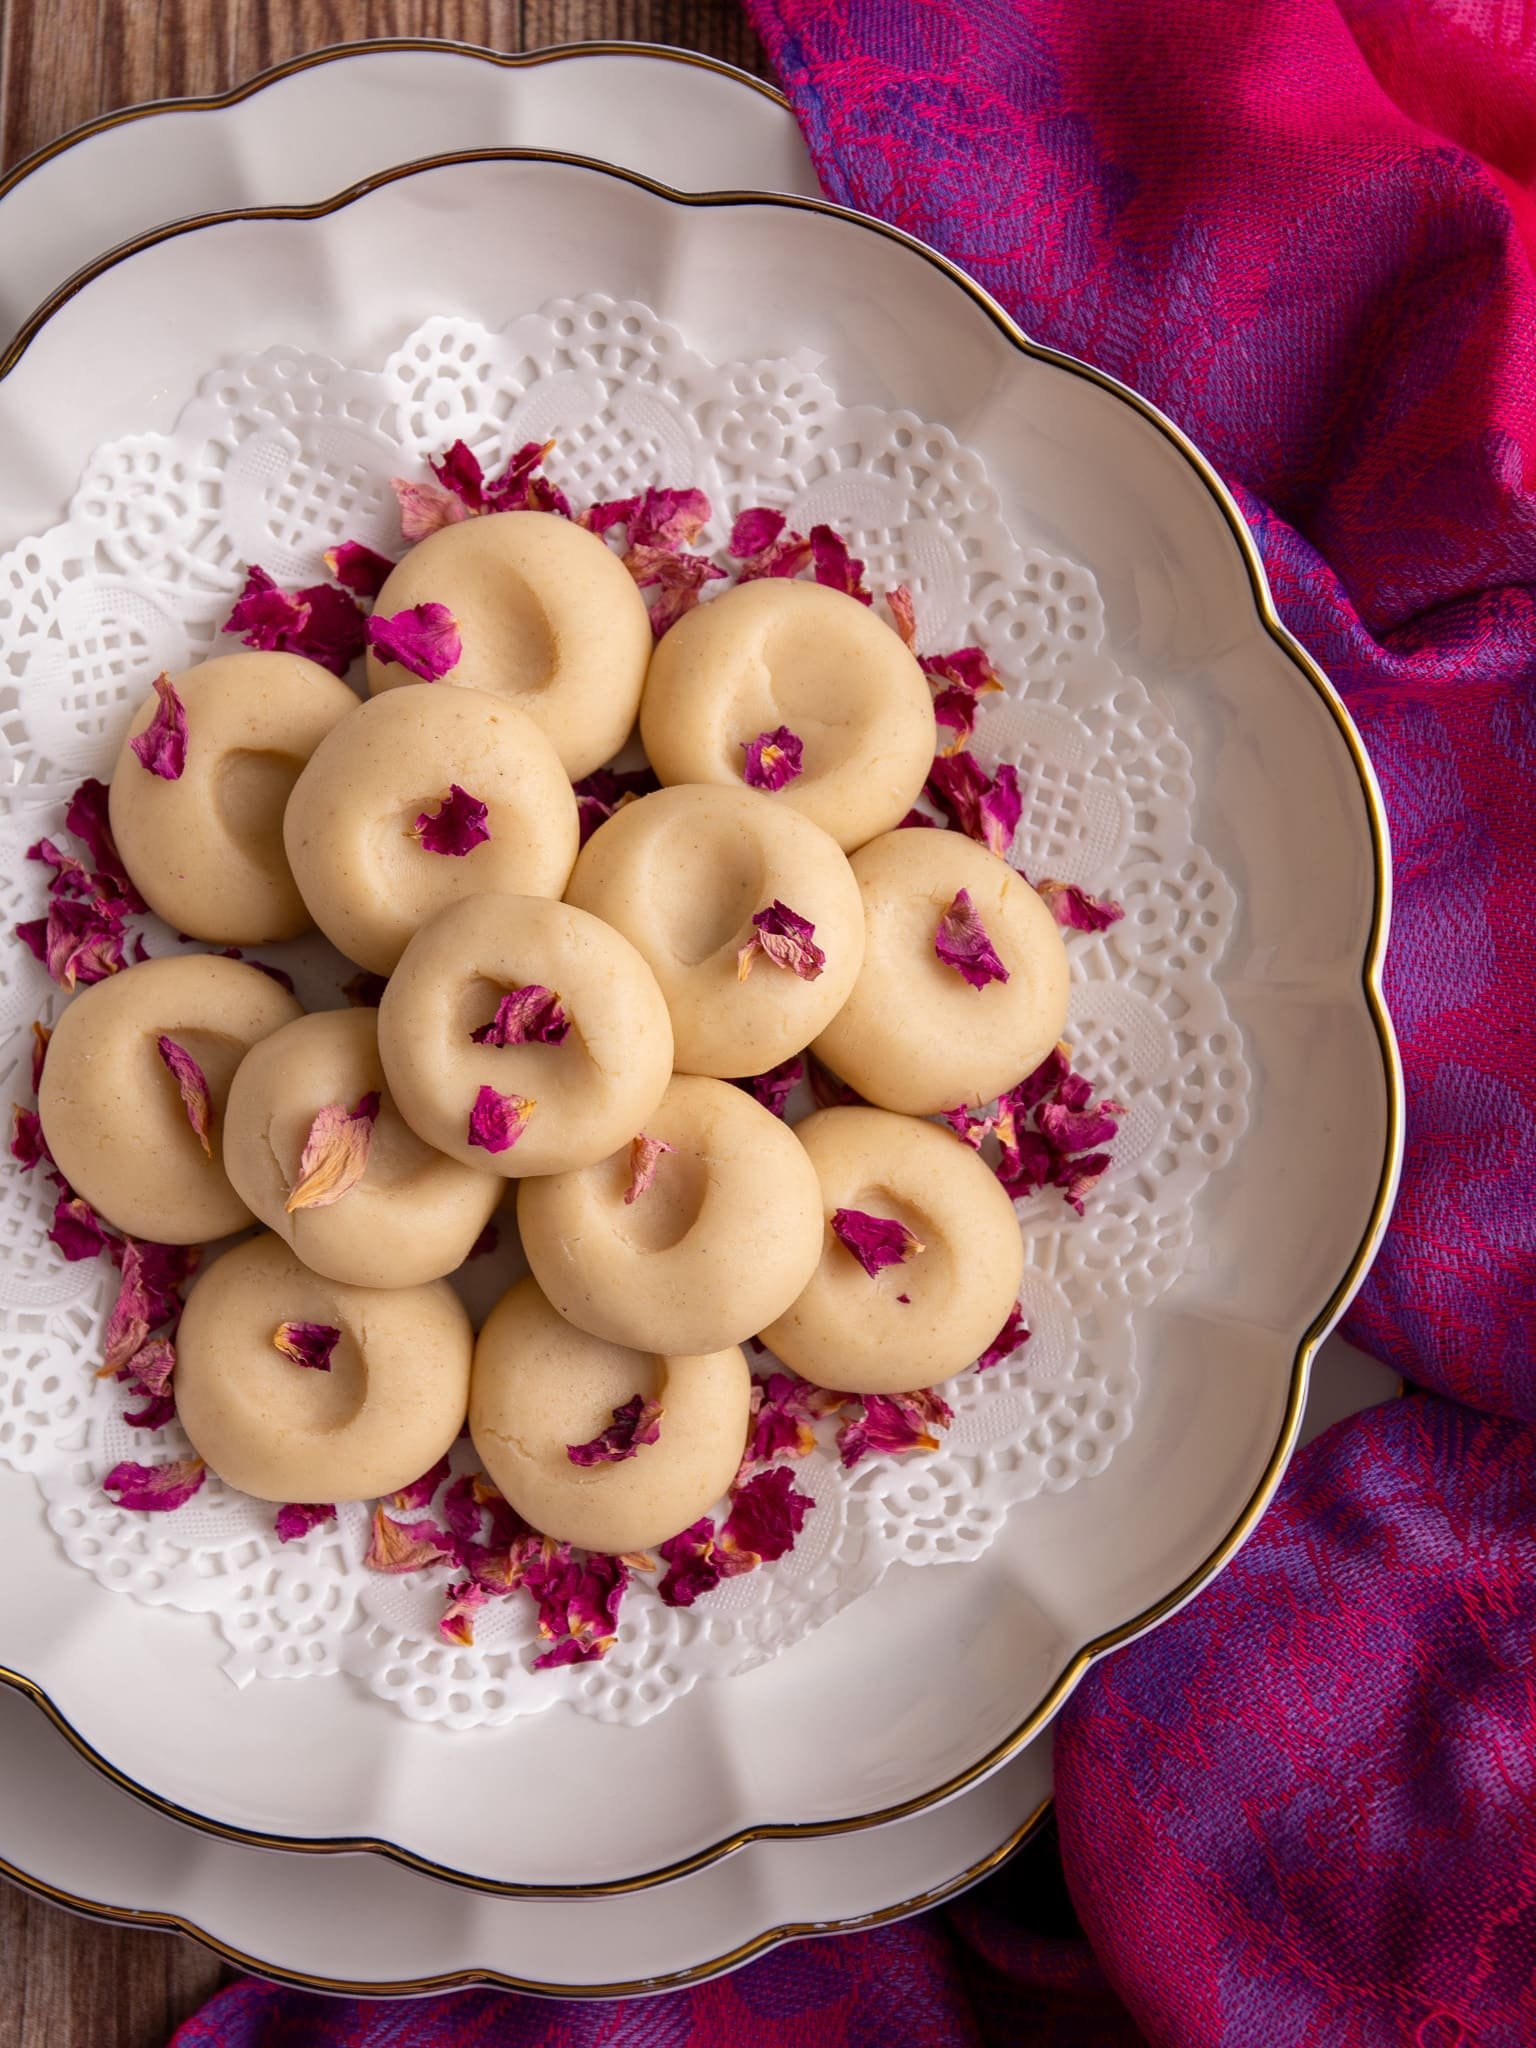
Peera or Pera is a sweet made with milk, sugar and spices. This simple fudge-like treat is typically made for Hindu religious celebrations and holidays.

Cow Milk Peera
This is the version many of you asked for after I shared my milk powder peera. Instead of using shortcuts, this recipe is made the traditional way with milk and sugar, cooked down slowly until thick and rich. My grandmother, who was Hindu, would make peera for Diwali, Holi, and other religious celebrations, so it’s something I’ve always associated with those moments. It’s also a sweet you’ll see throughout the year, not just for one occasion. It takes more time and attention, but the flavor develops in a way that feels familiar if you grew up around it.
My milk powder peera is a quicker option, but this method gives you a deeper, more developed flavor from slowly reducing the milk. If you enjoy sweets like this, my Guyanese-style vanilla fudge is another favorite, with a deeper caramel flavor that comes from slowly cooking milk and sugar.
What You Need to Know About this Cow Milk Peera Recipe
- Simple Ingredients: This recipe uses just a few pantry staples. Whole milk, sugar and cardamom come together to create a rich, traditional sweet without the need for milk powder.
- Takes time: This is a slow process that requires patience. The milk needs to reduce gradually, so plan to stay close to the stove and stir often as it thickens.
- Versatile: You can shape peera into small rounds, flatten them slightly, or use a spoon to decorate the top. The flavor stays the same, but the shape and finish can vary depending on how you grew up seeing it made.
Ingredients for Guyanese Milk Peera
These simple ingredients come together to make an indulgent treat.
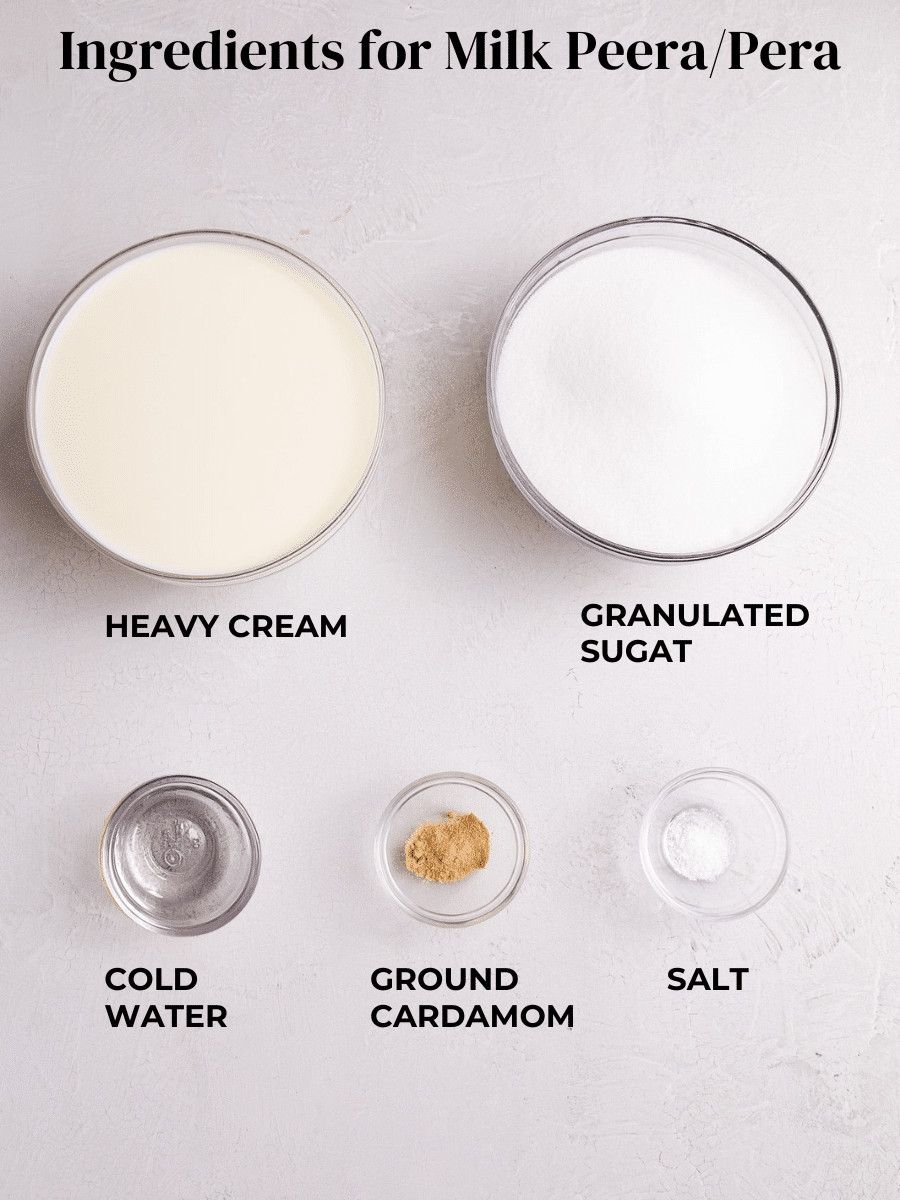
- Milk: I used heavy whipping cream to get as close to Guyanese cow’s milk as I could possibly get. As it reduces, it becomes thick, creamy and rich, which is what gives peera its signature texture.
- Sugar: Granulated or brown sugar both work here. Brown sugar will give a slightly deeper flavor, while granulated sugar keeps it lighter and more classic.
- Cardamom Powder: This adds that familiar warm, fragrant note that makes peera instantly recognizable.
- Water: Add just a touch of cold water to your palms before shaping. This helps prevent sticking and makes it easier to form smooth pieces.
- Salt: Not a traditional ingredient but a pinch of salt helps to balance out the sweetness from the sugar.
See recipe card for quantities.
How to Make Milk Peera/Peda
Start the Milk and Sugar
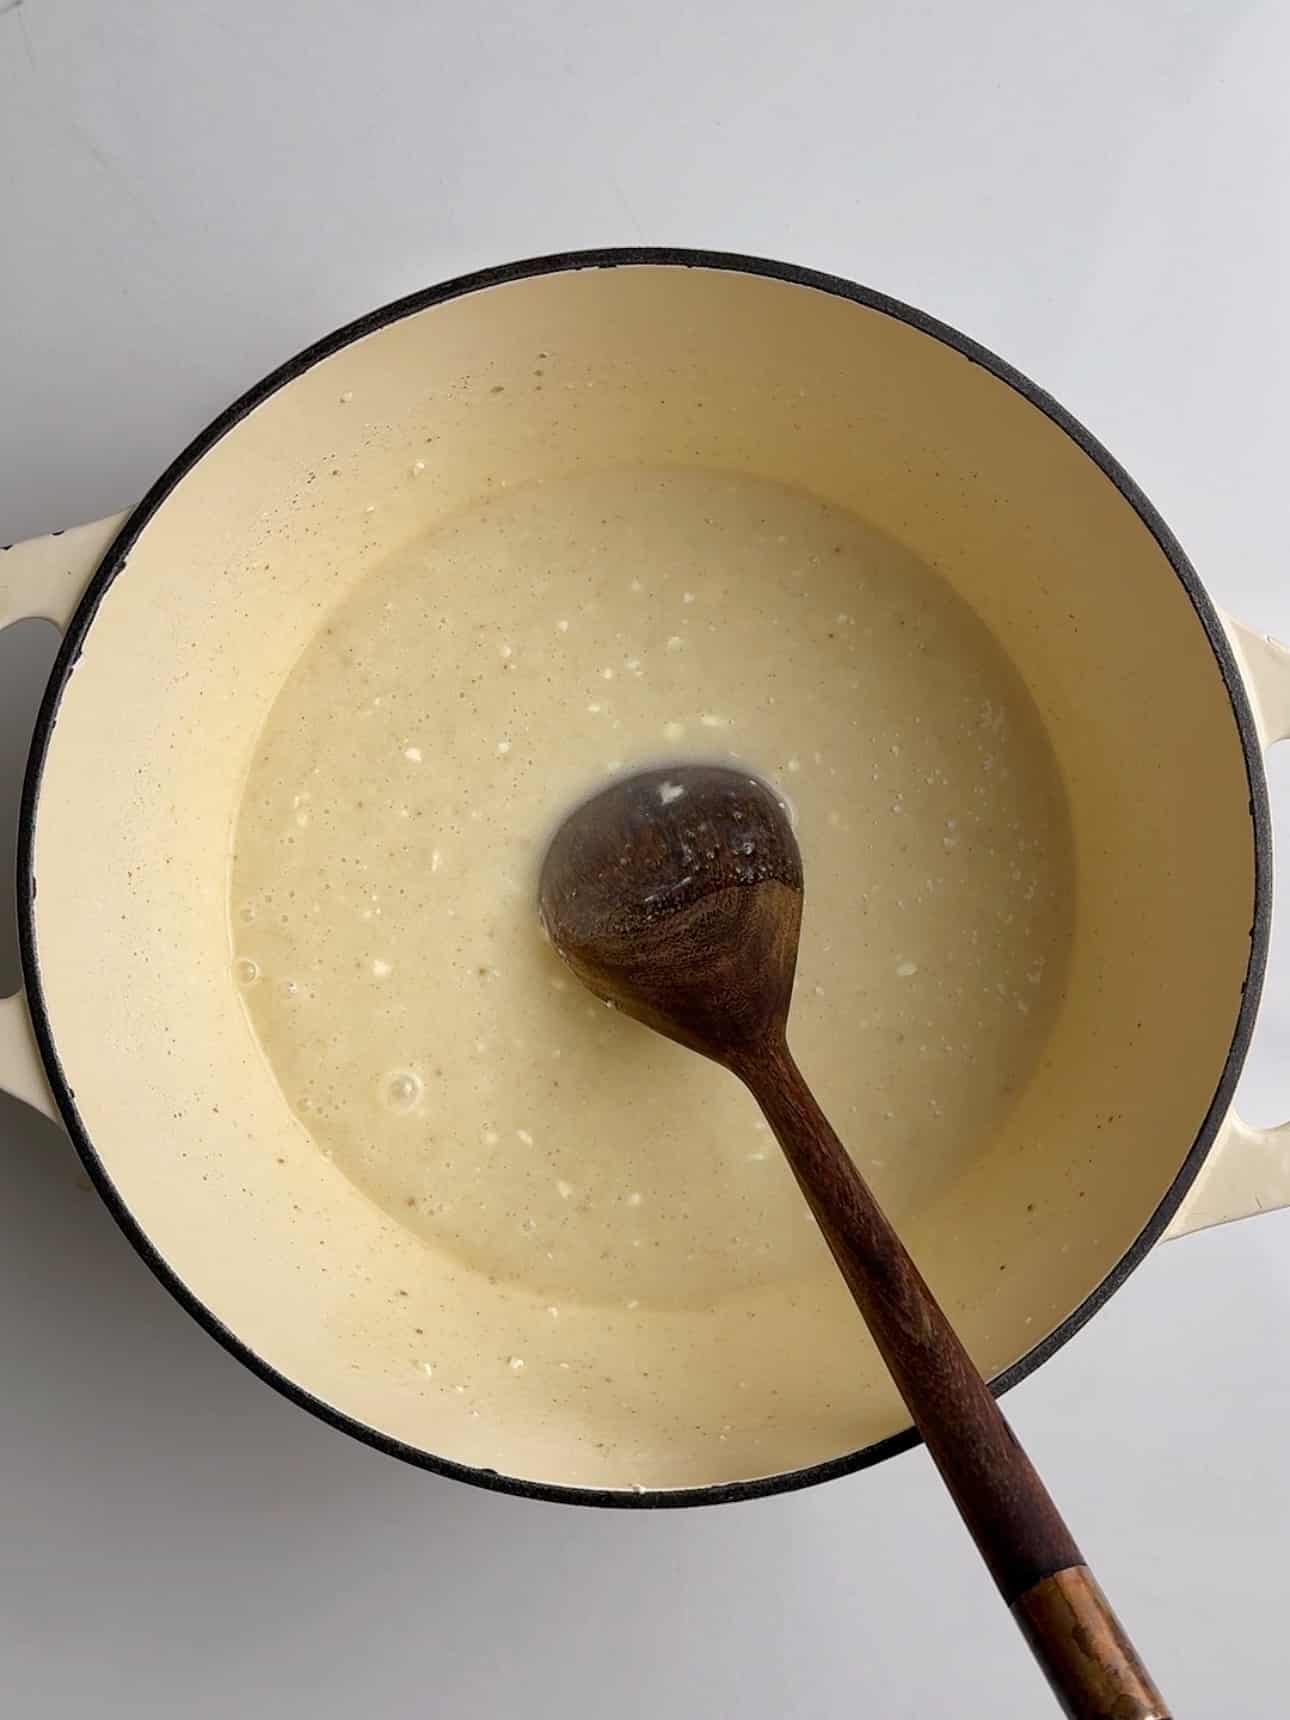
I add the milk and sugar to a large pot over medium heat and stir until the sugar fully dissolves. Once combined, I let it come up to a gentle simmer without rushing the process. This is where everything starts to come together.

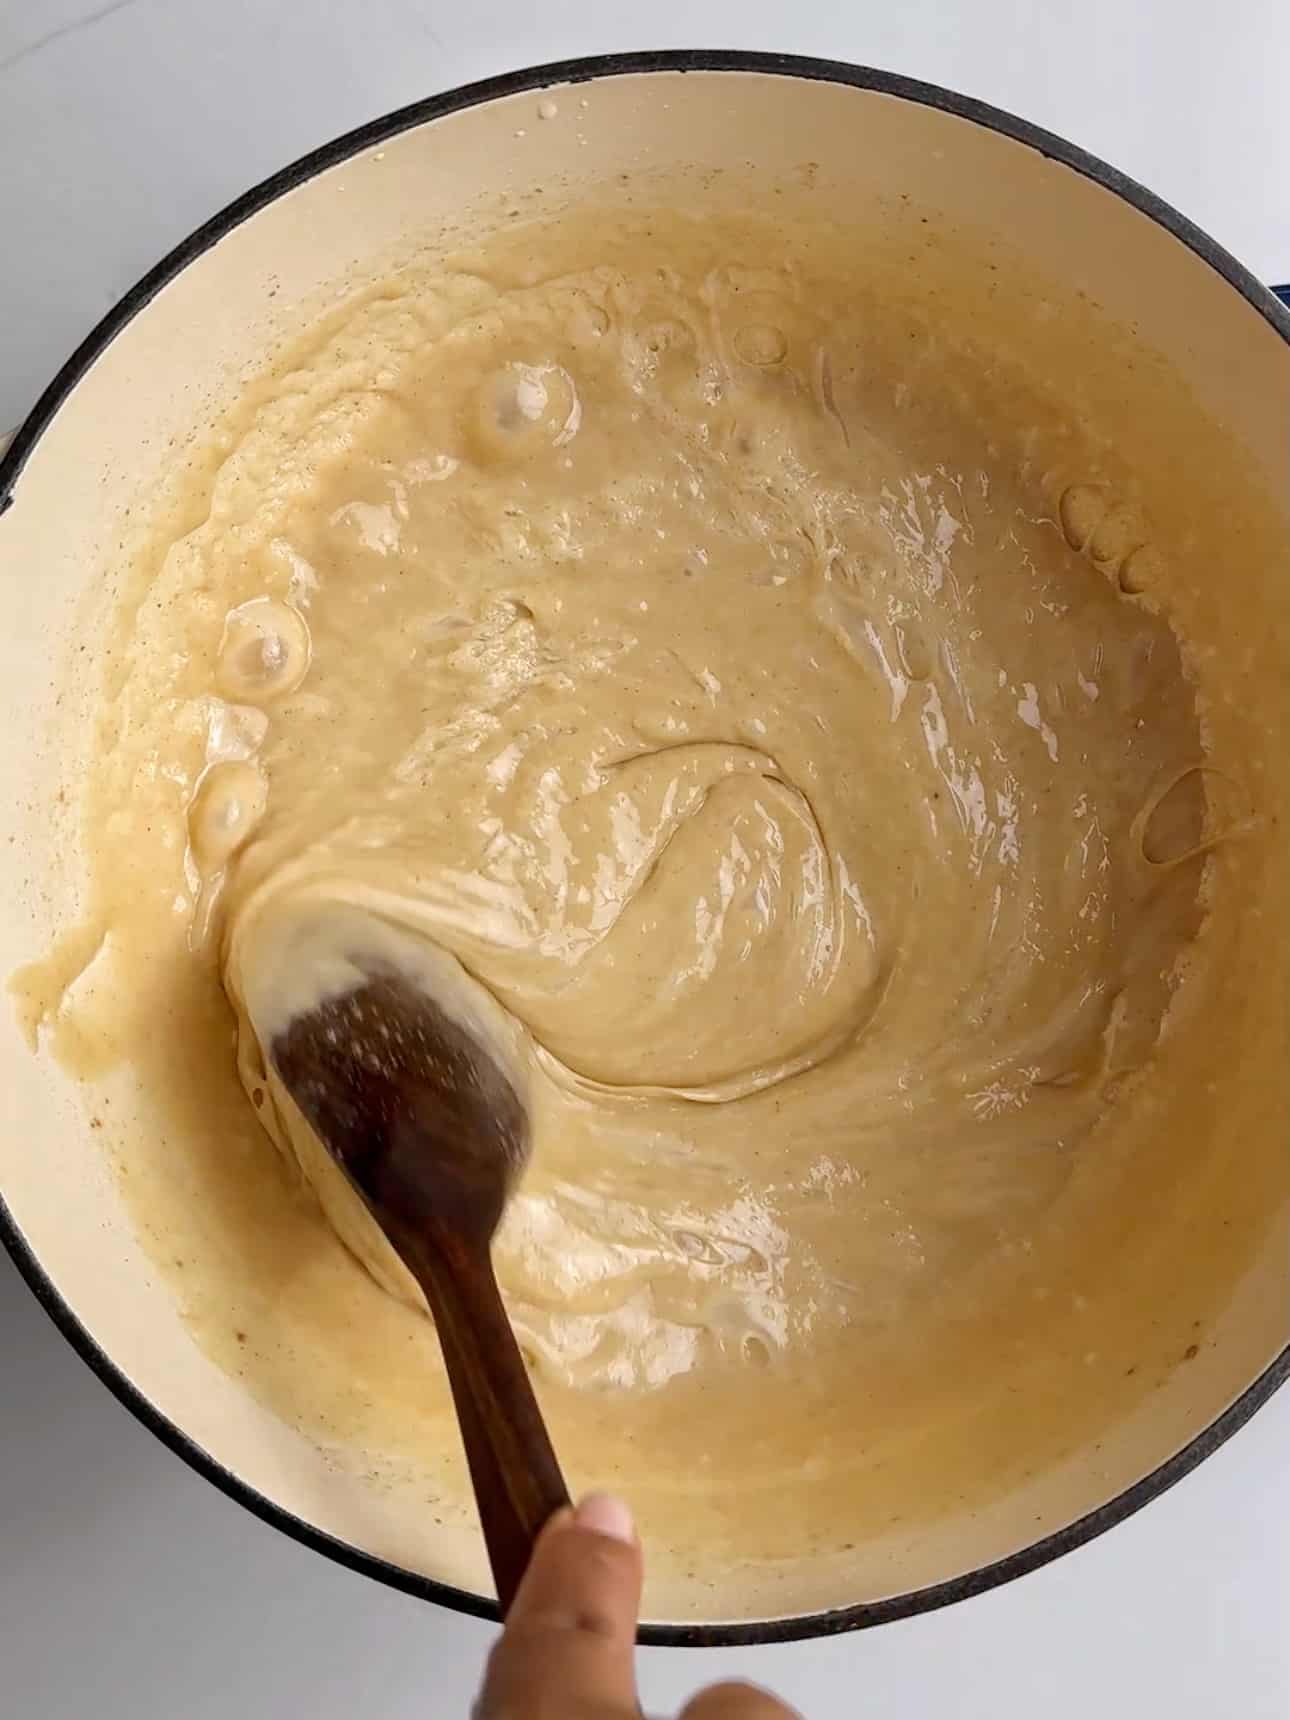
Let It Slowly Reduce
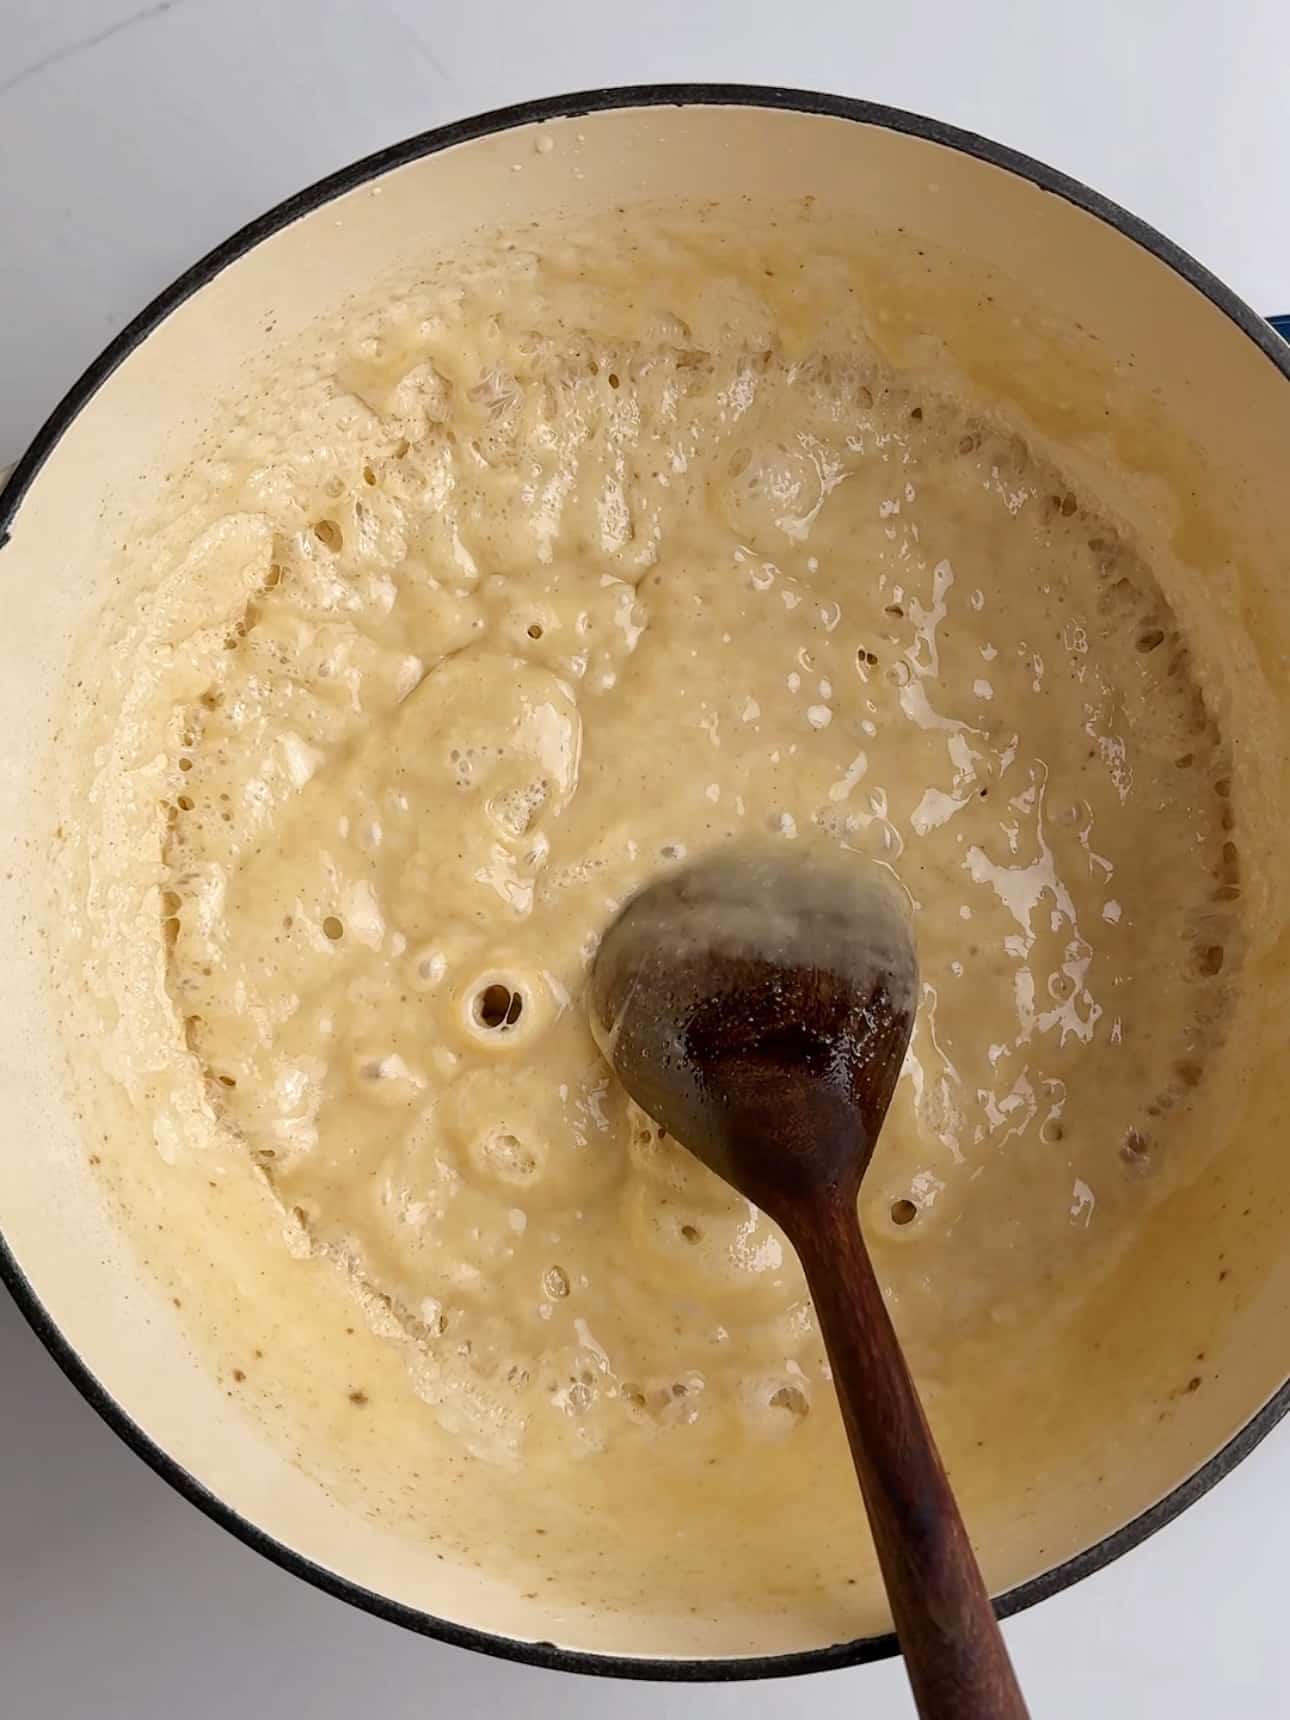
As the mixture simmers, I keep it moving with regular stirring so it doesn’t stick or burn. Over time, the milk reduces and thickens, and you’ll notice the texture starting to change. This part takes patience, but it’s what builds the flavor.
Watch for the Texture Change
After about an hour, the mixture becomes noticeably thicker and starts pulling away from the sides of the pot. At this stage, I lower the heat slightly and stay close, stirring more often to keep it smooth. It can catch quickly here, so this step needs a bit more attention.
How to Test if the Milk Peera/Pera is ready
I highly recommend keeping a candy thermometer or instant-read thermometer in your kitchen. My favorite is this one from Thermoworks. It’s a bit of an investment,but it’s incredibly reliable. Before I upgraded to the Thermopen, I used a much more affordable one that worked beautifully. I only made the switch because I travel often for events and needed something more durable.
If you don’t have a thermometer and this is your first time making peera, you can test the doneness by dropping a small amount of the mixture into a bowl of ice-cold water. If it forms a soft, pliable ball that holds its shape, it’s ready. Check out this video for a step-by-step guide on how to do the cold water test.
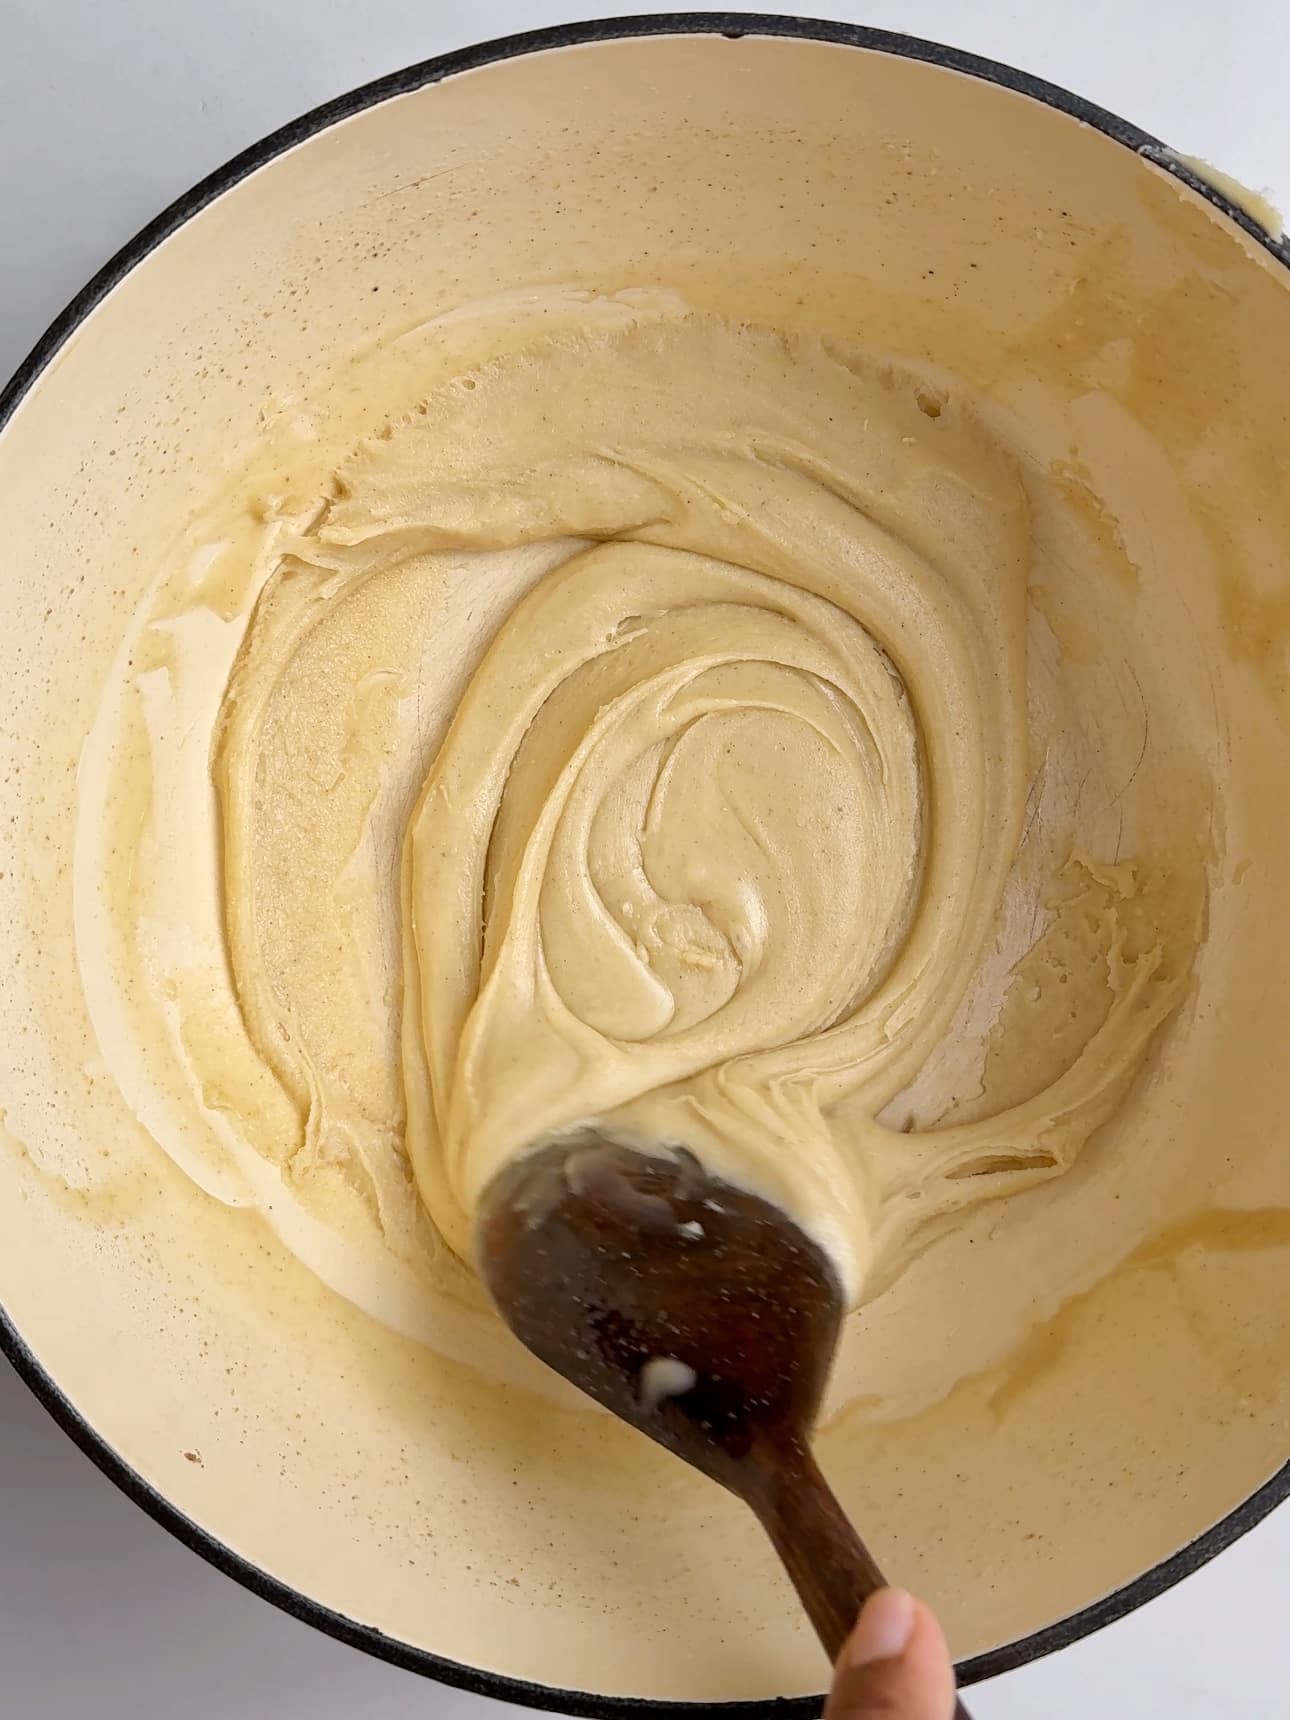
Add a pinch of salt and “Beat” the mixture.
Once the mixture reaches a soft, creamy consistency or soft-ball stage (237 °F) if you have a candy thermometer I remove from the heat then add in a pinch of salt. Then I continue to vigorously stir the mixture, off the heat until it thickens, some sugar crystals form and it no longer spreads when stirring.
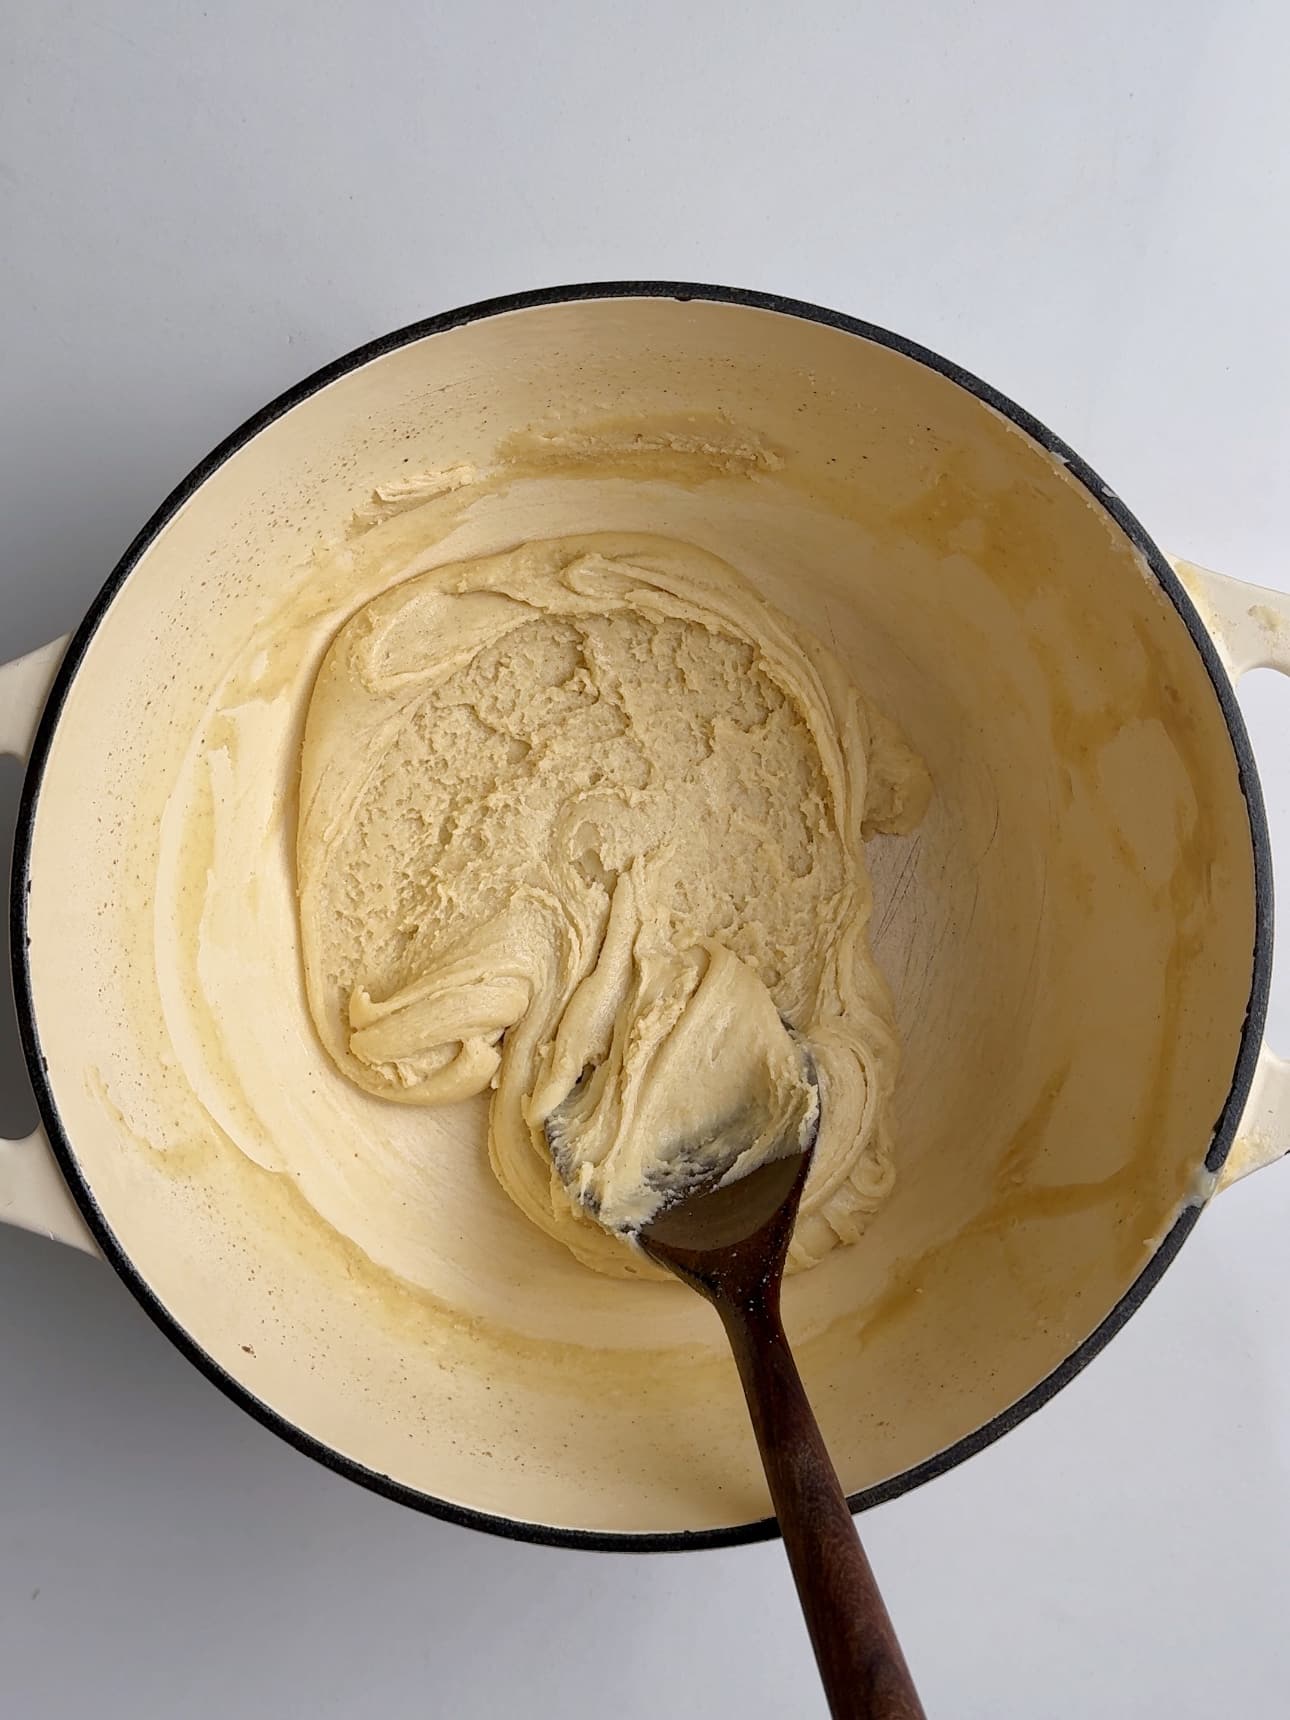
How to Shape Milk Peera
At this stage the peera will be cooled down and easy to work with. I separate the peera into 24 pieces. Then while it’s still warm, I lightly damn my hands a bit of water and shape the peera into small rounds. Working while it’s warm makes shaping much easier.

Then I gently press an indentation into the top with my index finger.

Let It Set
I place the shaped peera onto a greased surface or tray and let them cool completely. As they set, they firm up into that classic texture. Once cooled, they’re ready to enjoy.

Storage
Store peera in an airtight container at room temperature for up to two days. For longer storage, keep it in the fridge for up to one week. For the best texture, bring them to room temperature before serving.
Tips for the Milk Peera
- Keep the heat steady. I keep it at medium to low once the mixture starts to thicken so I have more control. If the heat is too high, it can burn quickly and affect both the flavor and texture.
- Stir more as it thickens. In the beginning, you can step away for a moment, but toward the end, I’m stirring almost constantly. This is when it’s most likely to stick, so staying close makes a big difference.
- Use a heavy-bottom pot. I’ve found this helps distribute the heat more evenly and prevents hot spots. It’s a small detail, but it really helps avoid scorching.
- Watch the texture, not the clock. Cook times can vary, so I focus more on how the mixture looks and feels. Once it starts pulling away from the pot and holds together, that’s when I know it’s ready.
- Shape while it’s still warm. If it cools too much, it becomes harder to work with. I usually grease my hands lightly or use a bit of water to make shaping smoother.
- Don’t rush it. When making milk peera, patience really pays off. Taking your time with the reduction is what gives it that rich flavor.
Frequently Asked Questions
Peera is made by reducing milk, which naturally takes time. The slow cooking process concentrates the milk and creates that thick, rich consistency.
The mixture should be thick and pull away from the sides of the pot. It should hold its shape when pressed together but still be soft enough to shape while warm.
Full fat milk is recommended for the best texture and flavor. Lower fat milk will not reduce in the same way and may result in a thinner consistency.
This version is made from scratch by reducing whole milk, while milk powder peera is a quicker method. The traditional version has a deeper, more developed flavor from the longer cooking process.
Guyanese Milk Peera

Equipment
- 1 Heavy Bottom Pot
- 1 Cookie Sheet Greased with ghee or butter
Ingredients
- 2 cups Heavy Whipping Cream (see notes)
- 2 Cups granulated sugar
- 1 tablespoon Ground Cardamom (elaichi)
- Pinch salt (optional)
- 1-2 tablespoons Cold Water
Instructions
- Add the milk, sugar and ground cardamom (elaichi) to a large heavy bottom pot. Mix until all of the sugar dissolves and the ground cardamom is fully combined.
- Then add the pot to medium heat and bring up to a boil. This should take about 10 minutes. Keep an eye on the mixture as it tends to climb up the sides of the pot and spill over during this step.
- Once the mixture comes up to a boil, reduce the heat to medium and continue to boil, stirring occasionally to prevent the mixture from sticking or burning. After about 10 minutes it should begin to thicken. Reduce the heat to medium-low and continue to cook.
- Cook until the mixture reaches 237 °F or soft ball stage (about another 5-8 minutes). See the section above for tips on how to test if the peera mixture is ready.
- Remove the mixture from the heat. Add in a pinch of salt (optional). Then using a wooden spoon, stir vigorously as it continues to cool and thicken (about 10 minutes). Alternatively, transfer it to a stand mixer fitted with a paddle attachment and mix for about 2 minutes, or until it thickens and you begin to see some sugar crystals forming.
- Next divide the mix into 24 equal portions. You can use a spoon to scoop equal amounts onto a plate.
- Then add a touch of cold water or on your palms. Roll each piece of peera between your hands to form a small ball, then place the ball on a greased cookie sheet.
- Next, use your index finger to gently press a small indentation into the peera. Allow the peera to cool completely before serving. It will harden as it cools.
Notes
Nutrition
The information listed in the recipe card is an estimate provided by an online nutrition tool. The tool evaluates ingredient names and amounts then makes calculations based on the number of servings listed for the recipe. It is provided as a general guideline and not as a precise calculation. For precise nutrition information please feel free to add the ingredients to your preferred nutrition calculator or consult a doctor or licensed nutritionist.
 Sardines and Crackers
 Guyanese Kitchri
 5 Must Try Guyanese Foods
 Best Guyanese Bake Recipes
Miss Marcia Persaud Says
Dear Althea,
I visit Guyana very regularly and am yet to find Guyanese cow’s milk in any supermarket in Georgetown. My cousins from De Kindren will bring me some fresh (unpasteurised) cow’s milk occasionally during my stay.
So, the moral to the story is that unless one is in the country areas, cow’s milk is an impossibility.
Just a thought.
Well done on your recipes, I am a slave to your recipes for my Guyanese cooking.
Kind regards,
Marcia
Althea Brown Says
Thanks for this. In the recipe, I share that I used heavy whipping cream to mimic the fat content of Guyanese cow’s milk. I know it is hard to find, but thought the origin of the recipe was important enough to mention it.