
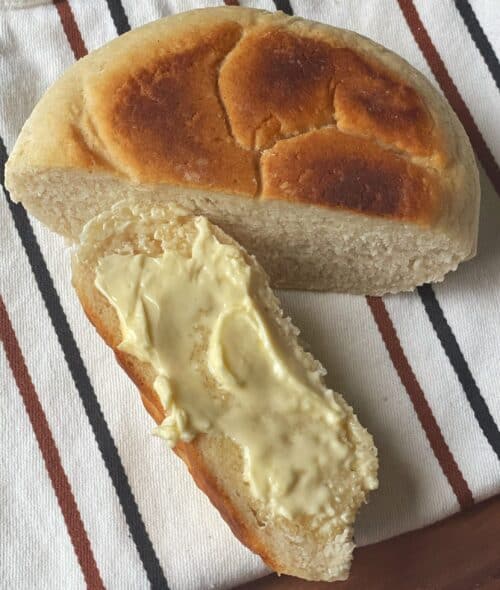
Gluten free pot bread, is a buttery, delicious, simple bread made in a dutch oven on the stovetop. It’s a convenient way to make gluten-free bread.
Gluten Free Pot Bread
Pot bread is one of my childhood favorites. I remember my dad making it in an old cast iron pressure cooker on top of a kerosene oil stove. It was a slow and long process to cook this bread just right, but one worth the taste of hot pot bread and golden cream margarine.
I have a non-celiac gluten sensitivity. Eating gluten makes me sick. So I avoid it at all costs. But I miss some of my favorite gluten filled things, like homemade stovetop breaf. Luckily I am relentless in my pursuit to create gluten free recipes of my favorite Guyanese dishes. Don’t have a gluten sensitivity, then try the traditional pot bread recipe.
- Gluten Free Pot Bread
- Why You’ll Love This Gluten Free Pot Bread Recipe
- Ingredients for Gluten Free Pot Bread
- How to Make Gluten Free Pot Bread
- Dough Perfection
- Best Heat Setting for the bread
- Best Pot for this Gluten Free Pot Bread Recipe
- Storage
- Tips for the Best Gluten Free Pot Bread
- Frequently Asked Questions
- Gluten Free Pot Bread
Why You’ll Love This Gluten Free Pot Bread Recipe
- Easy to Make: There’s no reason to be intimidated. Although this recipe takes a few hours to make, most of that time is hands-off, when the dough is either resting or cooking on the stovetop.
- Great Alternative to Baked Bread: Don’t have an oven? Or don’t want to heat up the entire kitchen? Making gluten free bread on the stove is a convenient alternative.
- Perfect Crumb and Texture: If you’ve baked gluten free breads before you know getting the right crumb texture is always a struggle. However, I was blown away by how much this bread texture resembled and tasted like regular bread. It was soft, light and a little crumbly; not dense and mealy like other gluten free flours that I’ve used in the past. This recipe made me happy beyond words and I hope you try this gluten free pot bread soon.
Ingredients for Gluten Free Pot Bread
All you need is gluten free flour and a few pantry staples.
- Caputo Gluten Free Flour: This is the flour I used to create magic in a cast iron dutch oven on my stove top. I haven’t tried this recipe with any other flour. I learned about Caputo Gluten Free Flour from Jenny over at Good for You Gluten Free. A blog I enjoy for all of its insights into living a gluten free life. Check out Jenny’s post on Caputo Gluten Free flour here. From her post I learned that this flour blend although 100% gluten free has wheat starch. The gluten is separated from the wheat starch making this flour blend gluten free. In her post she made pizza dough that looked amazing and of course gave me all sorts of ideas of Guyanese goodies I could make with this. So I had to try it for myself. Please note that if you have a wheat sensitivity this flour is not for you.
- Dry active yeast: Rehydrated and activated the yeast before incorporating it into the dough. When properly bloomed, it helps the dough to rise.
- Warm water: Ensure it is about 110°F. If it’s too hot, it will kill the yeast.
- Brown sugar: This activates the yeast.
- Butter: This adds moisture and contributes a rich and creamy flavor to the dough.
- Oil: Use avocado oil or olive oil to add moisture to the gluten free dough.
- Pinch of salt: Added for flavor.
See recipe card for quantities.
How to Make Gluten Free Pot Bread
Bloom Yeast
Combine warm water and sugar in a measuring cup or small bowl and mix together well until the sugar dissolves. Then add the dry active yeast, mix together and set aside (allowing the yeast to bloom)
Form & Knead Dough
While the yeast is blooming combine the Caputo gluten free flour and salt together in a mixing bowl and mix together well, then rub the butter into the flour and salt mixture. Next, make a well in the center of the ingredients and add the bloomed yeast mixture. Mix together well using a spoon or rubber spatula then turn onto a floured surface and knead into a smooth ball.
Rest Gluten Free Pot Bread Dough
Grease a medium sized bowl with about 1/2 tablespoon of oil, then add the dough ball to the bowl. Pour the remaining oil over the dough ensuring the top is completely covered with oil, to prevent crusting then cover with a kitchen towel or plastic wrap and allow the dough to rest for 1 1/2 hours.
Cook Pot Bread on the Stovetop
Preheat your dutch oven on medium heat and bring up to temperature. Then add a light dusting of flour. Next, knead the dough back into a small ball and add to the dutch oven or pot.
Cover and cook for 5 minutes then reduce the heat to the lowest possible heat and cook for 40 minutes. Then flip the bread, increase the heat to medium, cook on medium for 5 minutes then reduce the heat to the lowest possible heat and cook for 40 additional minutes.
Finally, remove the loaf from the dutch oven or pot, rub butter over the top, cover it with a kitchen towel, and let it rest for 5 minutes. Then cut your bread into slices and enjoy with butter.
Dough Perfection

For the first time since I’ve been experimenting with gluten free flour, my dough was workable and stretchy. Stretchy! It was stretchy! I kneaded it to make it smooth and it performed very similar to real deal all purpose flour. I was truly impressed at how easy everything came together.

Best Heat Setting for the bread

I cooked my gluten free pot bread low and slow, but to give the gluten free dough a bit more color, I started off by bringing my cast iron dutch oven up to temperature on medium heat. Then I added the dough, cooked for 5 minutes then reduced the heat to the lowest possible setting and cooked on each side for 40 minutes. If you like your bread with a bit more crust you may increase the heat to medium when you flip the bread and cook for 5 minutes, then reduce the heat and continue to cook for the remaining cooking time.
Best Pot for this Gluten Free Pot Bread Recipe
I highly recommend a cast iron dutch oven or similar pot for this recipe. A thick pot with a tight seal is needed to mimic an oven and allow the bread to cook evenly. Here are a few of my favorite cast iron Dutch ovens linked in my Amazon affiliate shop.
- Amazon Basics Cast Iron dutch oven: A good sturdy pot at a reasonable price.
- Bruntmor Preseasoned Cast Iron: This is perfect when you decide to make bread outside on a fire pit or your grill.
- Le Creuset Dutch Oven: This high end beauty is a great investment. I’ve had mine for 10 years and it still looks brand new.
Storage
Once it is completely cooled, store leftover bread in an airtight container or ziplock bag at room temperature for up to 3 days. For longer storage, refrigerate the bread for about one week. However, the bread will dry out faster.
Tips for the Best Gluten Free Pot Bread
- At first, the dough may seem pasty and sticky. However, with a little dusting of flour it was easy to work with.
- Let the dough rest for an hour and a half. This resting time allows the flour to fully hydrate and can result in a better texture and rise.
- Gluten-free flour tends to absorb more moisture than wheat flour, so be sure to add enough liquid to hydrate the dough properly. The dough should be sticky but not overly wet. Adjust the liquid as needed.
- Allow gluten free pot bread to rest for at least 5 minutes before slicing it. This helps prevent it from becoming gummy.
Frequently Asked Questions
The key to making good gluten-free pot bread is patience. The dough needs time to rest and the bread cooks low and slow so don’t try to speed up the process.
Dry active yeast is crucial when preparing gluten free pot bread. Without it, the bread won’t rise properly or have the right consistency.

Gluten Free Pot Bread
Equipment
- Dutch Oven
Ingredients
- 2 cups of Caputo Gluten Free Flour plus extra for dusting surfaces
- 1 teaspoon of dry active yeast
- 3/4 cup of warm water about 110 °F
- 2 tablespoons of brown sugar
- 1 tablespoon of butter
- 1 tablespoon of oil like avocado or olive oil
- Pinch of salt
Instructions
- Combine warm water and sugar in a measuring cup or small bowl and mix together well until the sugar dissolves
- Then add the dry active yeast, mix together and set aside (allowing the yeast to bloom).
- While the yeast is blooming combine the Caputo flour and salt together in a mixing bowl and mix well, then rub the butter into the flour and salt mixture.
- Next, make a well in the center of the ingredients and add the bloomed yeast mixture.
- Mix together well using a spoon or rubber spatula then turn onto a floured surface and knead into a smooth ball.
- If the mixture is too sticky to work with, a dusting of flour over top of the mixture should make it less sticky
- Grease a medium sized bowl with about 1/2 tablespoon of oil, then add the dough ball to the bowl.
- Pour the remaining oil over the dough ensuring the top is completely covered with oil, to prevent crusting then cover with a kitchen towel or plastic wrap and allow the dough to rest from 1 1/2 hours.
- Preheat your dutch oven on medium heat and bring up to temperature. Then add a light dusting of flour.
- Next knead the dough back into a small ball and add to the dutch oven or pot.
- Cover and cook for 5 minutes then reduce the heat to the lowest possible heat and cook for 40 minutes.
- Then flip the pot bread, increase the heat to medium, cook on medium for 5 minutes then reduce the heat to the lowest possible heat and cook for 40 additional minutes.
- Finally, remove your pot bread from the dutch oven or pot, rub butter over the top, cover with a kitchen towel and let it rest for 5 minutes.
- Then cut your gluten free pot bread into slices and enjoy with butter.
Nutrition
The information listed in the recipe card is an estimate provided by an online nutrition tool. The tool evaluates ingredient names and amounts then makes calculations based on the number of servings listed for the recipe. It is provided as a general guideline and not as a precise calculation. For precise nutrition information please feel free to add the ingredients to your preferred nutrition calculator or consult a doctor or licensed nutritionist.
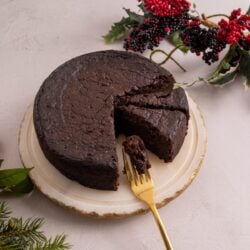 Non-alcoholic Guyanese Black Cake
 Pumpkin Flan
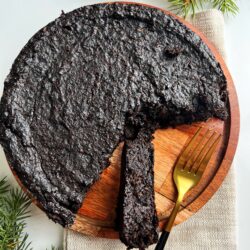 Almond Flour Black Cake
 Gluten Free Hot Cross Buns
Leave a Rating and a Comment