

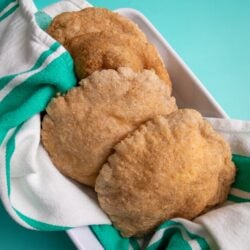
Gluten free Guyanese bakes have all the flavor and texture of traditional fried bakes or floats without the tummy ache from the gluten. Enjoy this doughy treat as a gluten free snack or breakfast side.
Gluten Free Guyanese Bakes
If you’ve been following me for a while, you know that I have a non celiac gluten sensitivity. This means that although I am not allergic to gluten, I don’t feel great when I have too much of it. Since being diagnosed with this sensitivity in 2015 I’ve experimented with many combinations of flour trying to recreate my beloved Caribbean foods with a viable gluten free alternative.
I recently shared my gluten free, grain free roti recipe after years of perfecting it! Now I am sharing my gluten free bake recipe and if you can’t have gluten (like me) I hope you give it a try.
- Gluten Free Guyanese Bakes
- Why You’ll Love This Gluten Free Guyanese Bake Recipe
- Ingredients for Gluten Free Guyanese Bakes
- How to Make Gluten Free Guyanese Bakes with Psyllium Gel
- Shaping the bakes
- Rough edges versus smooth edges
- Texture and Taste of the Gluten Free Bakes
- Storage
- Tips for the Best Gluten Free Guyanese Bakes
- Recipe Variations
- Frequently Asked Questions
- Gluten Free Guyanese Bakes
Why You’ll Love This Gluten Free Guyanese Bake Recipe
- Fun Family Activity: I used a hand pie cutter and made mini bakes, that my little people quite enjoy. This is also a great way to get your children involved. I measure, pour, and fry but let them mix the dough and cut it into different shapes.
- Just As Good As Traditional Guyanese Bakes: These gluten free bakes taste exactly like regular bakes. In a blind taste test (I fed it to my family without telling them it was gluten free) my family could not tell that it was gluten free.
- Easy to Make: Even with gluten free substitutes, this recipe is incredibly easy to follow and ready in less than 1 hour.
Ingredients for Gluten Free Guyanese Bakes
I’ve tested this recipe repeatedly and the ingredients listed below result in the best gluten free Guyanese bakes.

- Warm water: Use warmer water so the brown sugar dissolves easily.
- Brown sugar: This won’t make the bread super sweet but it enhances the overall flavor.
- Psyllium Husk: Whole psyllium husk acts as a binder for the gluten free flour and makes it workable.
- Gluten Free Flour: I’ve tried many combinations of gluten free flour, even grain free and the best flour for this recipe is the Bob’s Redmill 1 to 1 baking flour or All Purpose Gluten Free Flour by Gluten Free Jules. This flour is available for purchase online through Amazon (click here to shop) and also directly from the Gluten Free Jules website, which ships to the US and Canada (click here to shop). Get this flour. It will change your gluten free baking life! Now I know it is a bit pricey but it comes in different sizes and it is so worth it. I save it for special things like this gluten free Guyanese bake!
- Baking powder: This provides that light, airy texture you expect and helps the bake to puff up.
- Salt: Add to taste.
- Melted coconut oil: can sub for melted butter
- Large egg (optional): Using eggs makes the gluten free bakes light and fluffy, just like traditional bakes.
- Apple cider vinegar (only if using eggs): Don’t skip this ingredient because helps to take away the overly eggy taste that comes from the addition of the egg to this recipe.
- Oil: Use any oil that is suitable for frying. Avocado or light tasting olive oil works great.
See recipe card for quantities.
How to Make Gluten Free Guyanese Bakes with Psyllium Gel
I recently started using psyllium gel in my gluten free breads and it works really well in this recipe. You can learn more about psyllium gel from The loopy whisk who is also an excellent source for gluten free baking!
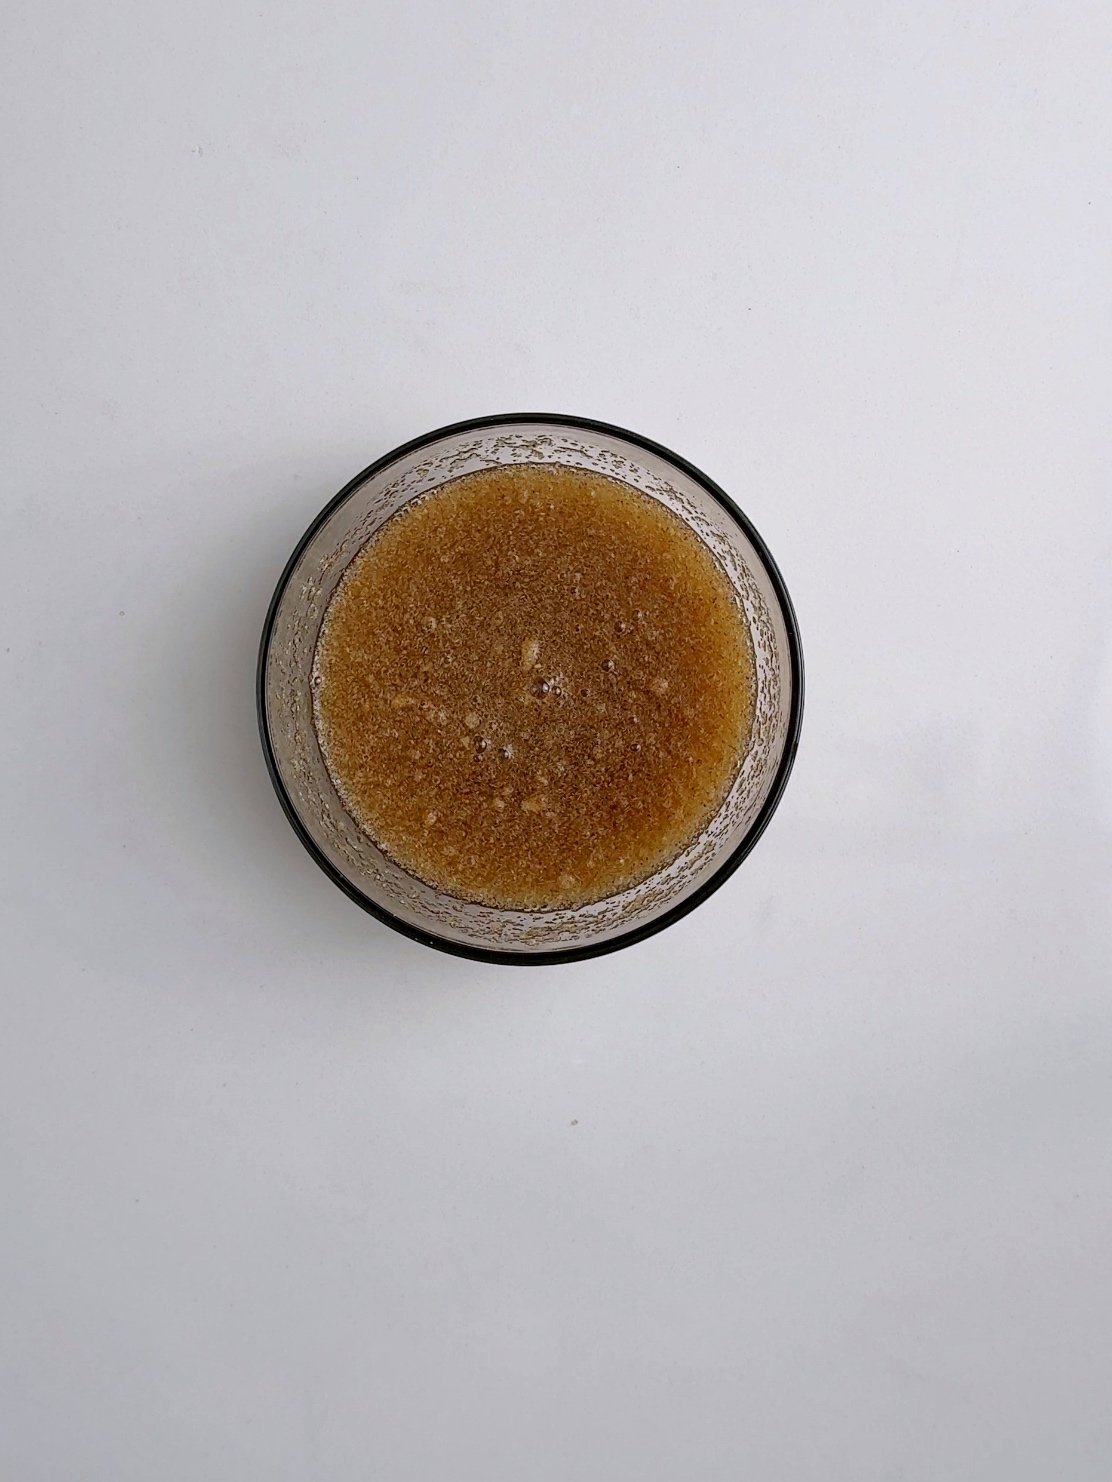
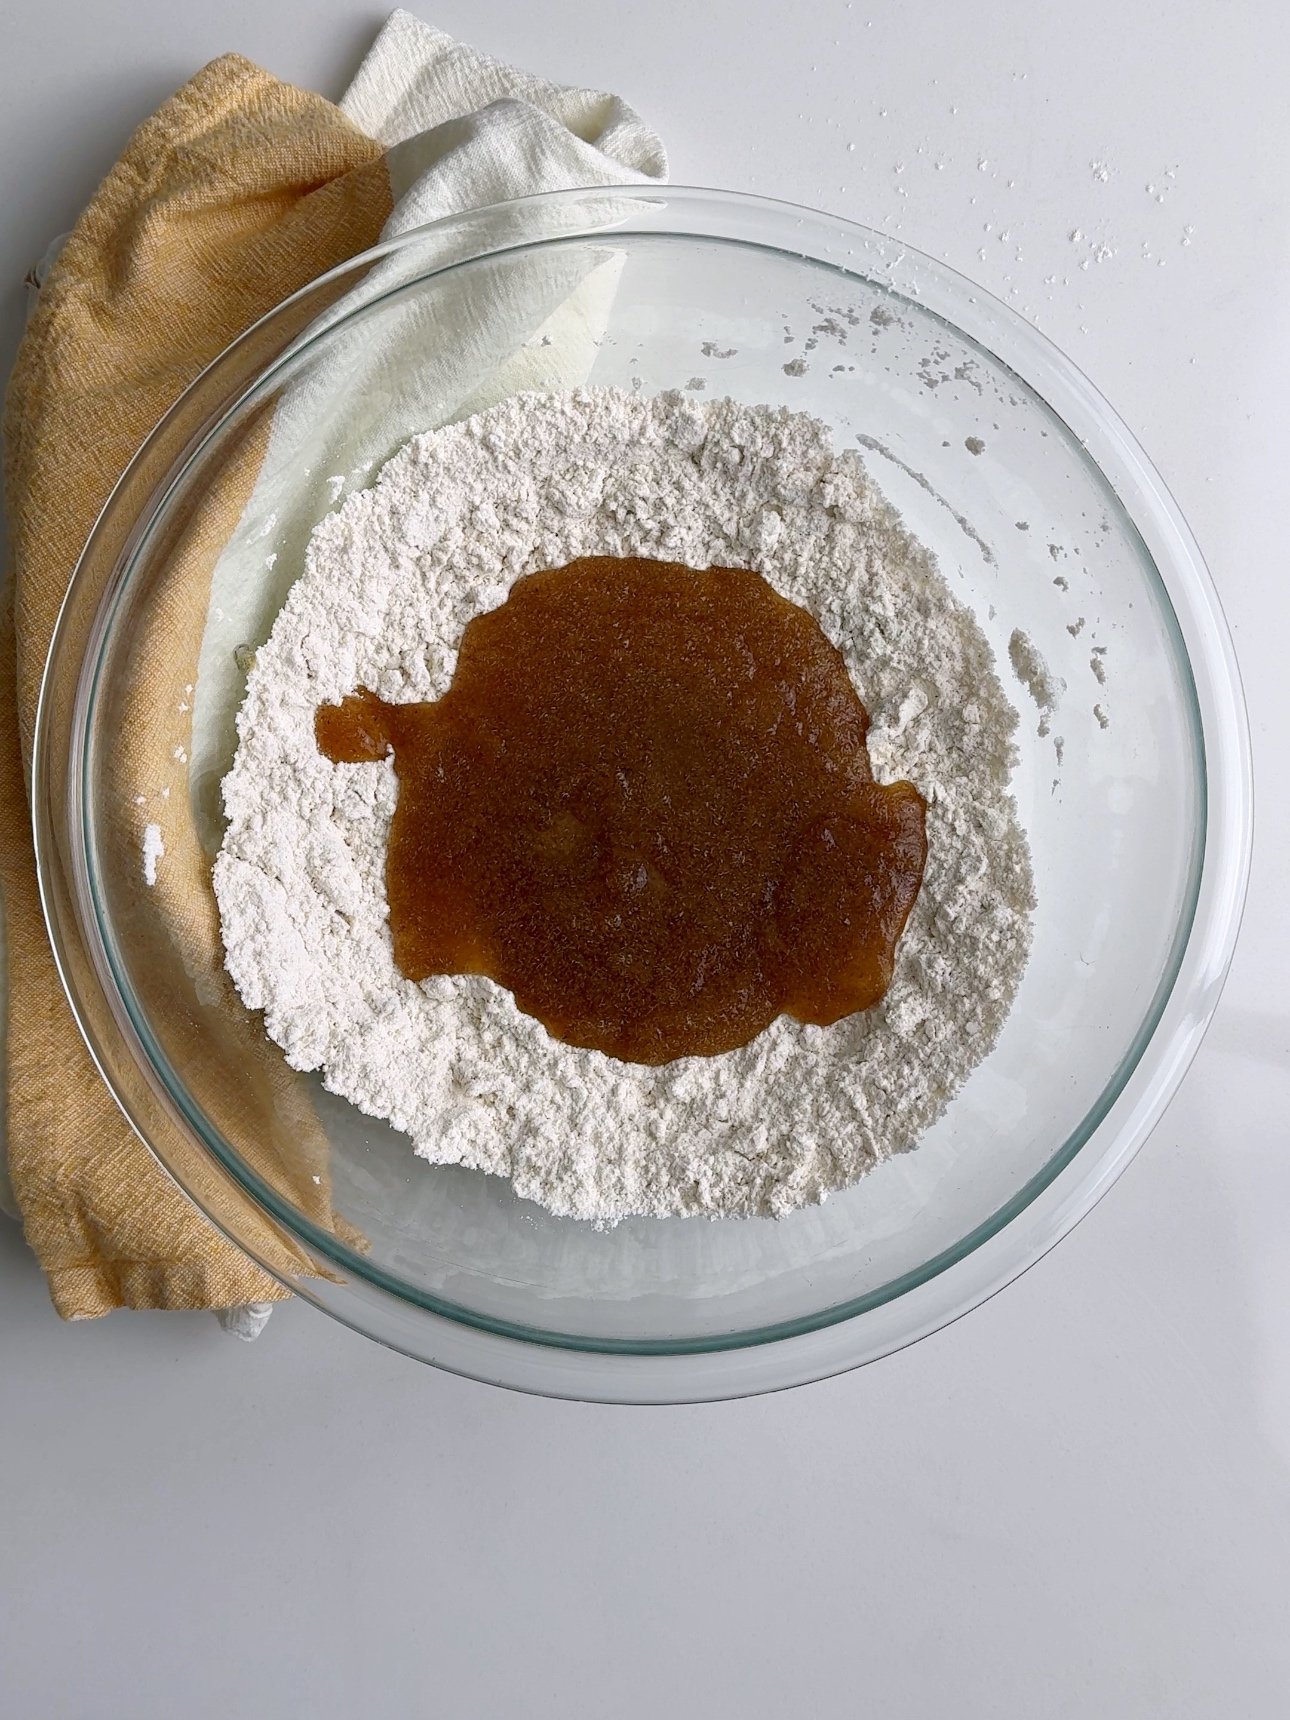
To make the psyllium gel I dissolve the brown sugar in the warm water first, then add the psyllium husk. I let the mixture rest for about 5 minutes, until it gets gel like then add it to the dry ingredients.
Make the bakes with Gluten Free Jules All Purpose Flour

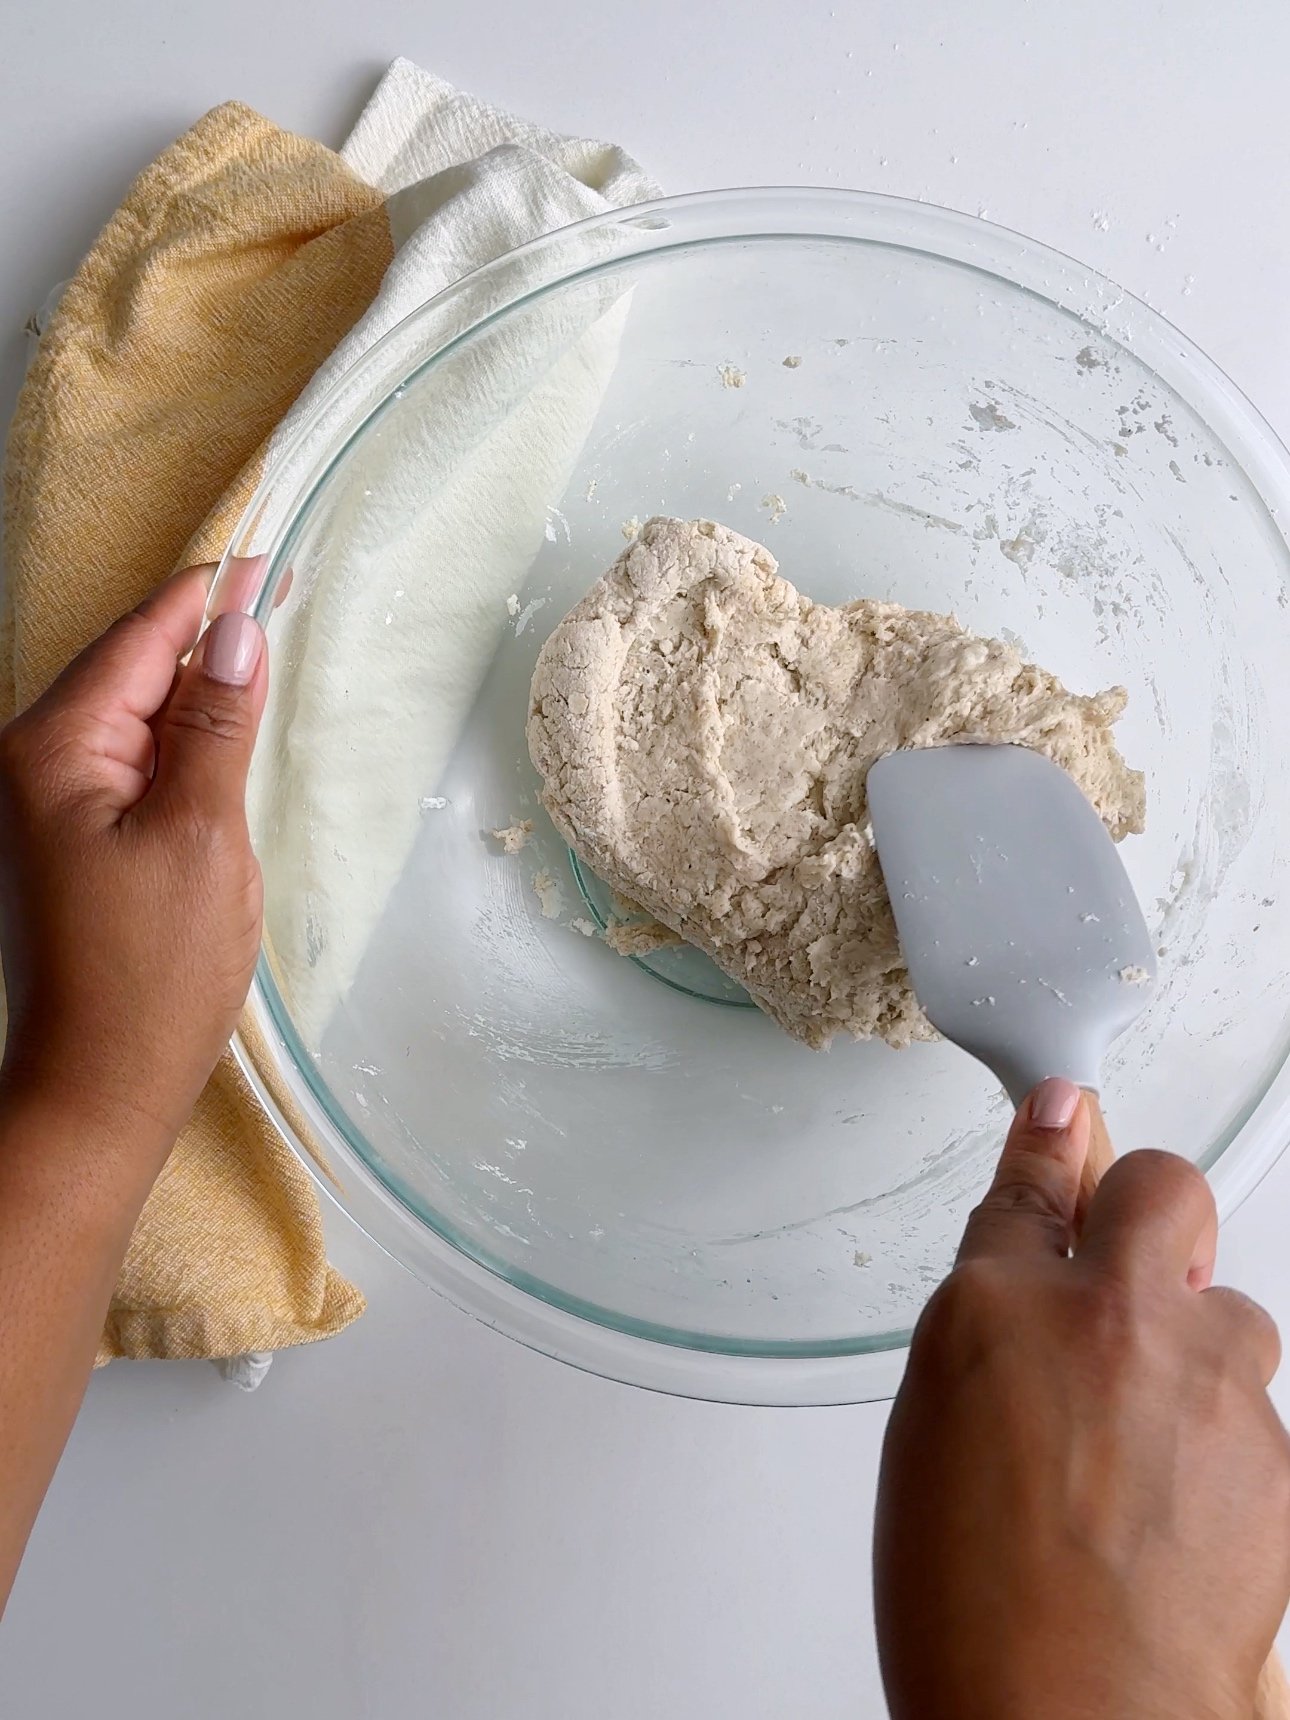
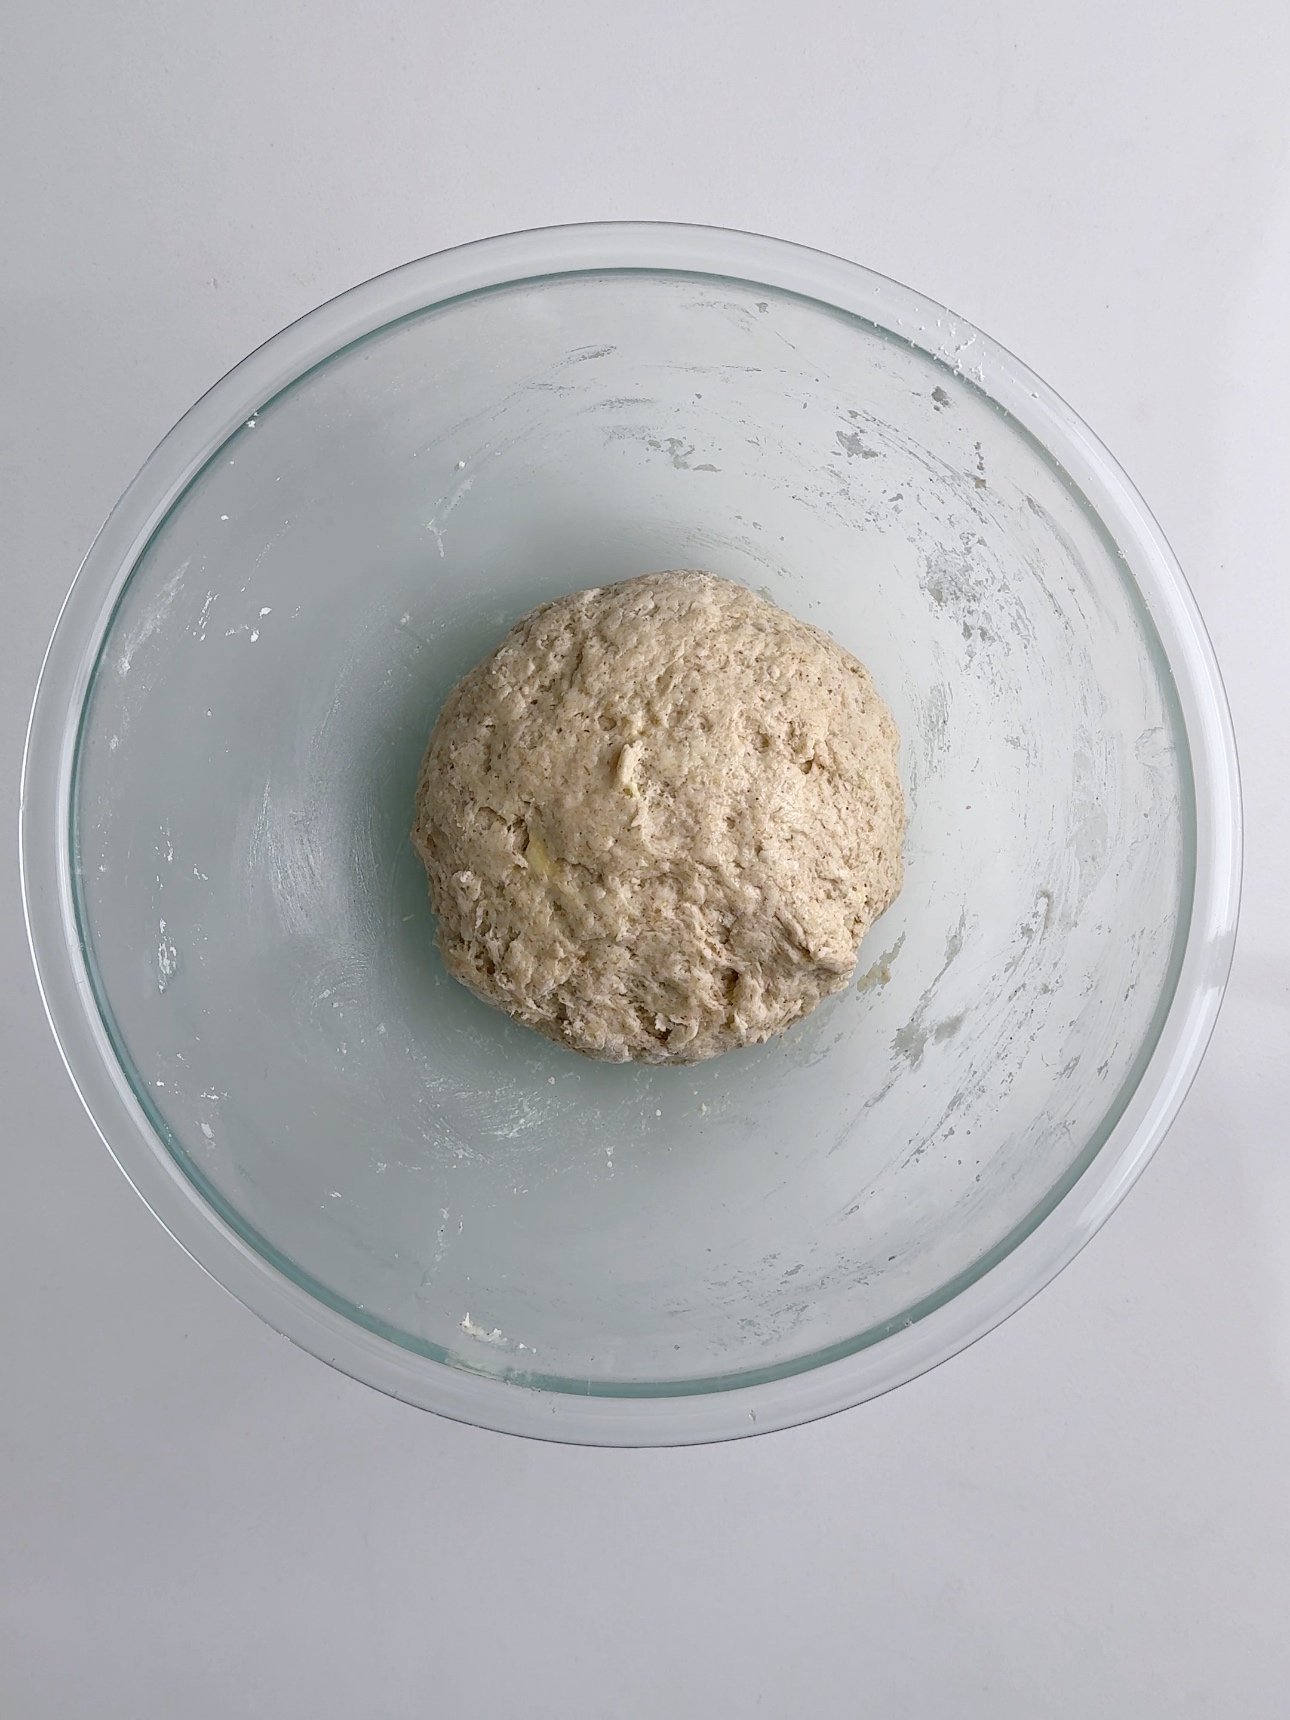
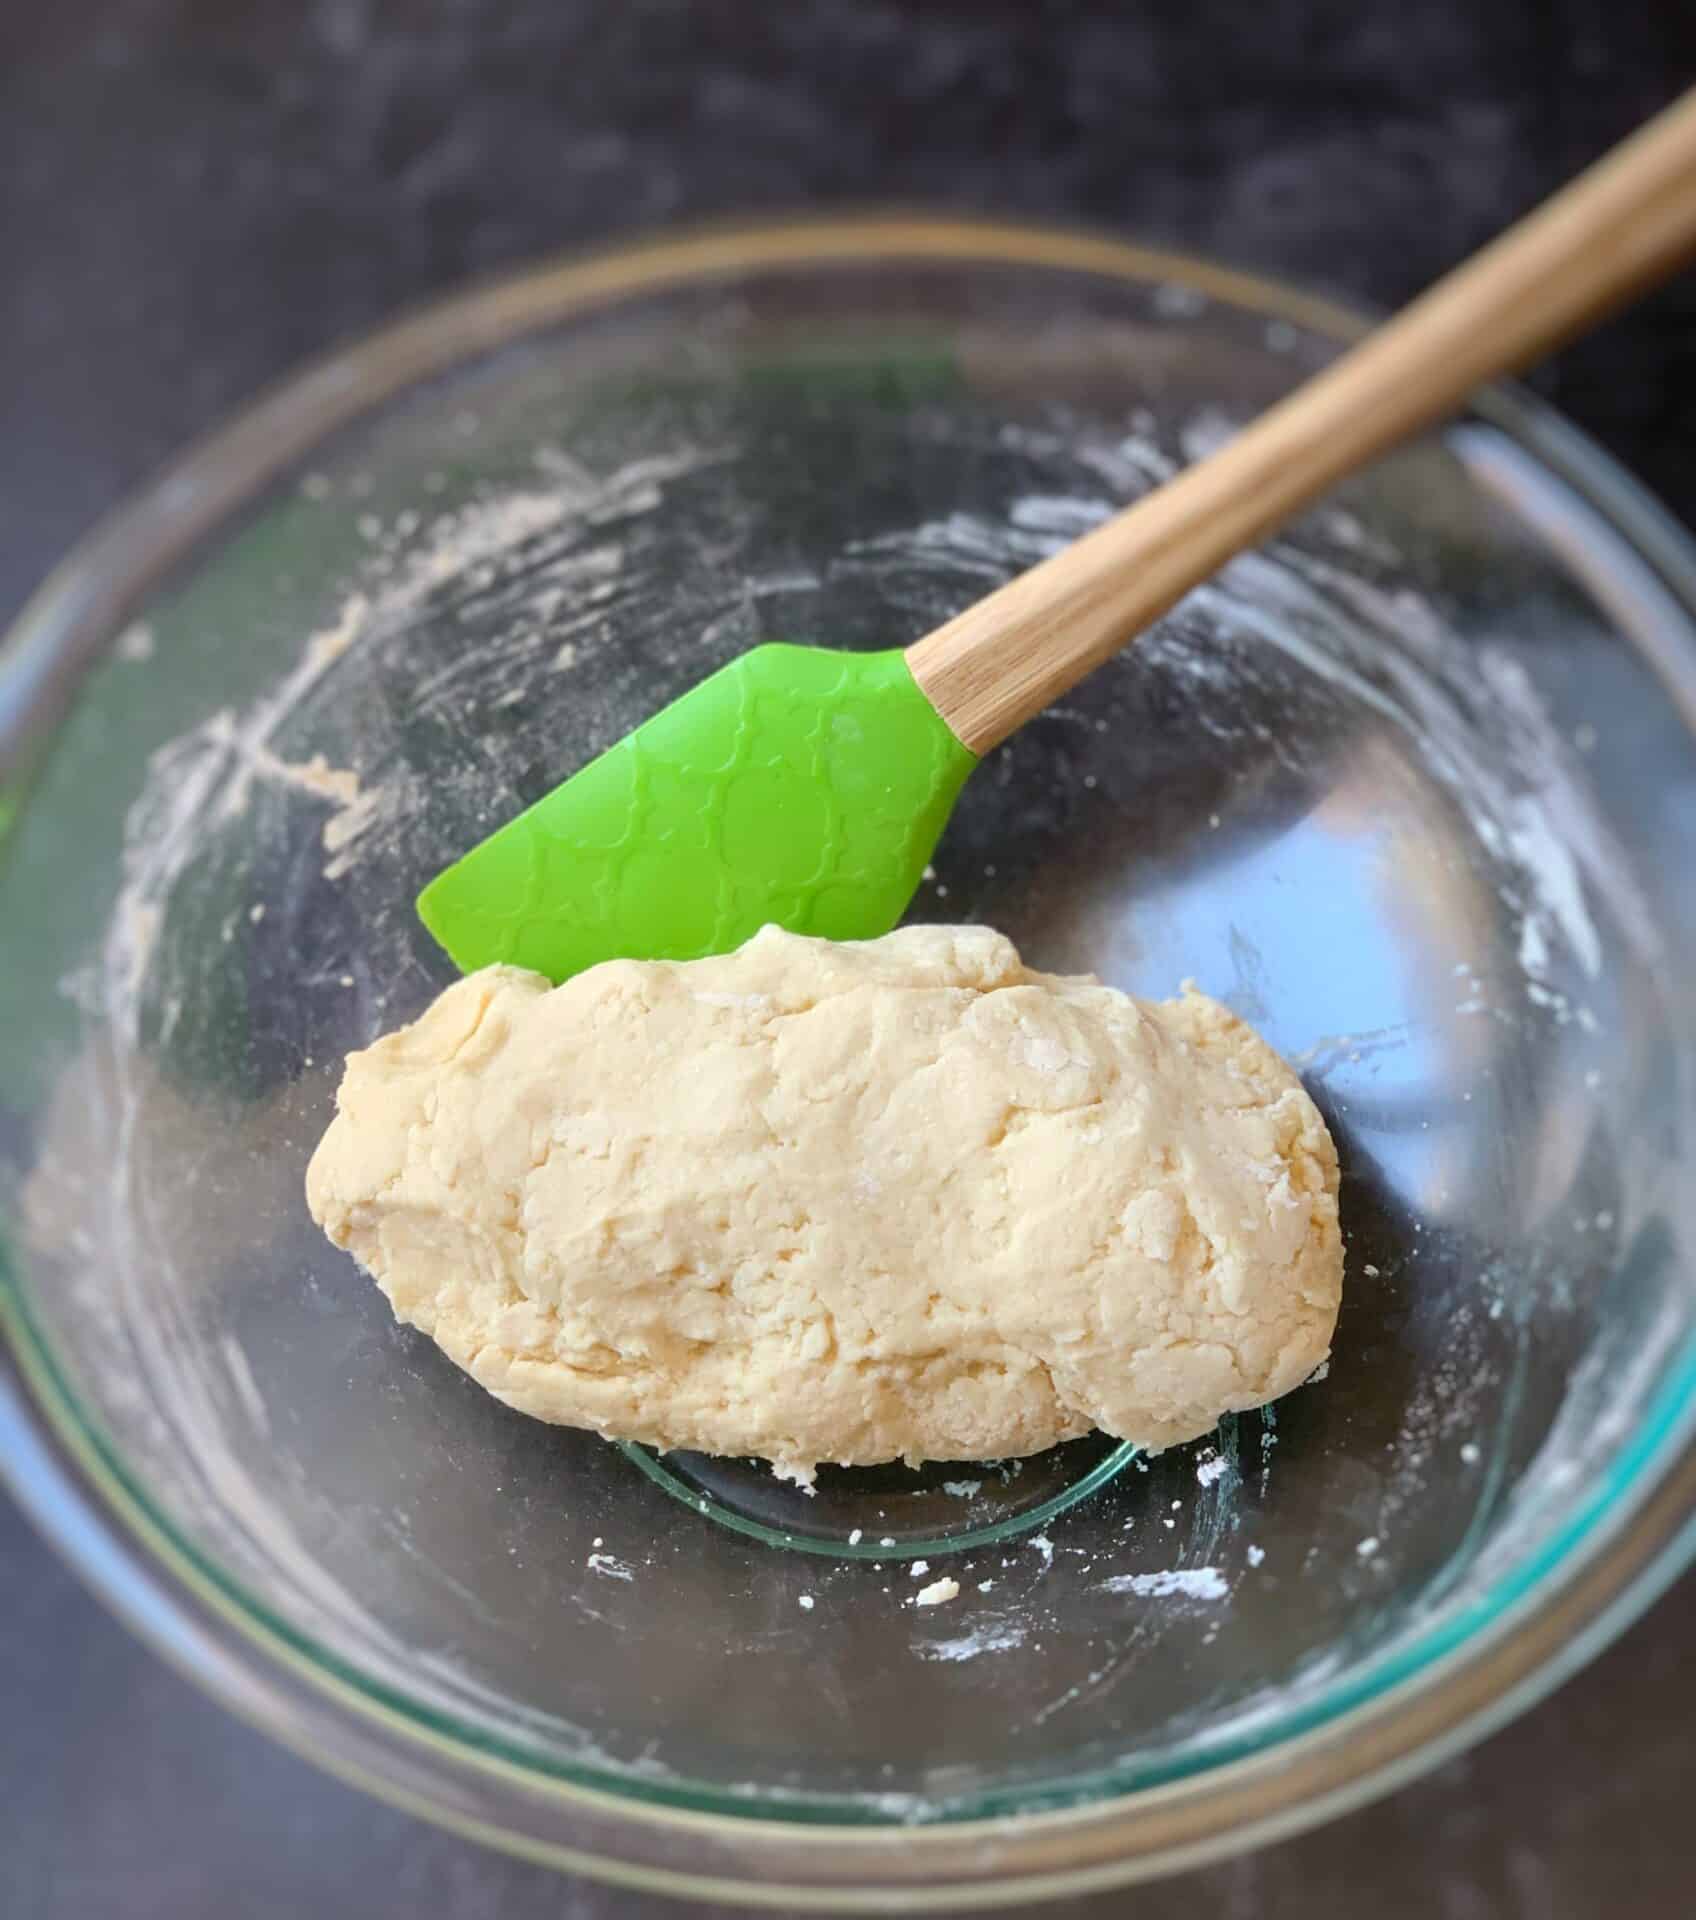
Making the dough is very easy. I used my rubber spatula method. Have you seen it? It was featured in my easy roti video tutorial and has been a hit ever since. This gluten-free all-purpose flour has a rich color and the dough is very pliable. It feels really soft and smooth and not grainy like the other measure for measure gluten free flours.
After mixing the dough, allow it to rest.
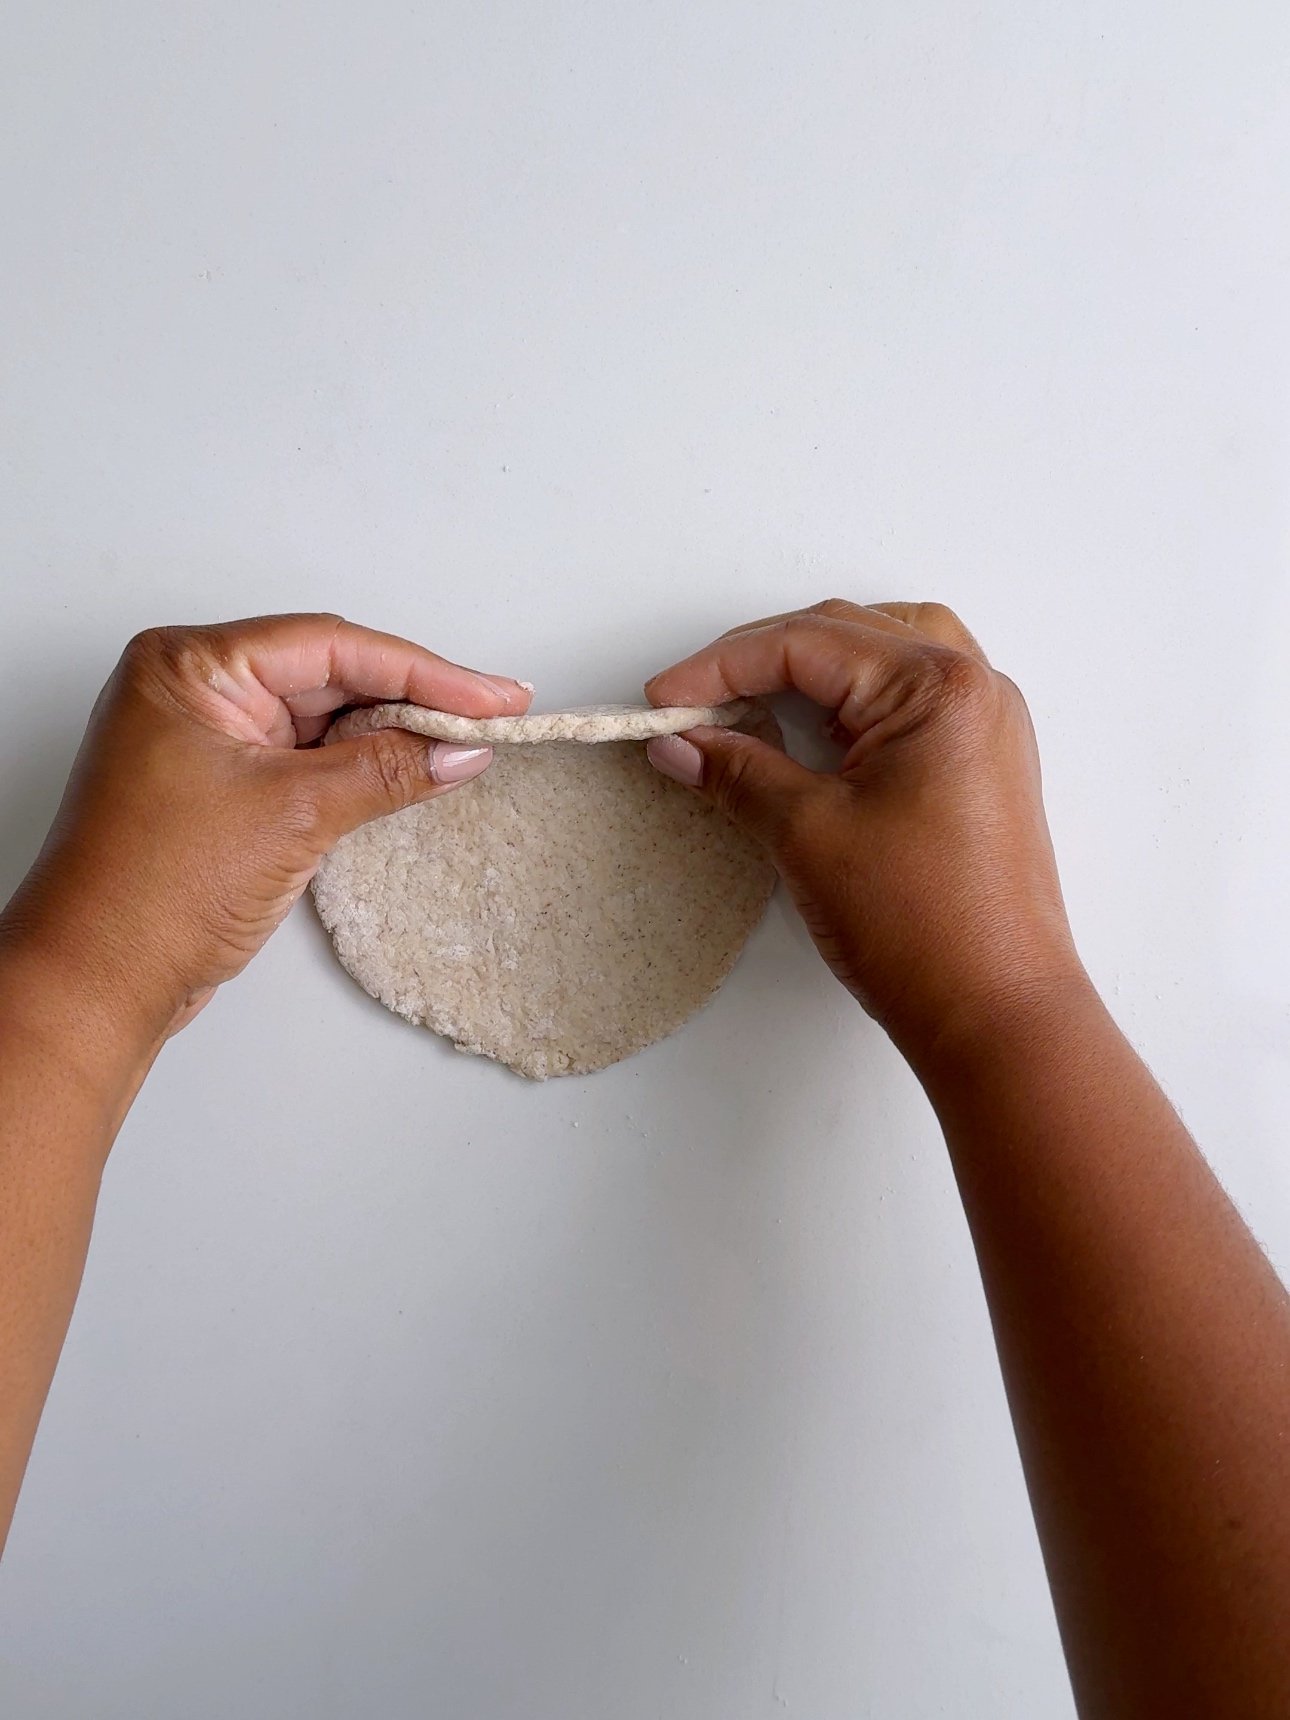
Shaping the bakes
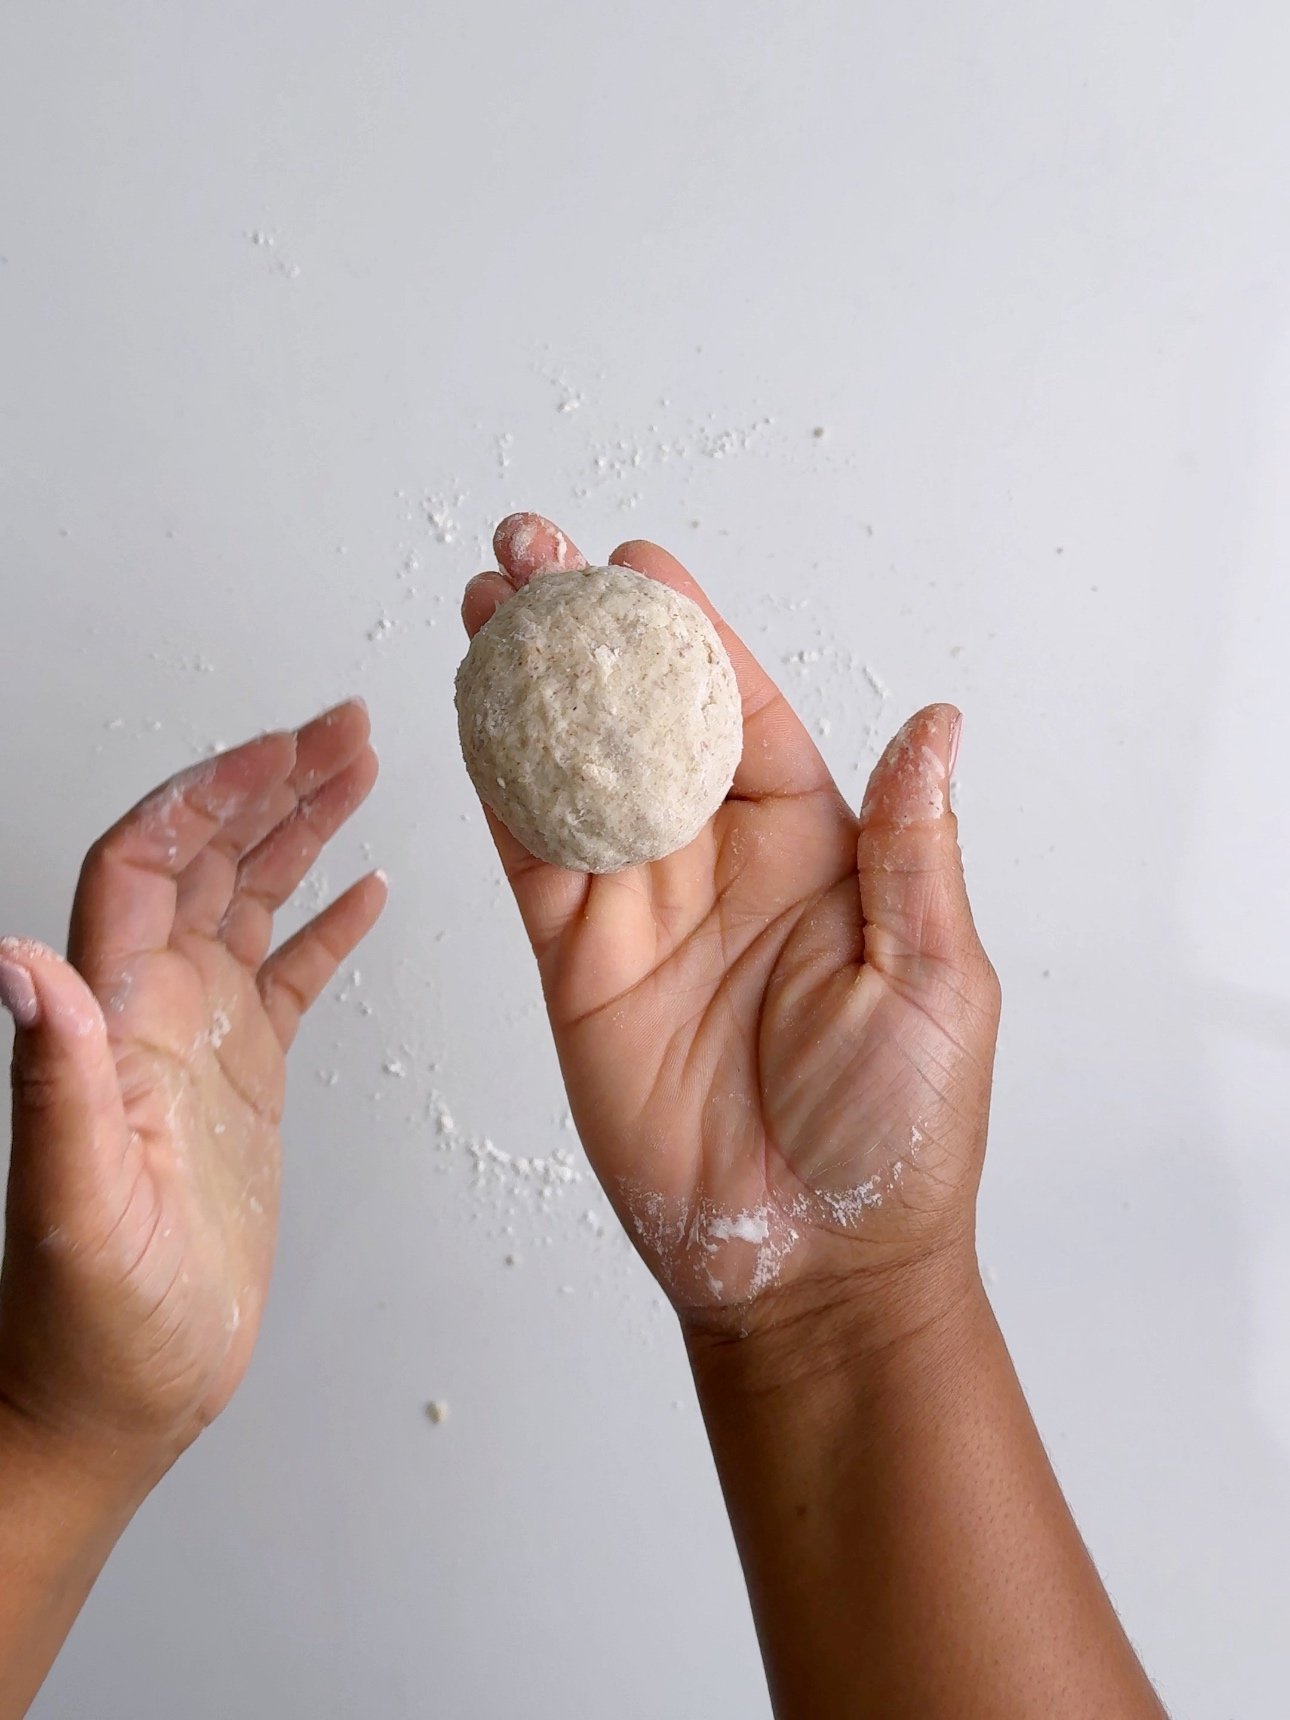
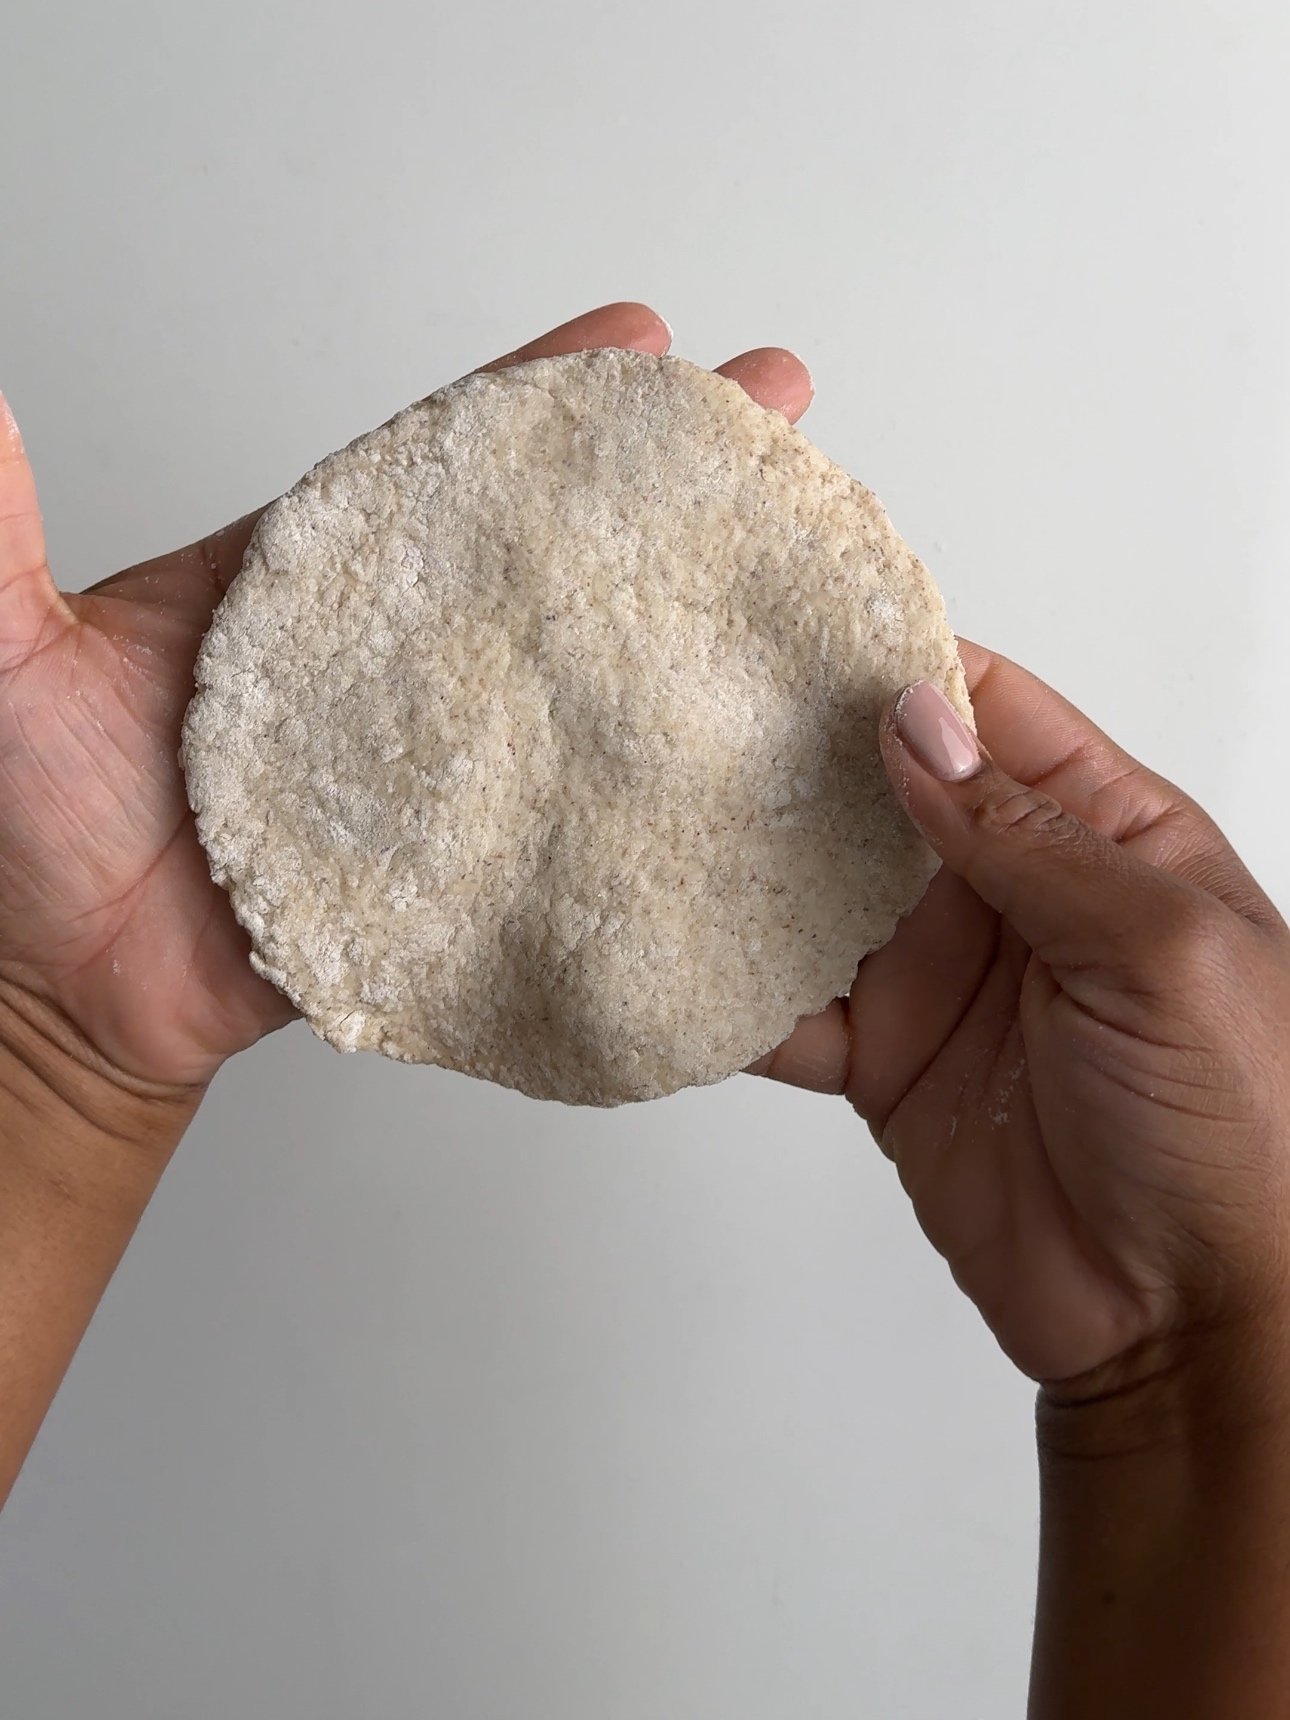
To shape the bakes simply pinch off a palm sized piece of dough and roll into between floured palms into a somewhat smooth ball. Then press on a floured surface to flatten. Then using a rolling pin dusted with gluten free flour roll the dough ball out into a flat disk about 1/8th of an inch thick. You may also roll this dough out between two sheets of parchment paper if you prefer.
Rough edges versus smooth edges

You can choose to leave the edges as is for a more homey, rustic looking bake. This does not compromise whether the bake will puff up during cooking. However, if you are more of a perfectionist (like me, most of the time) and want your bake to have smooth edges you can use a knife to neaten the edges or use a hand pie cutter or round plastic container lid to cut your bakes into perfect circles
I used a hand pie cutter and made mini bakes, that my little people quite enjoy. My children absolutely love helping in the kitchen! I supervise the measuring and pouring while they take turns using a rubber spatula to mix the dough together.
Then I roll the dough out and they take turns cutting it into different shapes. I place cut out bakes on a sheet pan and then fry all of them without the help of the children. I always remind them that this step (cooking the bake) is a grown-up job!
Every time I’ve made this recipe all my bakes puffed up on their own. However, if you are making it and for some reason it doesn’t puff up on its own you can use a pot spoon to ladle hot oil over the bake and give it a little boost for puffing up. I demonstrate this in my original bake tutorial which you can find here.
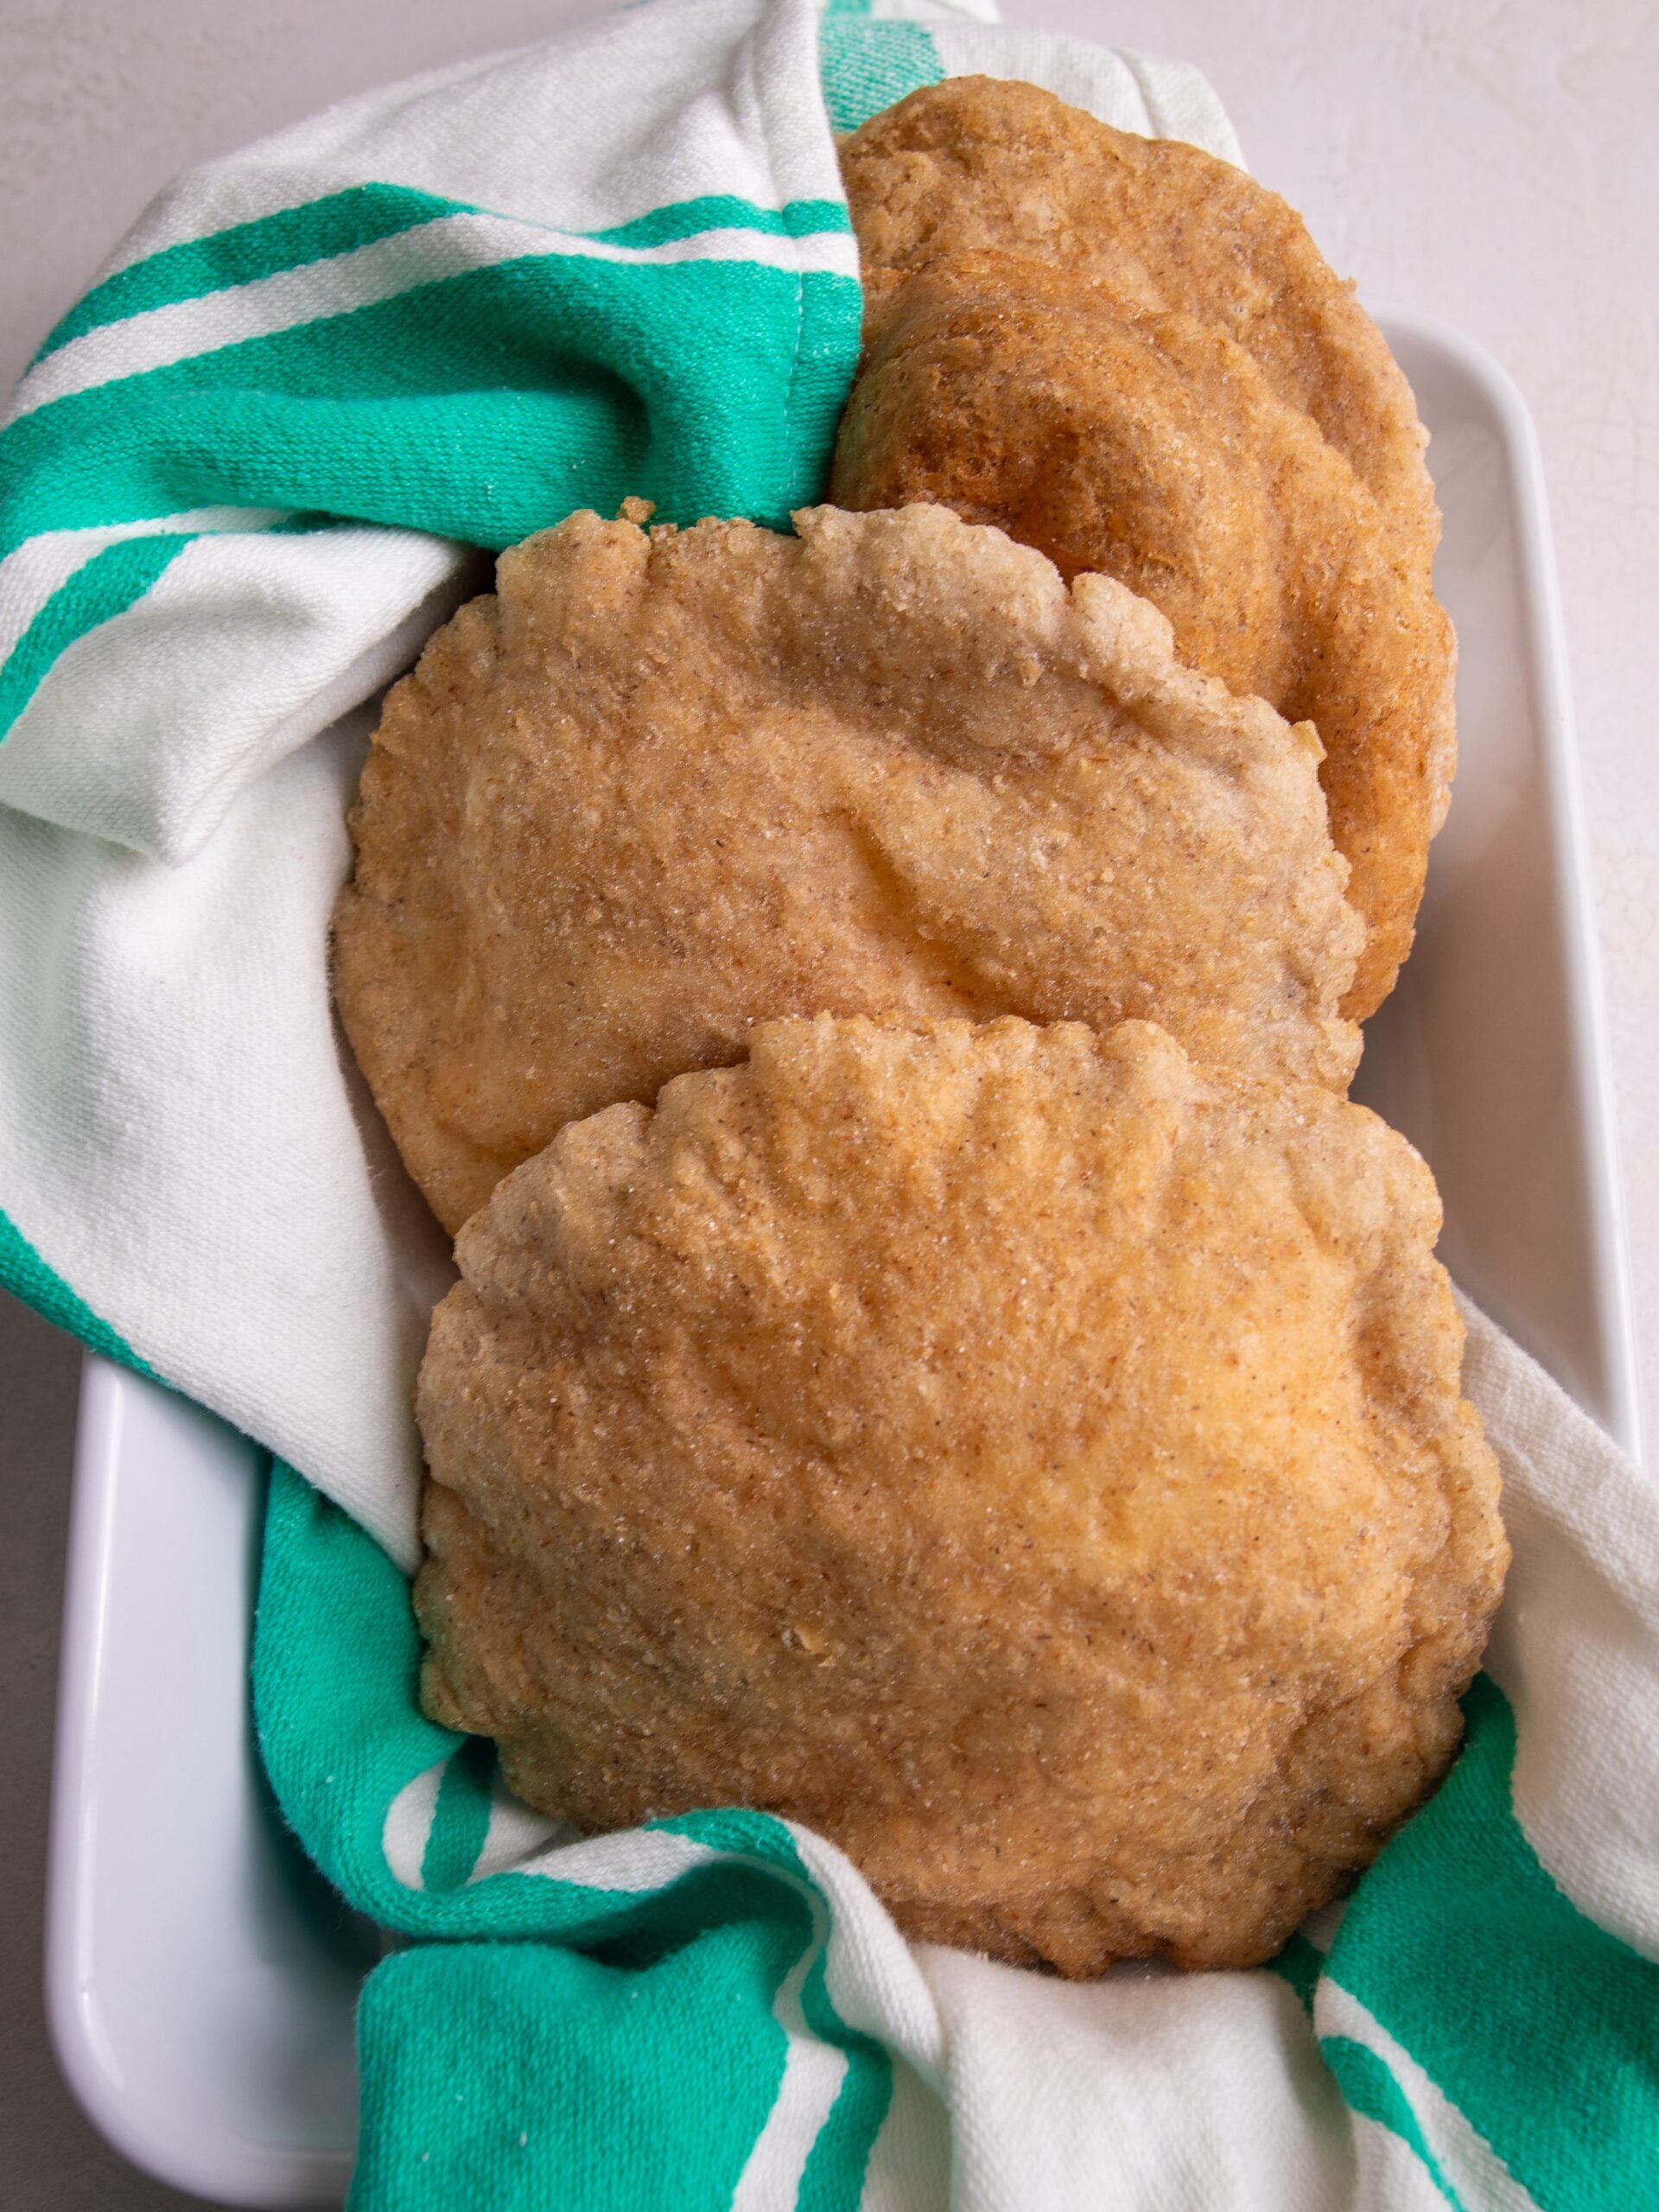
Texture and Taste of the Gluten Free Bakes
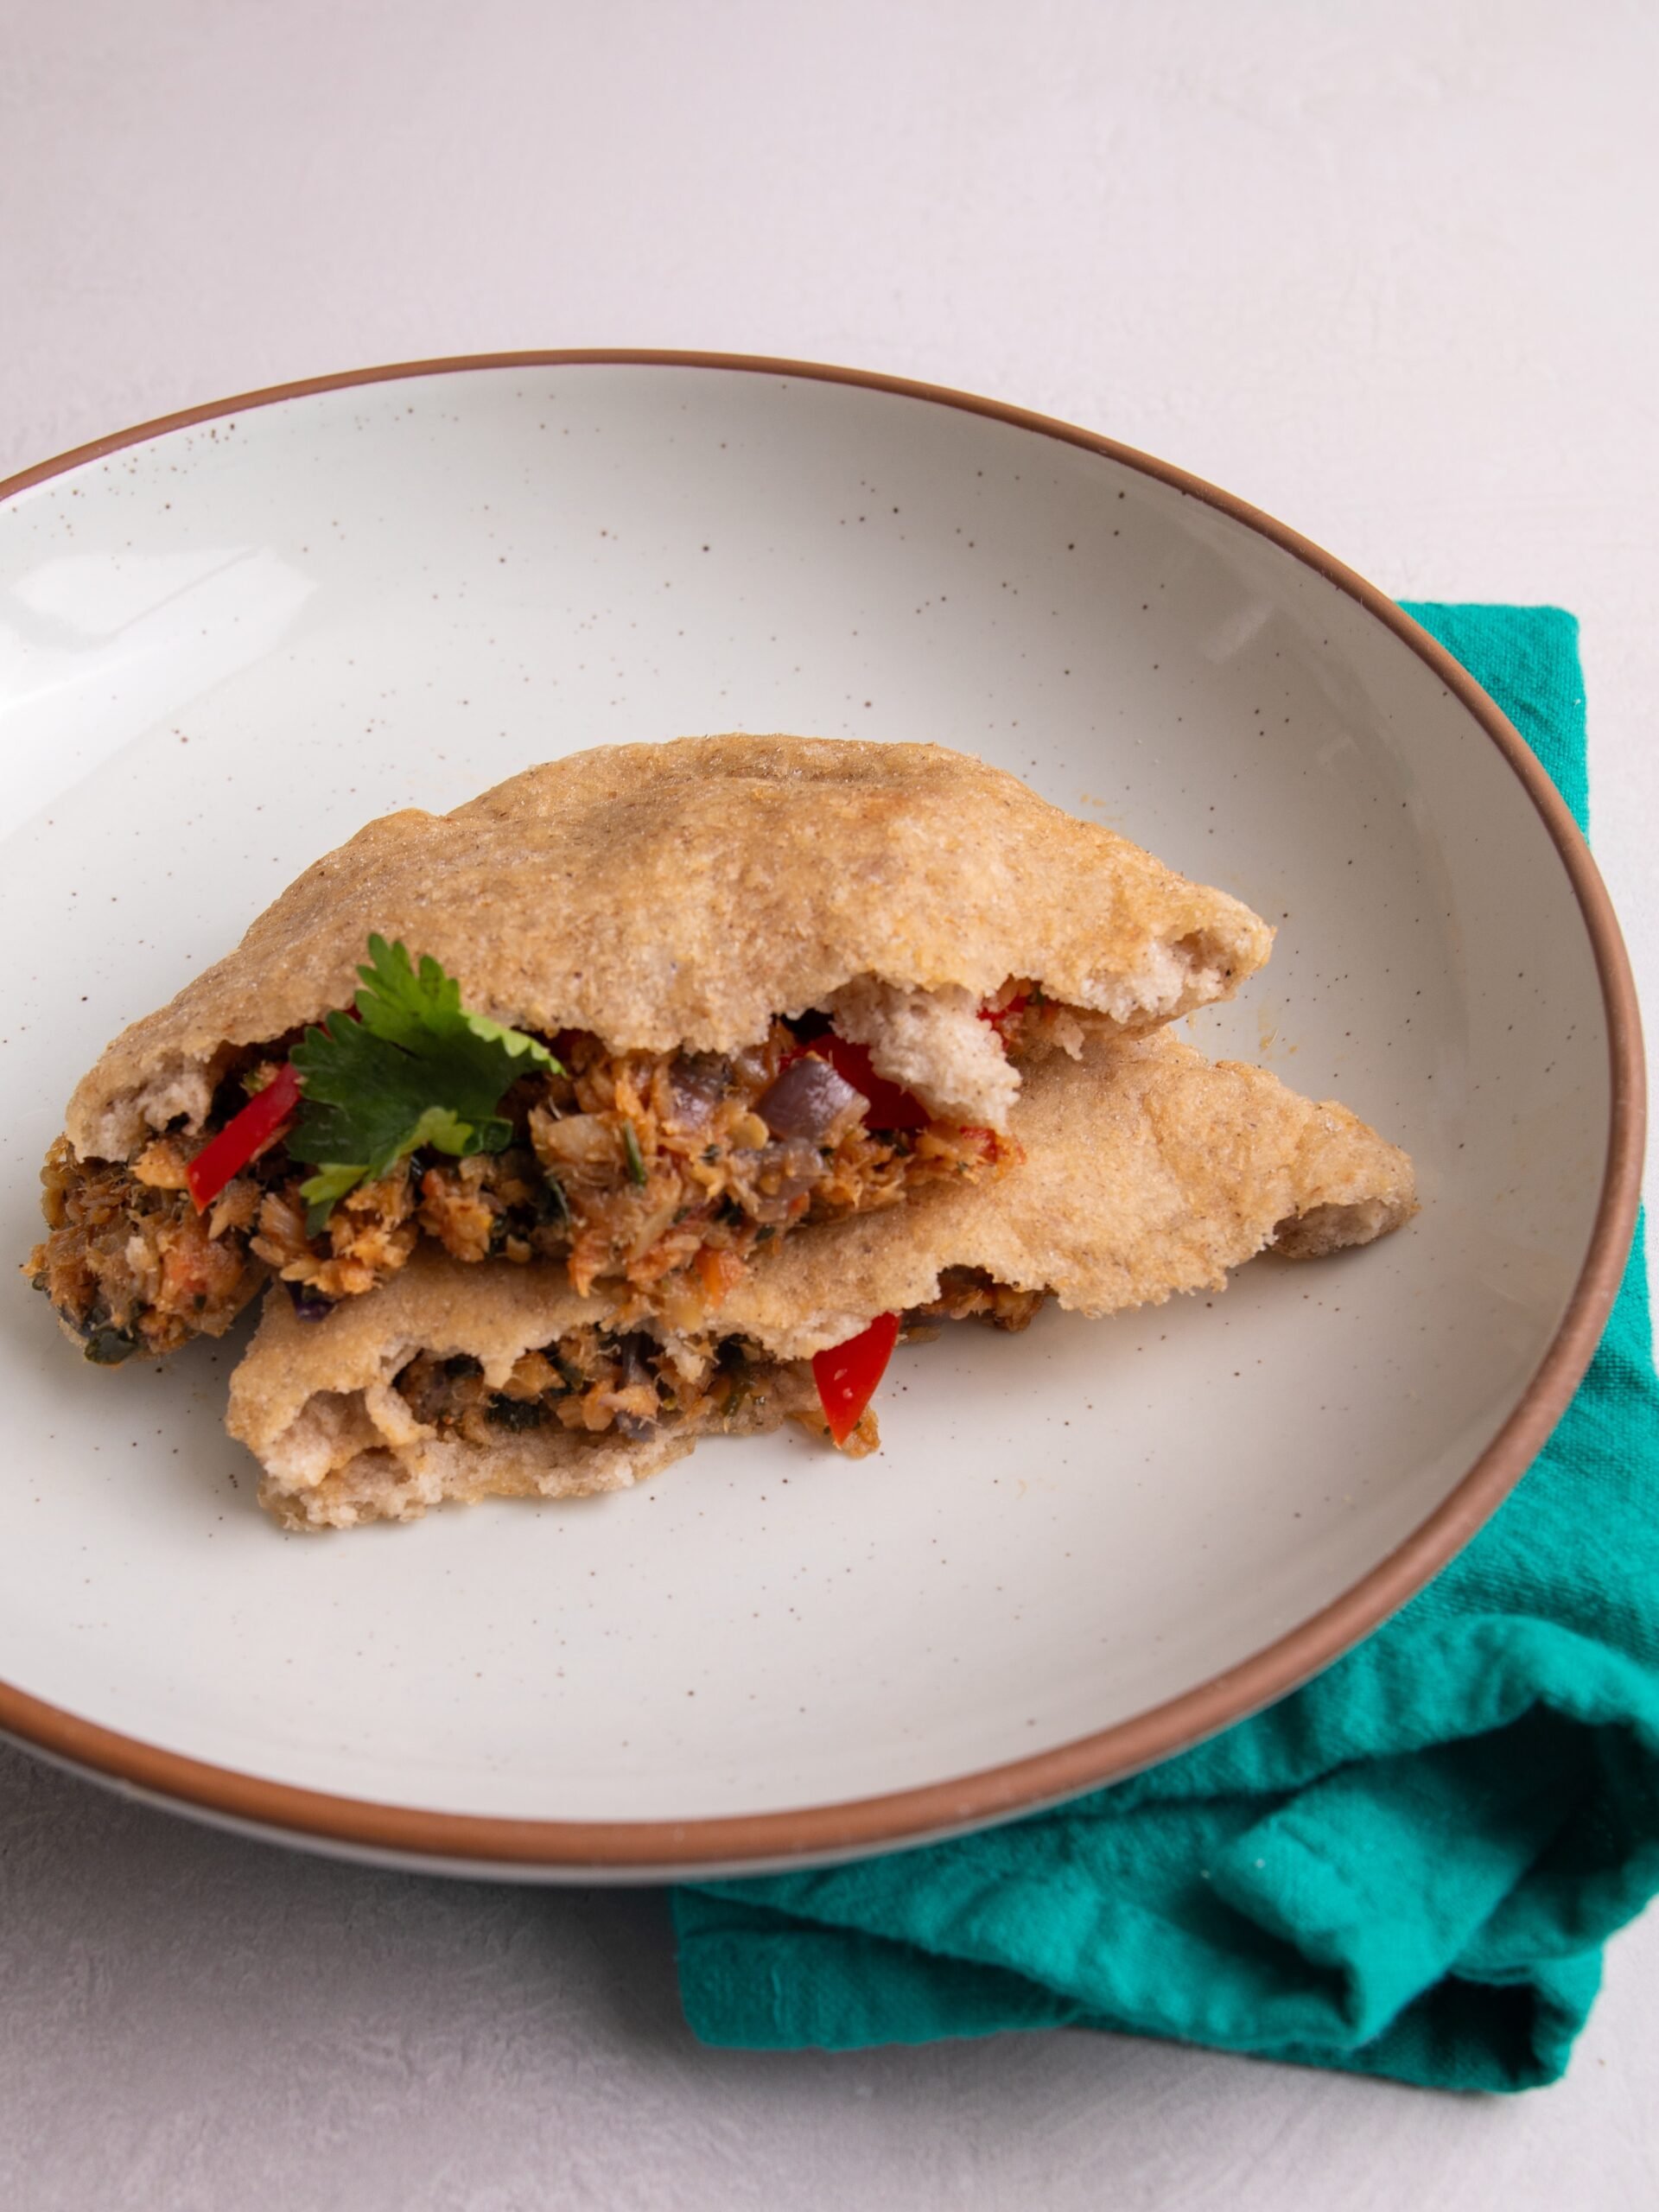
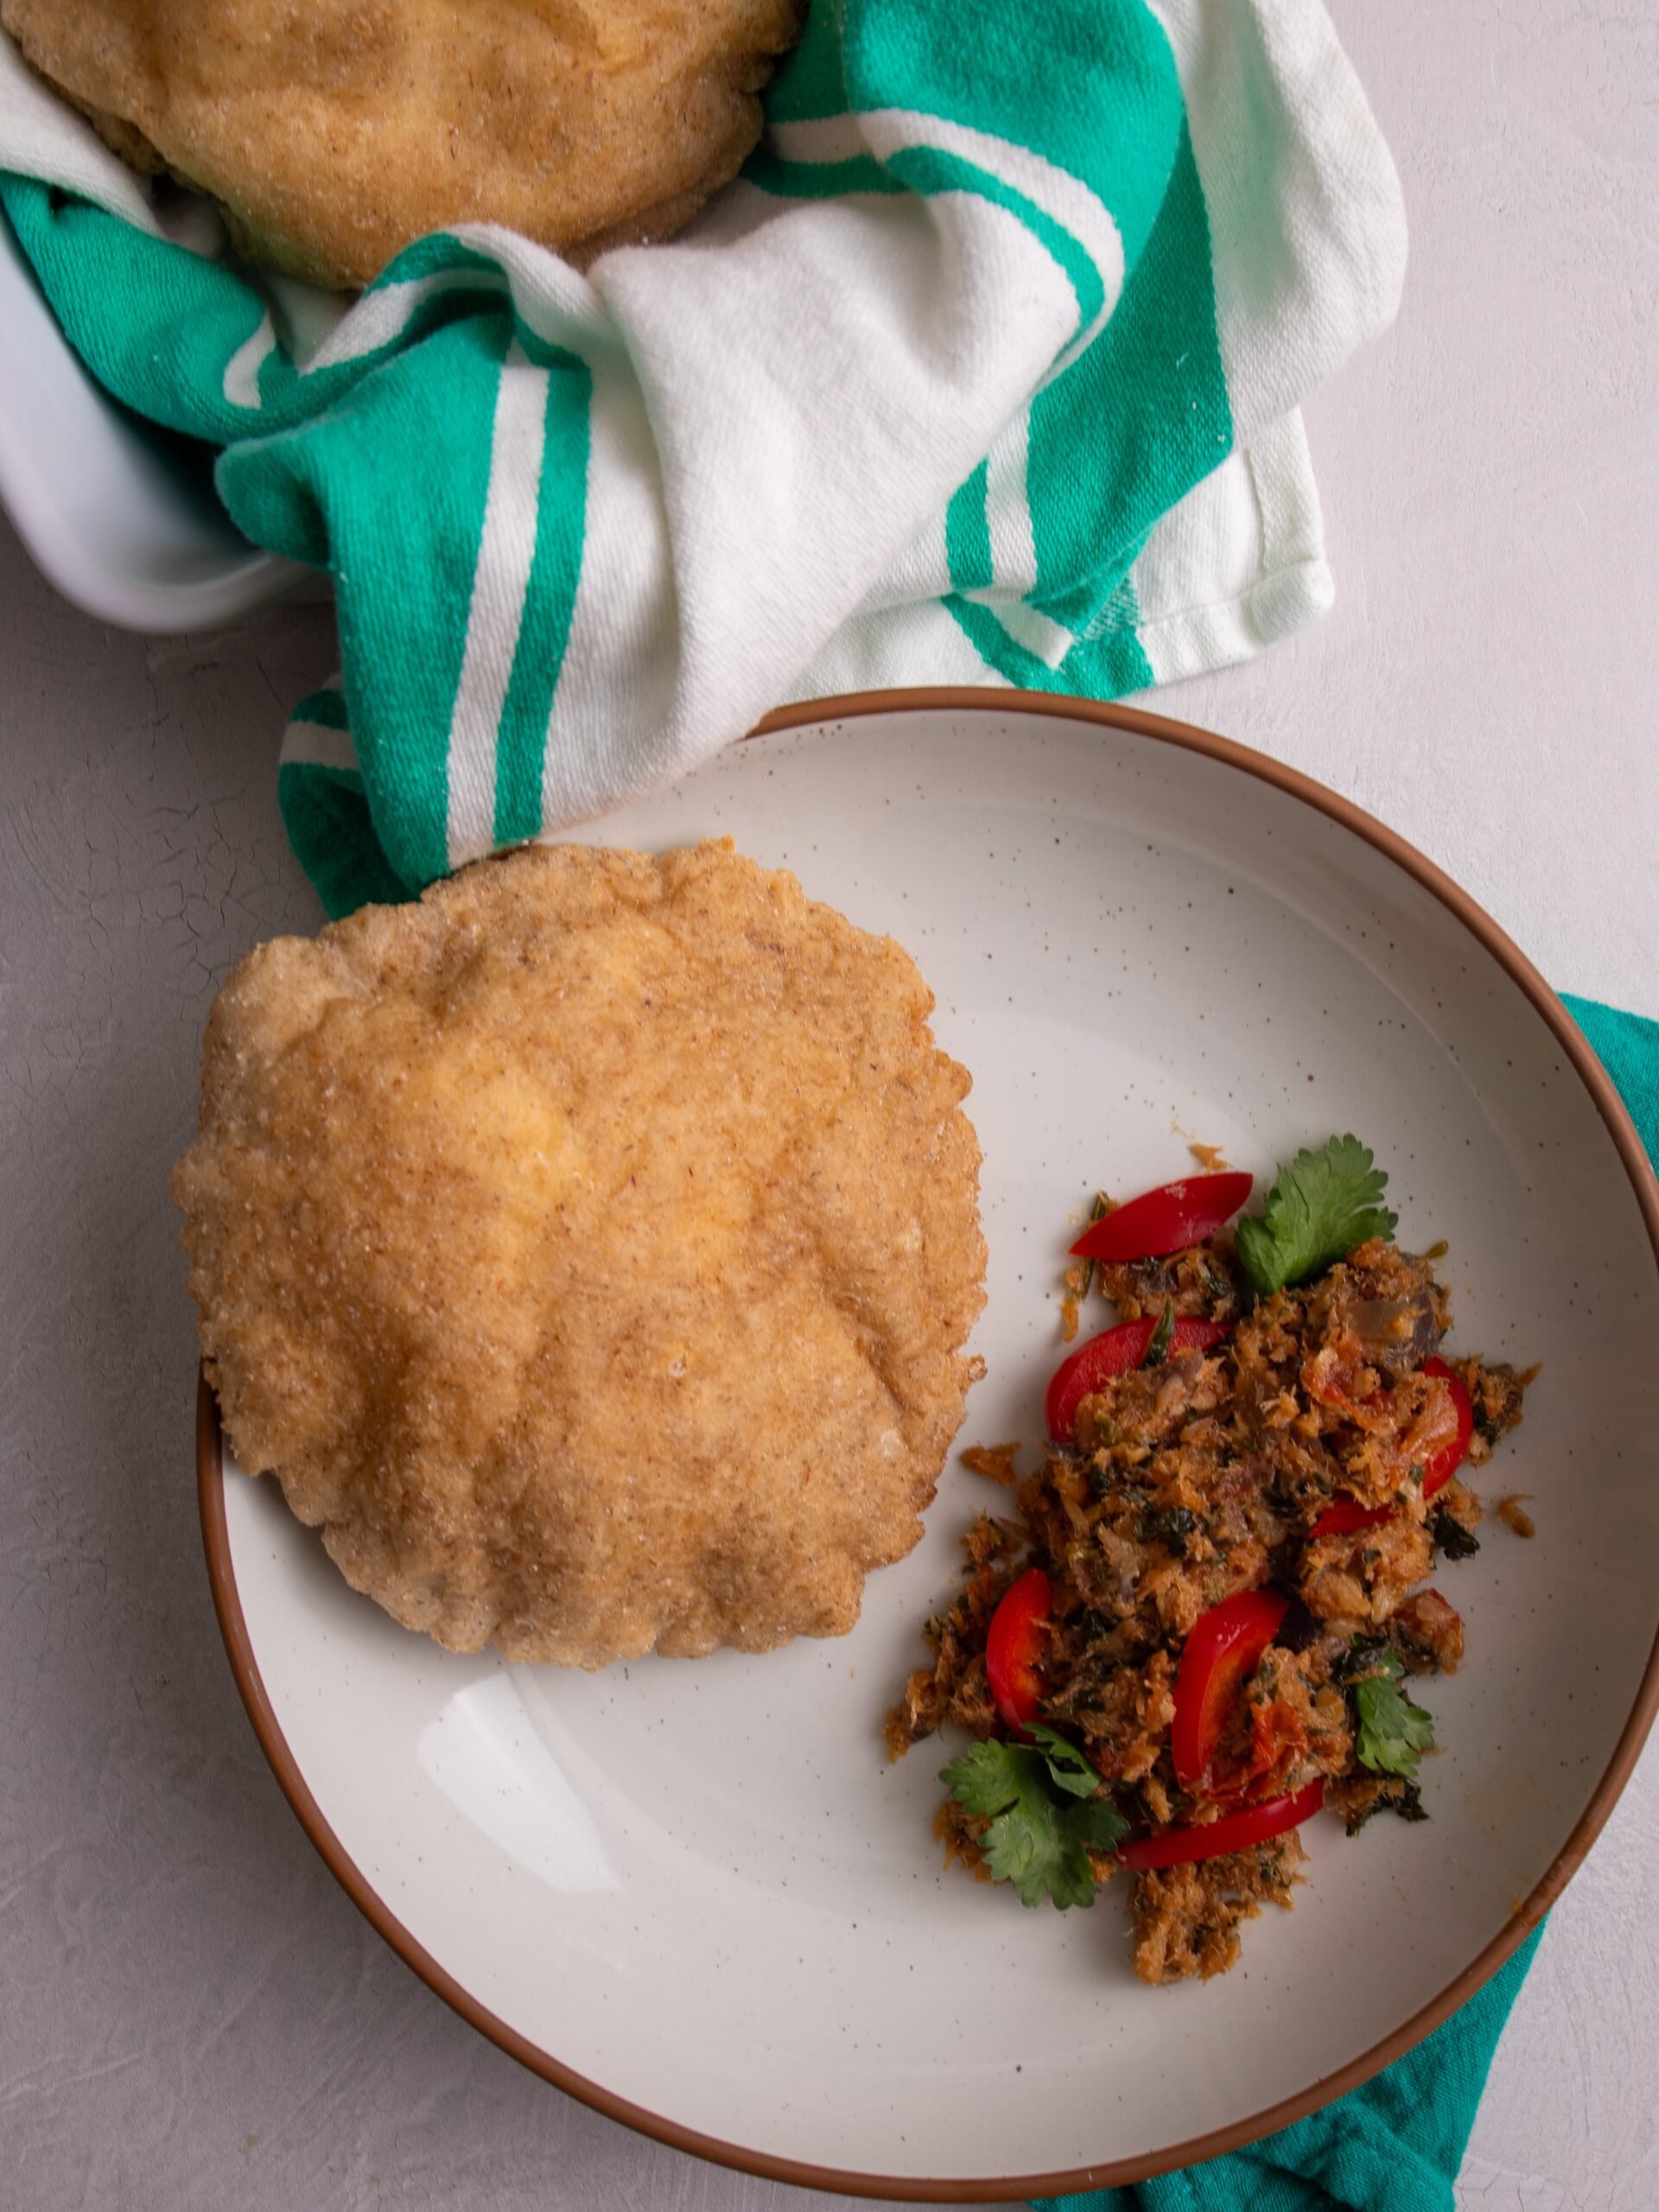
These gluten free bakes taste exactly like regular bakes. In a blind taste test (I fed it to my family without telling them it was gluten free) my family could not tell that it was gluten free.
They ate these bakes up with such haste that I almost didn’t get any. Almost! As you can see from the picture below the bake has a nice pocket for stuffing with salt fish. It has a thin, slightly crunchy upper layer and a thicker, soft lower layer. This is exactly how I like my gluten free Guyanese bakes.
Storage
Store leftovers in the fridge for up to one week. Reheat them in the microwave, by wrapping them in a damp paper towel and microwaving them in 30-second increments.
Tips for the Best Gluten Free Guyanese Bakes
- Be careful when handling the dough. For best results roll the dough out between two sheets of parchment paper. This prevents the dough from sticking to your work surface and rolling pin. This is especially important if you use cup for cup gluten free flour.
- You can fry your bakes with rough/rustic edges or use a hand pie cutter or knife to make the ends perfect. I only use a cutter when I am making gluten free bakes for guests. Otherwise, I don’t mind the rustic look.
- Don’t forget to let the dough rest. It gives the baking powder time to work and will be the difference between bakes that puff up and bakes that are flat.
Recipe Variations
I tried this gluten free bakes recipe with two different gluten free flours in order to determine the best outcome.
Using Cup for Cup Gluten Free Flour
Cup for cup or measure for measure gluten free flour that you can find on most supermarket shelves will give you a decent gluten free bake. It is quite delicious when it is fresh, but after a day or two it becomes grainy. If you are familiar with gluten free rice based flours, you know that that grainy texture can be quite off putting.
Using this exact recipe, you can use cup for cup gluten free flour such as Bob’s Red Mill 1 to 1 Gluten Free Flour or King Arthur Measure for Measure Gluten Free flour. Both of these brands work well with this recipe.
Keep in mind the texture will not be completely the same as regular white flour bakes but it’s a decent gluten free bake. Bakes made with these types of gluten free flour have a nice crunch and texture but it are not very soft and sometimes they don’t puff up as nicely as real deal bakes.
Frequently Asked Questions
Use a pot spoon to ladle hot oil over the bake and give it a little boost for puffing up. I demonstrate this in my original bake tutorial.
When you fry them properly, the bread floats on top of the oil, hence the name Guyanese floats.
Gluten Free Guyanese Bakes
Equipment
- Mixing Bowl
- Whisk
- Rolling Pin
- Saucepan
Ingredients
- 1 cup warm water plus 1 tablespoon
- 1/4 cup brown sugar
- 4 tbsp Whole Psyllium husk
- 2 cups All Purpose Gluten Free Flour
- 2 teaspoons baking powder
- 1/4 teaspoon salt
- 1 tablespoon melted coconut oil can sub for melted butter
- 1 large egg (optional)
- 1/3 teaspoon apple cider vinegar (optional)
- 4 cups oil suitable for frying
Instructions
- Add the water and sugar to a small mixing bowl or cup. Stir to dissolve the sugar, then add the psyllium husk. Mix to combine then set aside for about 5 minutes to allow a gel to form.
- In a mixing bowl combine the flour, baking powder and salt, then use a whisk to combine. Next add the coconut oil. Use a fork to mix the coconut oil into the the flour.
- Then add the psyllium gel to the flour mixture. Use a silicone spatula or your hands to mix the gel into the flour to form a dough. Then turn the dough onto a floured surface and knead into a smooth ball. Place the dough into a greased bowl, rub with a little bit of coconut oil or butter (to prevent it from crusting) and cover with a kitchen towel. Rest the dough for 20-20 minutes to allow the baking powder to activate and the dough to properly hydrate.
Using an egg as the binder
- Add the water and sugar to a small mixing bowl or cup. Stir to dissolve the sugar. Then whisk the egg, apple cider vinegar and melted coconut oil into the sugar-water solution.
- In a mixing bowl combine the flour, baking powder and salt, then use a whisk to combine. Then liquids you combined earlier to the dry ingredients and mix with your hands or a silicone spatula to form a soft dough.
- Cover the dough with a damp paper towel or a kitchen towel and let it rest for 20 to 30 minutes.
Shaping the gluten free bakes for frying
- Divide the dough into 6 to 8 pieces. Then on a floured surface, shape them into round balls.
- Next, place each dough ball on a floured surface and using a rolling pin dusted with flour roll the dough into a flat disk that is 1/8 inch thick. You may also do this step on a silicone mat or between parchment paper.
- You may choose to use a knife, hand pie cutter or the lid of a round container, to cut the bakes into neat round bakes or you can leave the edges as is for a more rustic look.
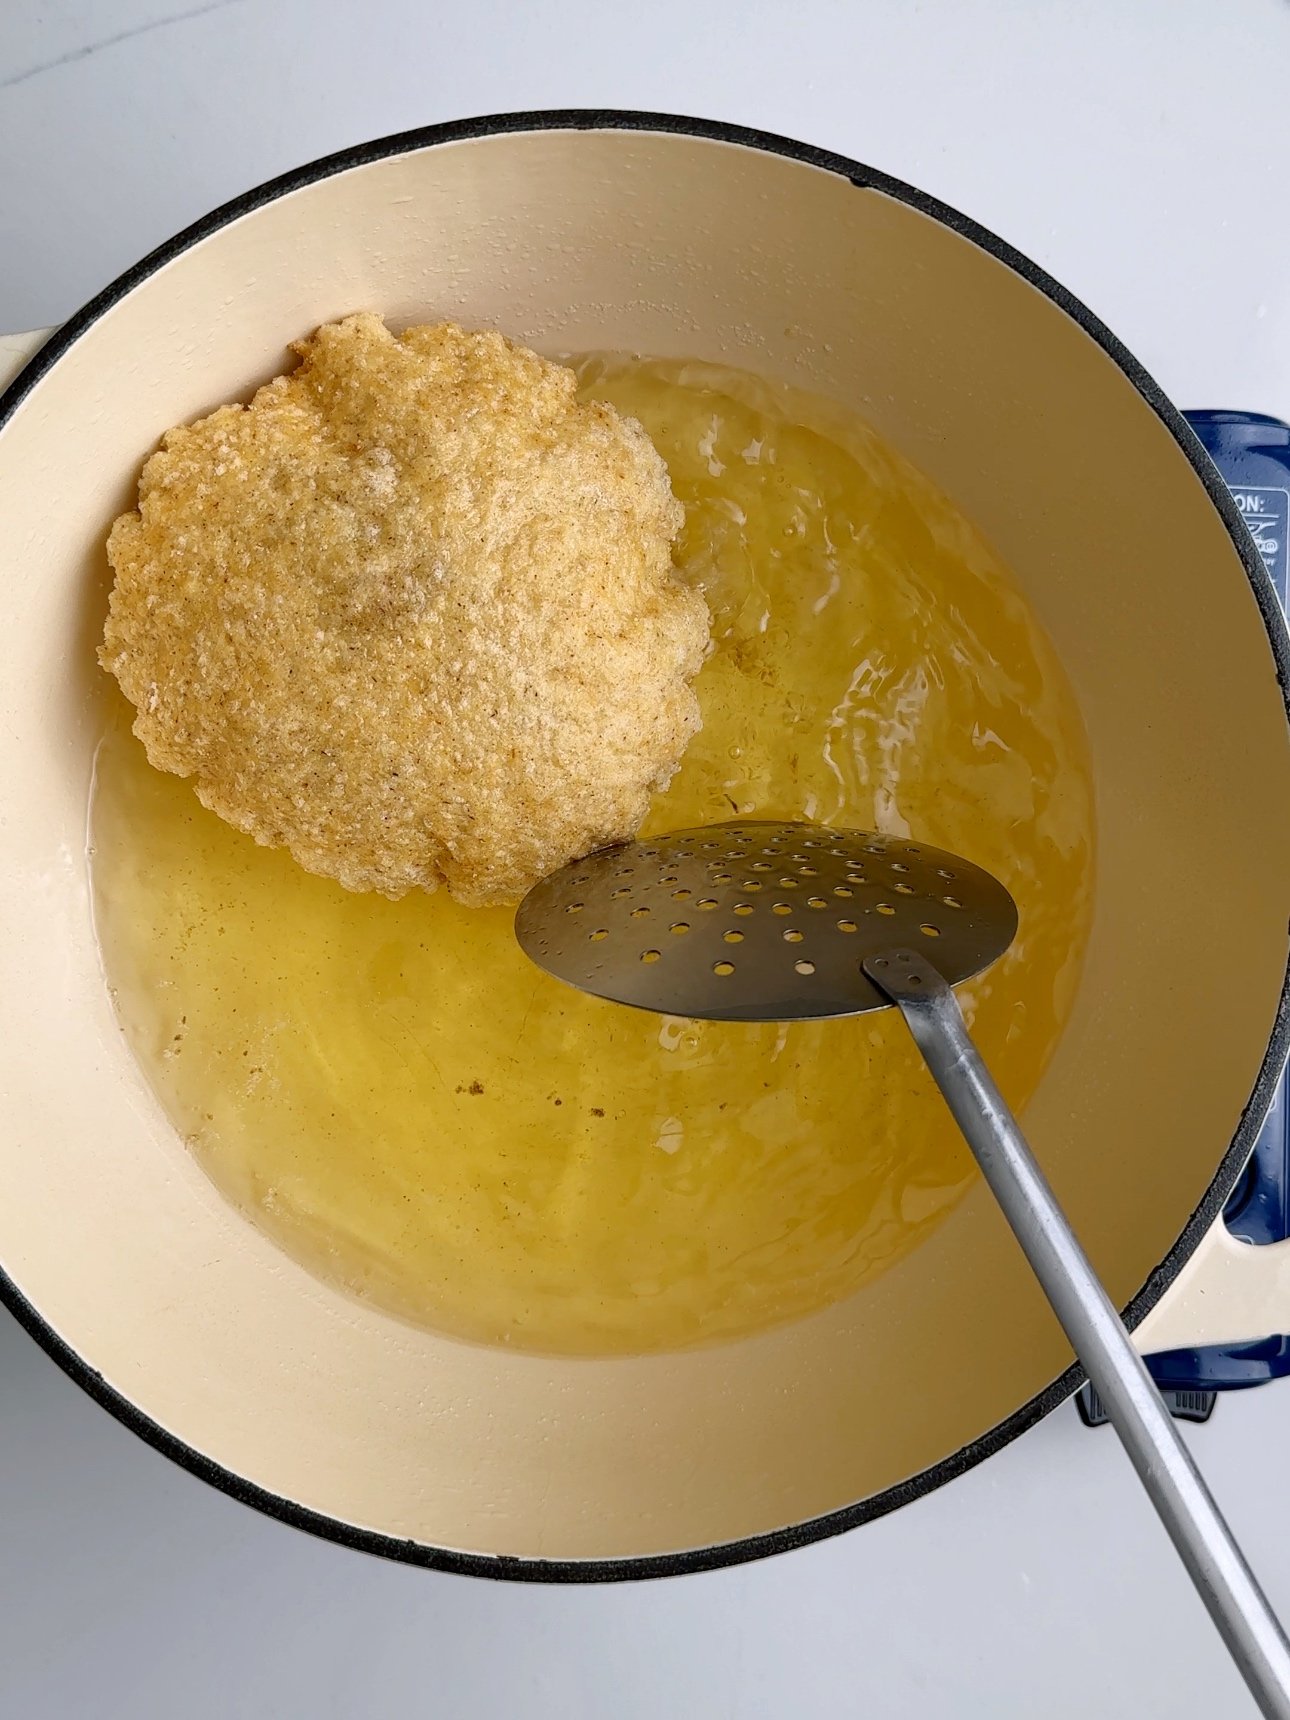
Cooking the bakes
- Add the oil to a saucepan on medium heat and bring up to temperature (about 300 °F). When the oil is hot but not smoking hot, gently add the rolled out bakes one at a time and cook for 40 second to a minute or until the oil side is brown. Flip and cook for another 30 seconds.
- Remove from the oil, and place the cooked bakes on a plate lined with paper towels or a kitchen towel to allow some of the excess oil to drain
- Serve bakes hot and fresh with a bit of butter or some sautéed salt fish
Notes
- If using the egg version, do not skip the apple cider vinegar in this recipe. It helps to take away the overly eggy taste that comes from the addition of the egg to this recipe. In versions of this recipe I made without using apple cider vinegar you can immediately taste and smell the egg when eating the gluten free bakes
- When you add the rolled out bake to the oil, it will sink to the bottom and then about 30 seconds later it will float back up to the top. Do not trouble the bake when it sinks to the bottom, allow it to float back up on it’s own.
- You may gently spoon hot oil over the bake to help it to inflate. Start to do this step immediately after the bake floats to the surface of the oil.
- Store any leftover bakes in the refrigerator and reheat for 30 second increments in the microwave.
Nutrition
The information listed in the recipe card is an estimate provided by an online nutrition tool. The tool evaluates ingredient names and amounts then makes calculations based on the number of servings listed for the recipe. It is provided as a general guideline and not as a precise calculation. For precise nutrition information please feel free to add the ingredients to your preferred nutrition calculator or consult a doctor or licensed nutritionist.
 Gluten Free Doubles
 Gluten Free Guyanese Pholourie
 Gluten Free Parsad
 Ground Beef Chow Mein (Whole30, Paleo)
D Says
I noticed this is revised recipe you’ve added Psyllium Husk: Whole psyllium husk
I didn’t want to buy this ingredient as I have no idea what else to use it for – although I understand this is what make it a softer better bake – can I just omit it or do i need to tweak another ingredient? Sorry to ask but I never saved the old one to look back on.
Thanks for the gf recipes !
Ann Says
Just got a packet of coconut flour and would like some help in making coconut bakes, Caribbean style. It’s basically coconut processed so very fine. Much thanks.
Whitley Roper Says
This looks amazing! If I use a “flax egg” do I still need to use the ACV?
Althea Brown Says
I think you can skip it.
Elena Says
Man, you did it again! I was literally just thinking yesterday how nice it would be to have some GF Bake to go with the stew chicken my mother in law brought us, but my previous attempts failed so badly, I didn’t feel like testing and experimenting again. I think I know what my girls and I will be making today! Yum yum!
Althea Brown Says
I can’t wait to hear what you think. I’m working on getting all my gluten free favorites to the blog. So stay tuned for more yumminess.
Asha Says
Can I use air fryer w this recipe?
Althea Brown Says
I haven’t tried