
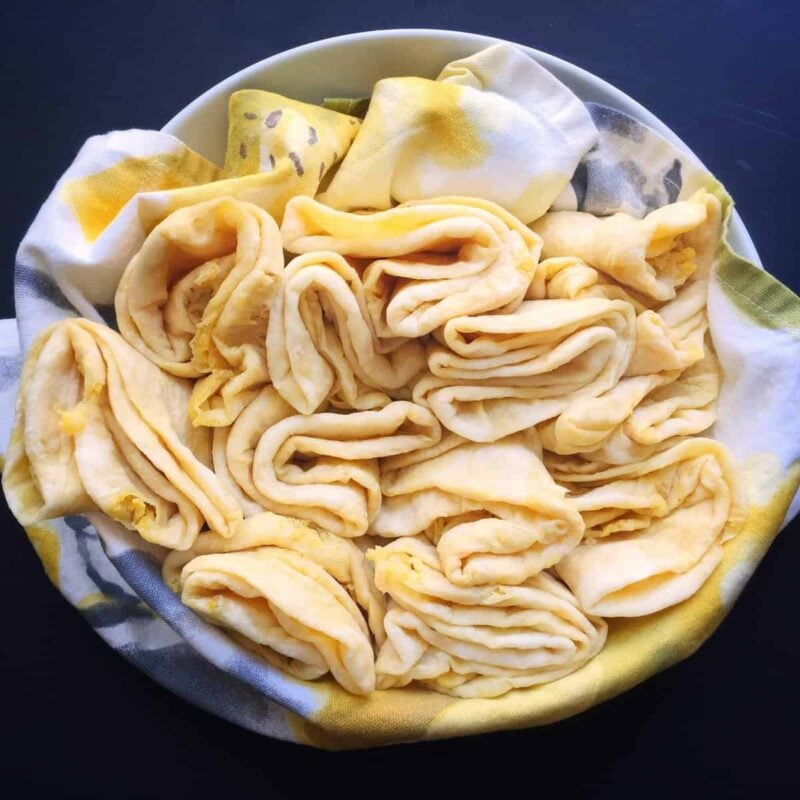
Guyanese dhal puri has paper-thin, melt-in-your-mouth layers of savory yellow split pea mash and buttery dough. Enjoy this mouthwatering flatbread with a saucy dish, stew, or your favorite dipping sauce.

Street Style Dhal Puri vs Traditional Homemade Dhal Puri
In my opinion, there are two types of Guyanese dhal puri; the one my mom made at home and the ones that I’d buy from street vendors in Guyana. My mom’s dhal puri was delicious when freshly made but somehow it got really stiff once it cooled. It was also thick and never as soft as the street vendors’ version.
Dhal puris from street vendors were paper thin and stuffed with the perfect amount of peas. And all they ever needed were hot mango sour! That’s the kind of dhal puri I strived to make and that’s the recipe I am sharing with you today!
Why You’ll Love This Dhal Puri Recipe
- The Perfect Pea-to-Dough Ratio: Cooked yellow split peas are mashed into a smooth paste for easy integration into the roti dough. While other recipes have a crumbly pea mixture, this is moist and more evenly distributed.
- Versatile: This bread can be used as a side dish or a snack. I especially love dipping it in curry but it will taste amazing with any saucy, savory dish.
- Super Satisfying: This Carribean flatbread is more than dough and seasoning. The veggie inclusion makes it more nourishing and filling.
What is Dhal Puri?
Dhal puri is a Guyanese staple. It is a type of roti (or flatbread). In Hindi, dhal means peas, and puri references fried bread.
Dhal puri is stuffed with seasoned, ground up yellow split peas. It is served as a side dish and pairs perfectly with mango sour or any type of curry.
Dhal Puri Origin
Dhal puri is a type of Indian flatbread that made its way to the Carribean islands via merchants in the 1800s. Indentured servants from India brought this and recipes like it to Guyana where it is today, a cultural staple.
Ingredients for Dhal Puri
Listed below are the ingredients you need to make the seasoned yellow split peas mash, and the dough that will contain it.

- Yellow split peas: These have a more subtle taste than green peas so if you don’t like peas, give it a chance! Soak them overnight before cooking them (see notes).
- Water: You will need water to cook the split peas and then warm water (about 110 °F) when you make the dough.
- Salt: Used for the dough and the split peas.
- All purpose flour: It is the base of your dough but is also used for dusting throughout the cooking process.
- Instant yeast: You will only need to rise the dough once when using this.
- Baking powder: This leavening agent creates air bubbles, which results in light, fluffy bread.
- Brown sugar: This is my secret ingredient. It adds moisture and keeps the dough soft.
- Seasoning: Season the split pea paste with garlic powder, onion powder, and ground cumin (geera).
- Cooking oil: Use a light tasting oil like sunflower oil, vegetable oil, or grape seed oil. Avoid olive oil because that’s not the texture or texture we want for this recipe.
See recipe card for quantities.
How to Make Dhal Puri
How to Make Dough
Rinse split peas and add to a large saucepan with 4 to 5 cups of water and 1 teaspoon of salt.
Bring to a boil uncovered on high heat then reduce to medium heat and cook until peas are tender enough to be crushed without any graininess
While peas are boiling, mix the dhal puri dough by combining 3 cups of flour, the yeast, baking powder, sugar and 1/4 teaspoon of salt in a large mixing bowl. Mix together with a whisk, then form a well in the center of the flour mixture and add 1 1/4 cups of warm water.


Mix well and knead into a smooth dough ball (this should take about 5 minutes). Cover and rest in a warm place for no more than 30 minutes.


When the peas boils to the right texture, remove from the heat, drain with a colander and rinse peas with cold water. Then add the peas, onion powder, garlic powder, geera and 1/4 teaspoon of salt to a food processor and blend until smooth.


After the dough has been resting for 30 minutes turn the dough onto a floured surface and knead for a minute or two then divide it into 15 equal pieces. Knead each piece into a smooth round ball and set it aside.
How to Stuff Dhal Puri
Roll each ball into a flat disk, brush with some oil, then stuff with 2-3 tablespoons of the split peas mixture.


Seal the balls up by pinching the dough together, then shape into a round ball and set aside. Repeat until all 15 balls are stuffed with the peas filling.


How to Pan Fry Guyanese Dhal Puri
To cook the dhal puri, add a tawah or skillet to medium-low heat. While the tawah is heating up, a floured surface gently roll each stuffed puri ball into a thin flat disk about an 1/8th of an inch thick.

Cook for about 1 minute then flip and brush with oil. Immediately flip again then brush with oil. Continue to cook for another minute until the dhal puri inflates.


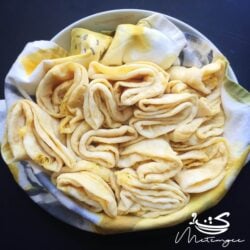
Remove from the heat and place in a dish lined with a kitchen towel. Keep covered while cooking the remaining dhal puris.
Serve your delicious Guyanese dhal puri warm with some mango sour or your favorite curry
Substitutions & Variations
- Add spice. If you want your flatbread to have more flavor try adding turmeric or a bit of curry powder if you don’t mind the yellow hue.
- Fluffy Dhal Puri. This recipe makes a very thin dhal puri. I’ll have a recipe soon for that thicker roti that I mentioned at the top of the post. Stay tuned!
Equipment
- Saucepan: To cook the peas in.
- Whisk: Use this to mix the dry ingredients when forming the dough.
- Food Processor: This is used to make the cooked split peas into a smooth paste.
- Rolling Pin: To roll out the stuffed dhal puri dough balls.
- Tawah or Skillet: Use either of these for a flat hot surface to cook the flattened dough on.
Storage
Dhal puri roti is best served warm but leftovers can be stored for later. It lasts for several hours covered at room temperature but then it needs to be refrigerated. It lasts up to one week in the fridge, stored in an airtight container.
Freeze: It is best to seal to vacuum seal and freeze for up to 3 months. Alternatively, wrap in cling wrap and put in a Zip lock bag to freeze for one month.
Reheat: Wrap the roti in a few sheets of damp paper towels. Microwave in 30-second increments until the roti is warm. Some people also reheat on the tawah but that may cause them to dry out.
Tips for the Best Dhal Puri
- Use a fork or finger to ensure the yellow split peas are thoroughly mashed. There should be no graininess. You want a smooth, paste-like filling.
- If mixing the dough by hand is difficult, try using a spatula. This is great for beginners. It’s the method I used to teach my son how to mix roti dough.
- The kneading method I use for this dhal puri recipe is different from typical bread recipes. I pinch and push for five minutes for a soft, smooth dough.
- Divide the dough into even pieces. If you’ve done this a few times, you can eyeball it but if you’re a newbie or just want to be precise, use a digit scale.
- Do not overstuff the dough with the pea mixture or it may rip when rolling out the dough.
- In order to avoid tearing the stuffed dough as you roll it flat, flour the dough and the rolling pin. This prevents the dough from sticking to any surface and coming apart. Still, be gentle when rolling out the dough.
- Do not cook dhal puri on high heat. Keep it on medium-low so it doesn’t get too brown.
- As you cook each roti, cover the cooked ones so they stay warm and moist while you complete the cooking process.

The YouTube Dhal Puri Video:
Check out this youtube video to see how I make the dhal puri and for tricks and tips!

FAQ
Dal puri is a type of roti. Roti is a blanket term for a variety of flatbreads and this recipe is one.
It is a nutritious vegetarian side dish. Split peas are an excellent source of iron, potassium, and folate. They’re also fiber rich.
Dhal roti originated in India.
Dhal Puri
Ingredients
- 2 1/2 cups yellow split peas soaked over night (see notes)
- 6 cups water divided
- 1 1/2 teaspoon salt
- 3 cups All purpose flour plus more for dusting
- 1/4 teaspoon instant yeast
- 1 teaspoon baking powder
- 1 teaspoon brown sugar
- 1 1/4 cup warm water (about 110 °F)
- 1 tablespoon garlic powder
- 1/2 tablespoon onion powder
- 1 teaspoon roasted ground cumin (geera)
- 1/2 cup Cooking oil use a light tasting oil like sunflower or grape seed
Instructions
- Rinse split peas and add to a large saucepan with 4 to 5 cups of water and 1 teaspoon of salt.
- Bring to a boil uncovered on high heat then reduce to medium heat and cook until peas are tender enough to be crushed without any graininess
- While peas are boiling mix the dhal puri dough by combining 3 cups of flour, the yeast, baking powder, sugar ad 1/4 teaspoon of salt in a large mixing bowl. Mix together with a whisk, then form a well in the center of the flour mixture and add 1 1/4 cups of warm water.
- Mix well and knead into a smooth dough ball (this should take about 5 minutes). Cover and rest in a warm place for no more than 30 minutes.
- When the peas boils to the right texture, remove from the heat, drain with a colander and rinse peas with cold water. Then add the peas, onion powder, garlic powder, geera and 1/4 teaspoon of salt to a food processor and blend until smooth.
- After the dough has been resting for 30 minutes turn the dough onto a floured surface and knead for a minute or two then divide into 15 equal pieces. Knead each piece into a smooth round ball and set aside.
- Then roll each ball into a flat disk, brush with some oil, then stuff with 2-3 tablespoons of the split peas mixture. Seal the dhal puri balls up by pinching the dough together, then shape into a round ball and set aside. Repeat until all 15 balls are stuffed with the peas filling.
How to cook Guyanese Dhal Puri
- To cook the dhal puri add a tawah or skillet to medium-low heat. While the tawah is heating up, a floured surface gently roll each stuffed puri ball into a thin flat disk about an 1/8th of an inch thick.
- Cook for about 1 minute then flip and brush with oil. Immediately flip again then brush with oil. Continue to cook for another minute until the dhal puri inflates.
- Remove from the heat and place in a dish lined with a kitchen towel. Keep covered while cooking the remaining dhal puris.
- Serve your delicious Guyanese dhal puri warm with some mango sour or your favorite curry
Nutrition
The information listed in the recipe card is an estimate provided by an online nutrition tool. The tool evaluates ingredient names and amounts then makes calculations based on the number of servings listed for the recipe. It is provided as a general guideline and not as a precise calculation. For precise nutrition information please feel free to add the ingredients to your preferred nutrition calculator or consult a doctor or licensed nutritionist.
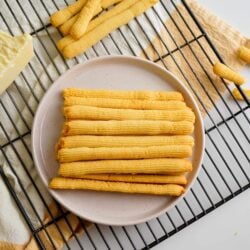 Guyanese Cheese Straws
 Spaghetti Squash Mac and Cheese (Paleo, Whole30, Keto)
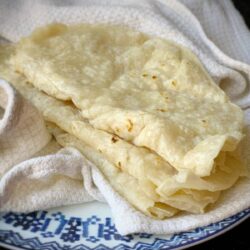 Gluten Free and Grain Free Guyanese Roti (Paleo)
 Guyanese Beef Patties
Ann Says
Can you tell me which brand of flour you used? Thanks
Kathleen Aguilar Says
Hi Althea,
This recipe is fantastic, easy to follow ( thanks for all the details) and made for exceptional puris!
I am loving the softness!!
Keeping on shining and creating more recipes!!
Thanks a million for making being in the kitchen fun
Marie Says
Hi, I followed this recipe in its entirety and it was a complete and utter disaster. I read everything before I tried it. I really have no idea what you thought you were doing with this recipe but it needs to be retested. I wasted a lot of split peas and a lot of flour.
Althea Brown Says
Hi Marie,
I am not sure where you went wrong, but I have used this recipe several time and share it in several videos on social media and as you can see from some of the comments here it works.
Joy Says
Not sure what @Marie did that hers was a “disaster” the recipe was perfect for me. The best I’ve made. Thanks!
Neka Says
I’ve been using this recipe for years. The best! So soft and delicious. Thank you for sharing! It comes in so useful when Im cooking for my Guyanese family.
Donna Says
Awesome love this it’s delicious thanks ever so much for sharing
Yvonne McArthur Says
My Dalhpuri is stiff and will puff but is thick on one side.
Any suggestions on how to fix this?
Althea Brown Says
Just want to confirm that you are following the recipe as written to make the number of dhal puris as listed. If your dhal puri is this on one side I suggest rolling out the loi with a rolling pin before stuffing it, so that you start with an even base before stuffing.
Janalyn Says
Hi following on TikTok and I decided to try your dhal puri recipe and it came out quite all right, I’ll definitely be making it again. Thank u
Janalyn Says
Hi following on TikTok and I decided to try your dahl puri recipe and it came out quite all right, I’ll definitely be making it again. Thank u
Anna Says
Hi Althea,
Could you tell me where you got your food processor as mine doesn’t grind the peas into a paste like you showed.
Thank you.
Chef pumpkin Says
Hey althea I’ve tried dhal puri twice before and failed. So happy I found your receipe. Tried it today and it taste great and it’s so soft, I’m yet to perfect the look of it . Thanks I’ll be saving this receipe for my next try. Keep up the great job!
Helen Says
Love this recipe and your wonderful video! So happy to have found your videos, it’s the best. Thank you.
Althea Brown Says
Thank you so much