
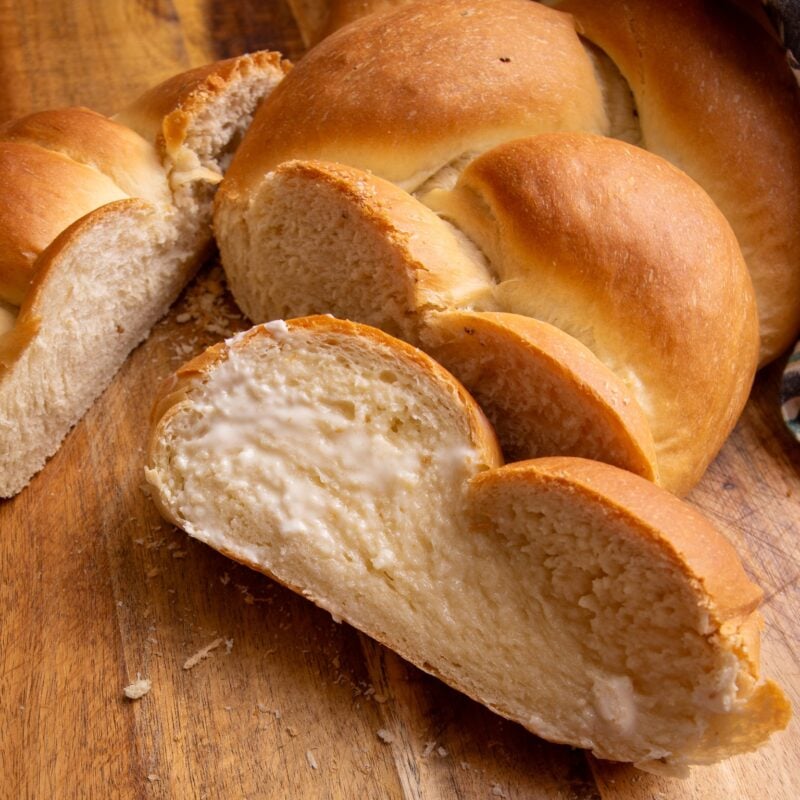
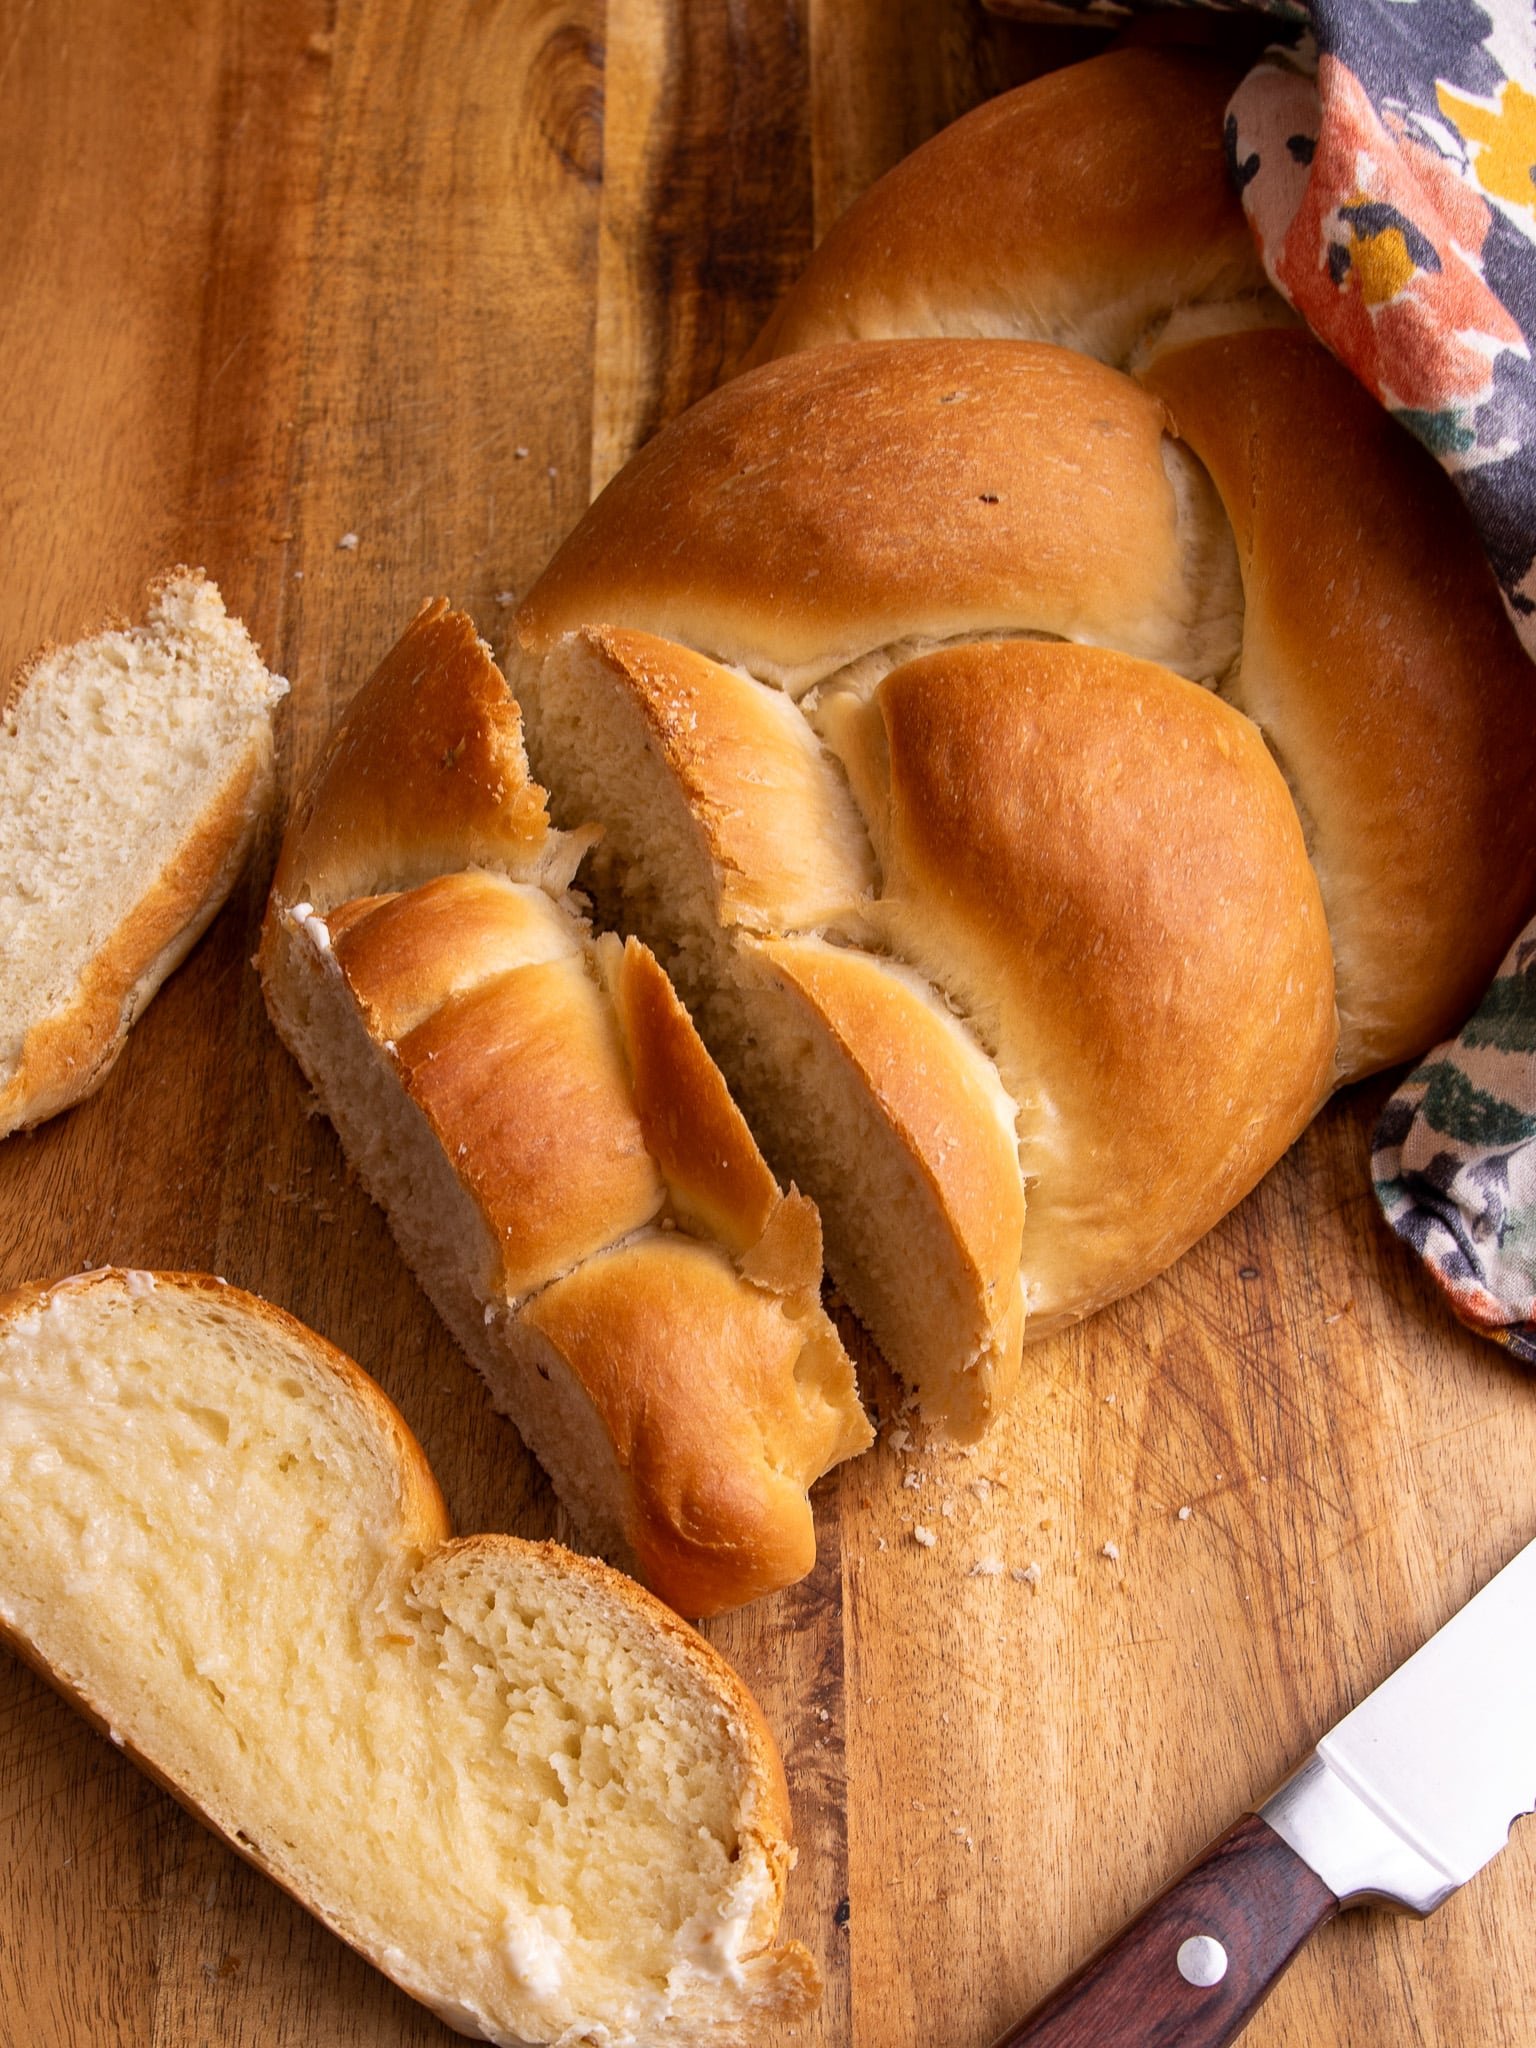
Guyanese plait bread is a soft, fluffy loaf of bread that is as beautiful as it is delicious. Serve it during the holidays with pepperpot or indulge as often as you’d like!
Guyanese Plait Bread
This post is dedicated to my late grandmother Inez Glen, from West Ruimveldt Housing Scheme, Georgetown, Guyana. She baked homemade Guyanese bread every Saturday and it was the softest, tastiest bread. She passed down her cooking genes to all generations of our family and I am forever grateful that she gave us these traditions!
Although many Guyanese people reserve this plait bread recipe for Christmas, I make it for my family whenever it is requested. And despite my own gluten-free diet, I often risk it all for a piece of this bread because it is that irresistible!
- Guyanese Plait Bread
- Why You’ll Love This Guyanese Plait Bread Recipe
- What is Plait Bread?
- Ingredients for Guyanese Plait Bread
- How to Make Plait Bread
- Proof the Dough for Plait Bread
- How to braid Plait Bread
- Baking Plait Bread
- The Step by Step Video Tutorial
- Substitutions & Variations
- Guyanese Aniseed (Anise seed) Bread
- Equipment
- Storage
- Tips for the Best Plait Bread
- FAQ
- Plait Bread
You’ll smell it before you even see it. The mouthwatering aroma of freshly baked bread makes my entire home smell like a bakery when this is in the oven. Get ready for the best plait braid recipe!
Why You’ll Love This Guyanese Plait Bread Recipe
- No Fancy Equipment Needed: Yes, making your dough in a stand mixer with a dough hook makes life a bit easier, but it is not necessary for this plait bread recipe.
- Great for Holidays: Some foods are the marker for special occasions and this is definitely one. There is nothing better to me than freshly baked bread, especially when paired with Pepperpot on Christmas morning. It’s comfort food at its finest!
- So Simple: You don’t need a special occasion to make bread when it is this easy! I’m sure you have the ingredients in your pantry right now. Mix it up and let it rise, you could have plait bread in about 2 hours.
What is Plait Bread?
Plait Bread (Guyanese Style) is a hand-kneaded white bread that is soft and buttery. It is perfect for stews and pairs nicely with Pepperpot!
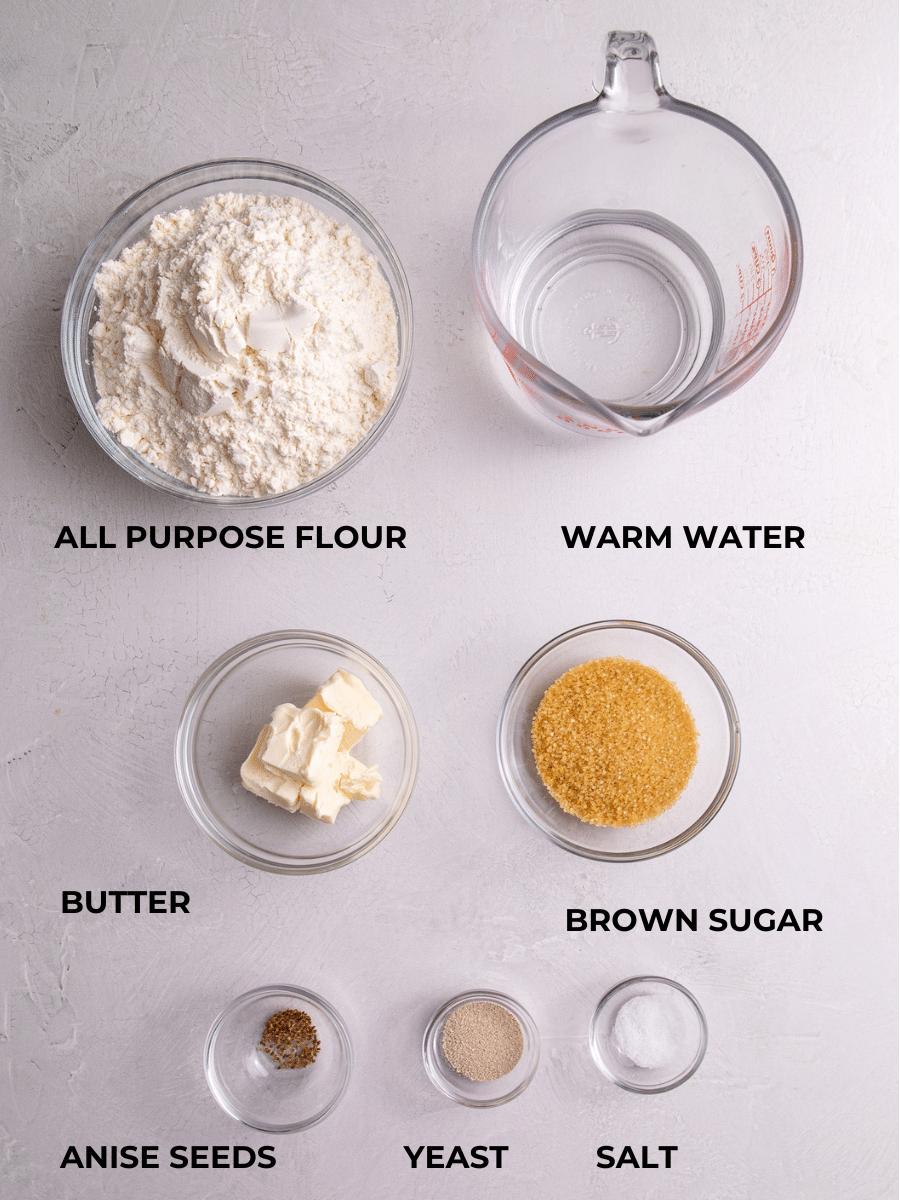
Ingredients for Guyanese Plait Bread
The ingredients for plait bread are very simple and you probably have them in your pantry right now!
In the video below I accidentally added 1/2 cup of butter to my dough for this plait bread instead of 1/4 cup (what I typically use) but it made the bread the softest bread I’ve ever made.
- Dry active yeast: This is for texture, rise, and flavor.
- Warm water: It should be approximately 110°F.
- Brown sugar: This activates the yeast. I prefer Demarara sugar or sugar in the raw.
- All-purpose flour: For the structure of the bread, plus more for dusting.
- Salt: We use just a little to taste because too much salt will affect the rise.
- Butter: Room temperature butter is best for this recipe. It is added to the dough but also used to baste the bread once it’s done baking.
- Anise Seeds (optional): This gives the bread a sweet and slightly licorice taste.
See recipe card for quantities.
How to Make Plait Bread
Bloom the yeast
You don’t need a mixer for this simple bread. It is easy to pull together in a mixing bowl, using your hands.
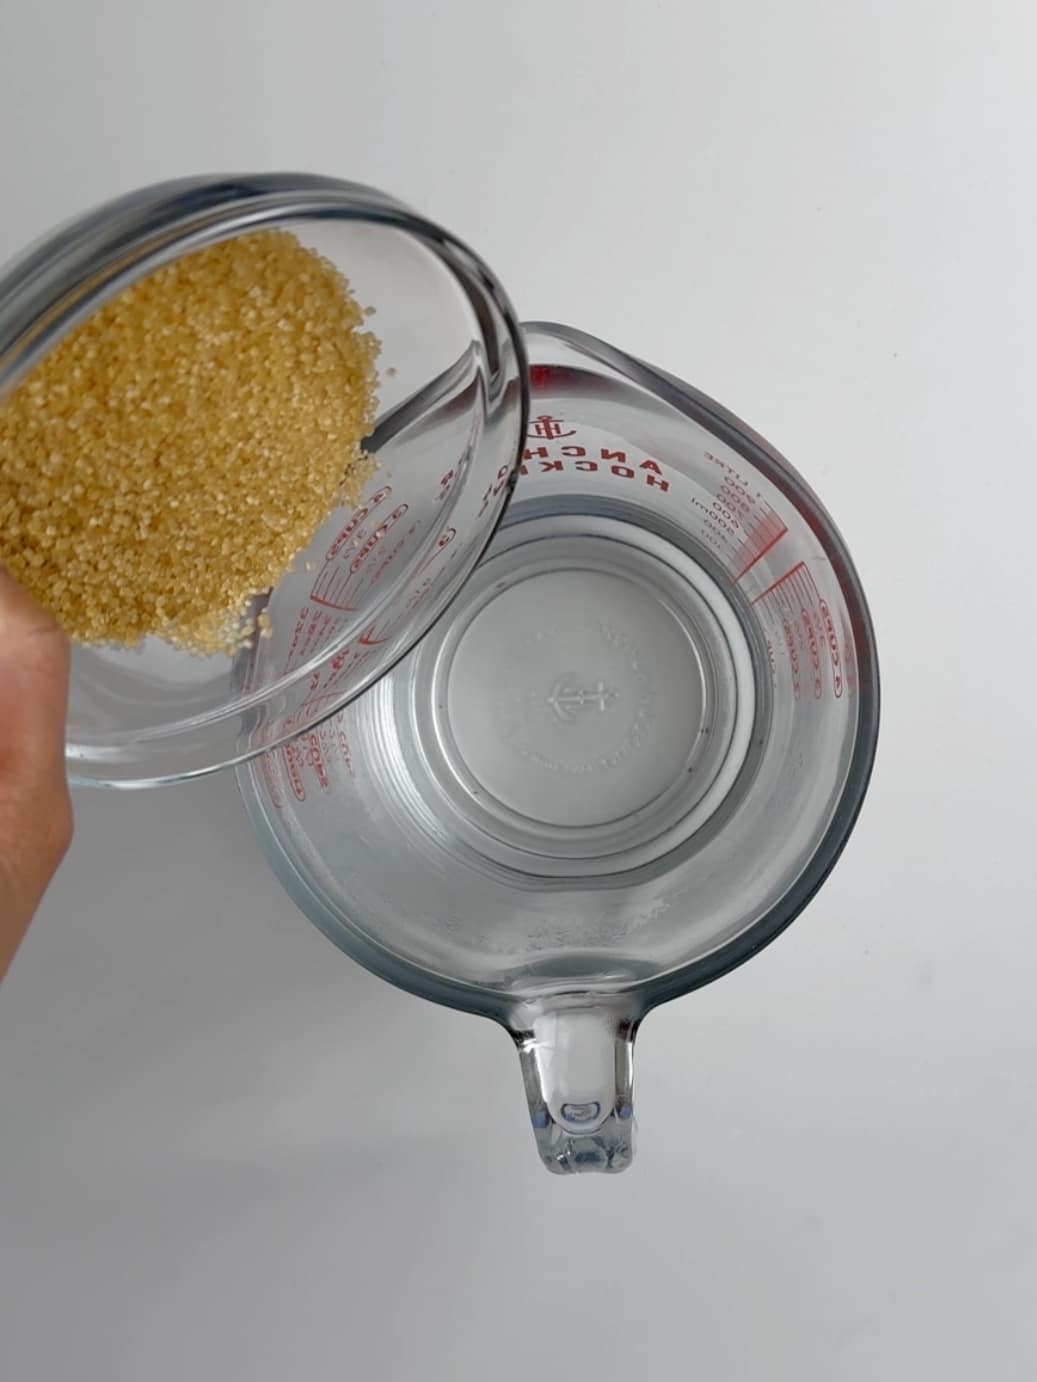
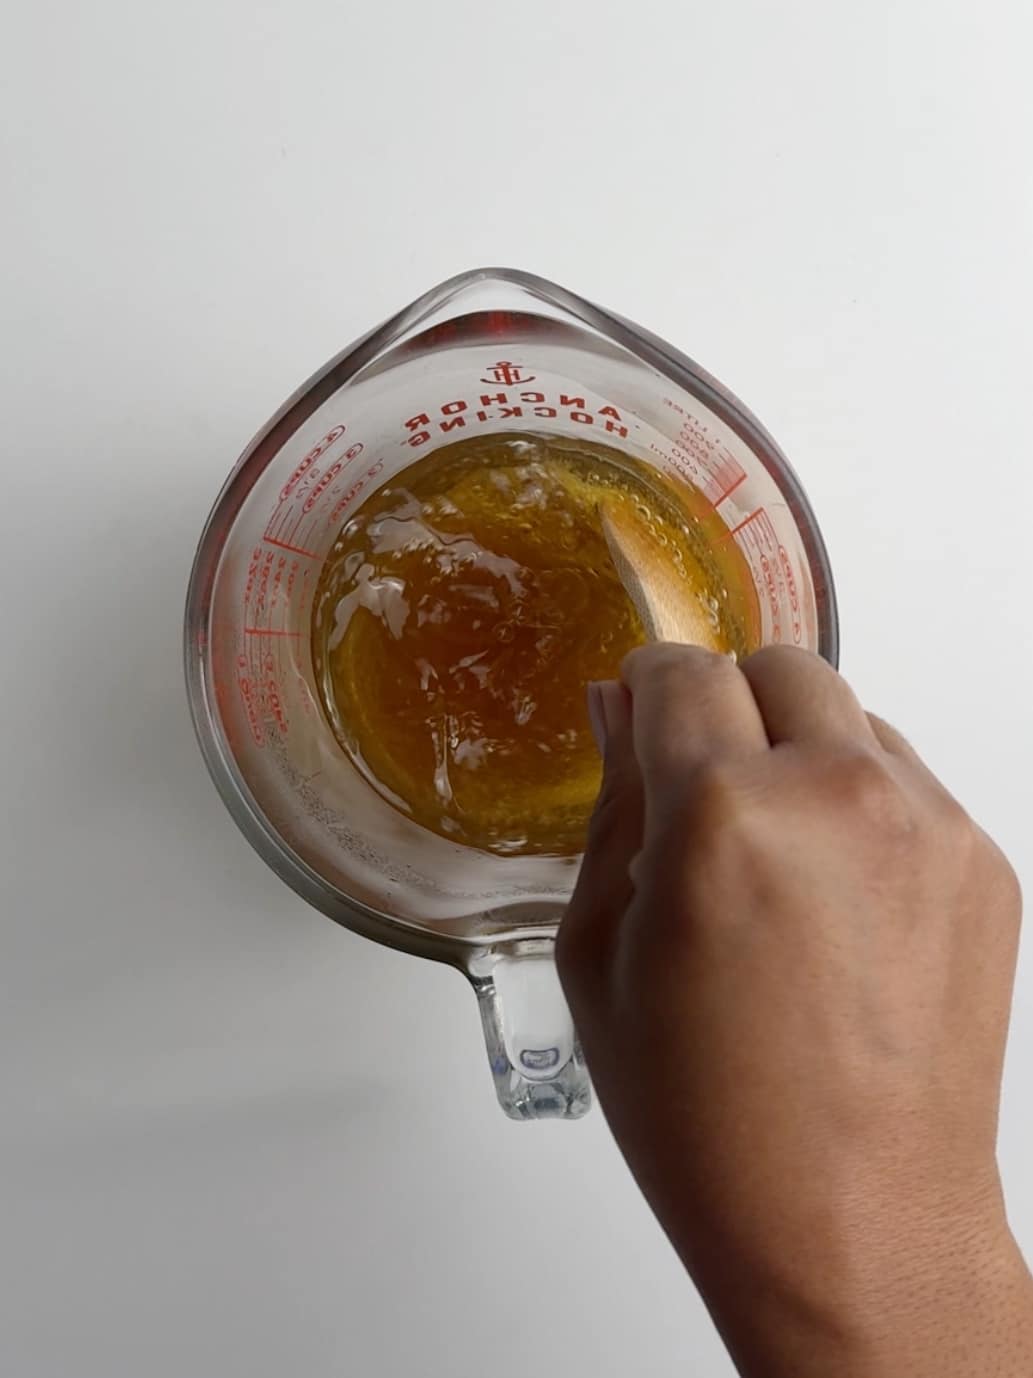
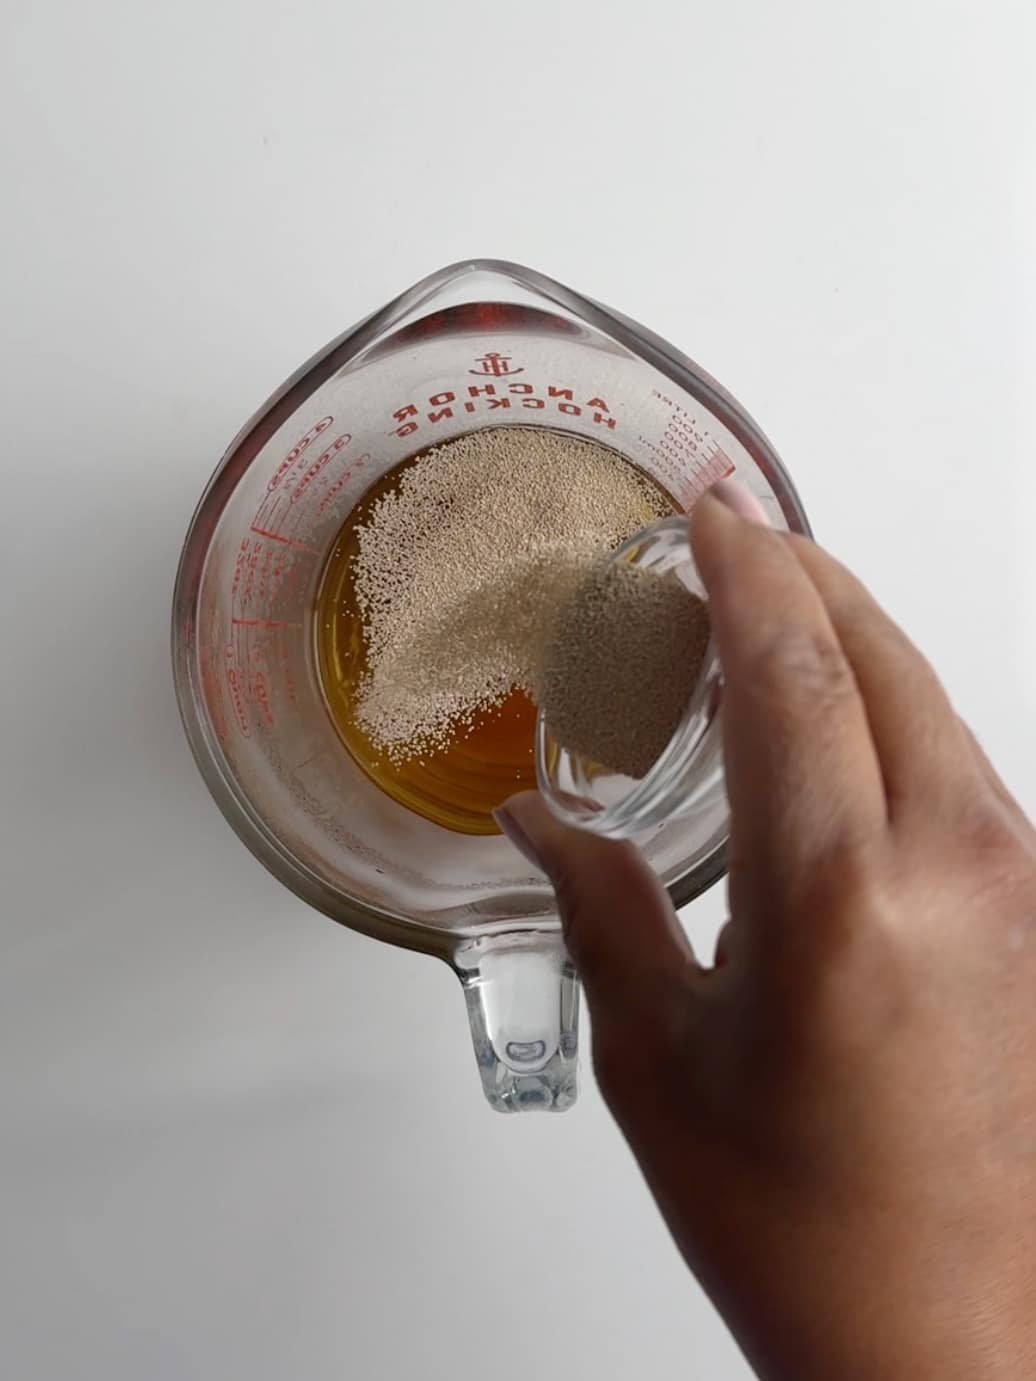
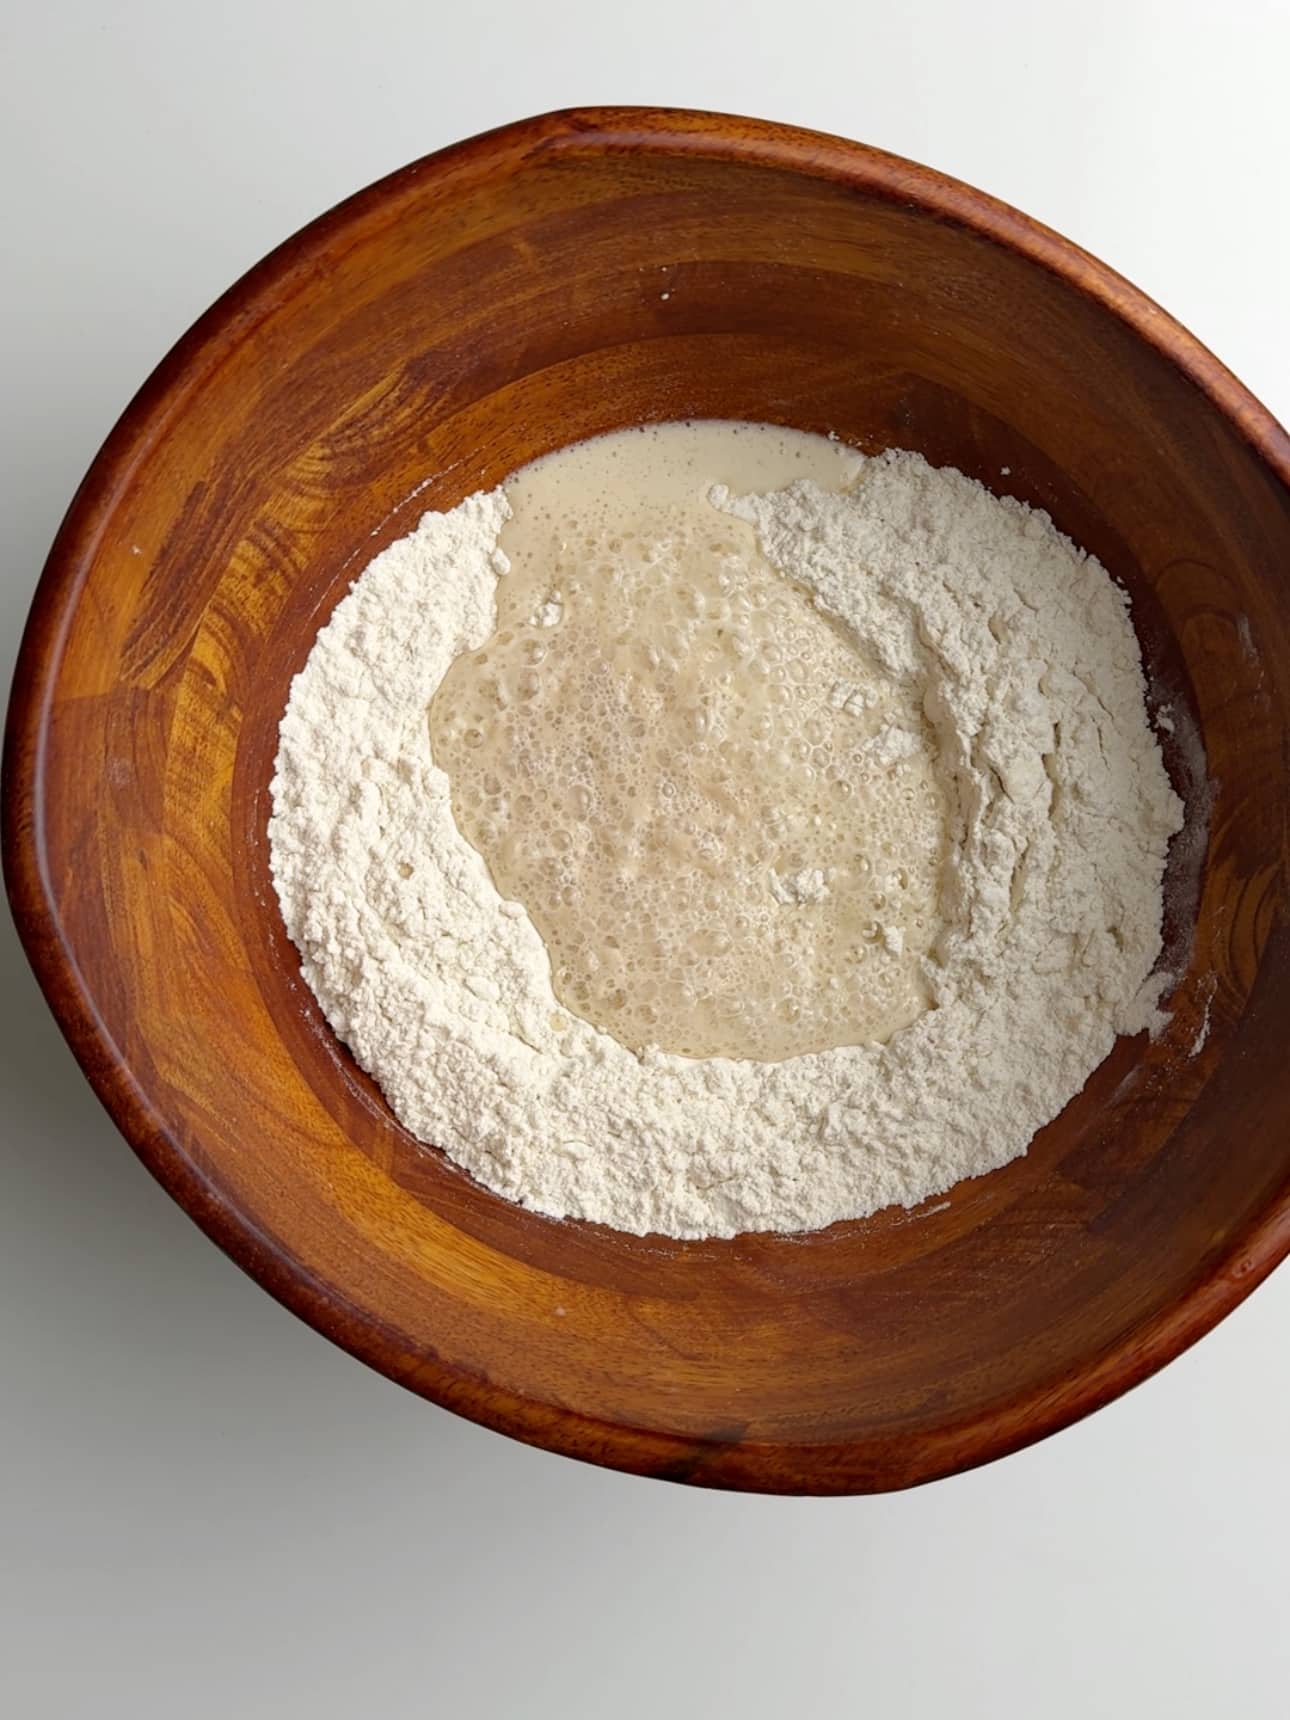
Start by blooming the yeast. Dissolve the brown sugar into warm water, then add the yeast. Cover and leave in a warm place for about 10 minutes or until the mixture has a 1 to 2 inches thick frothy top.
Make the dough
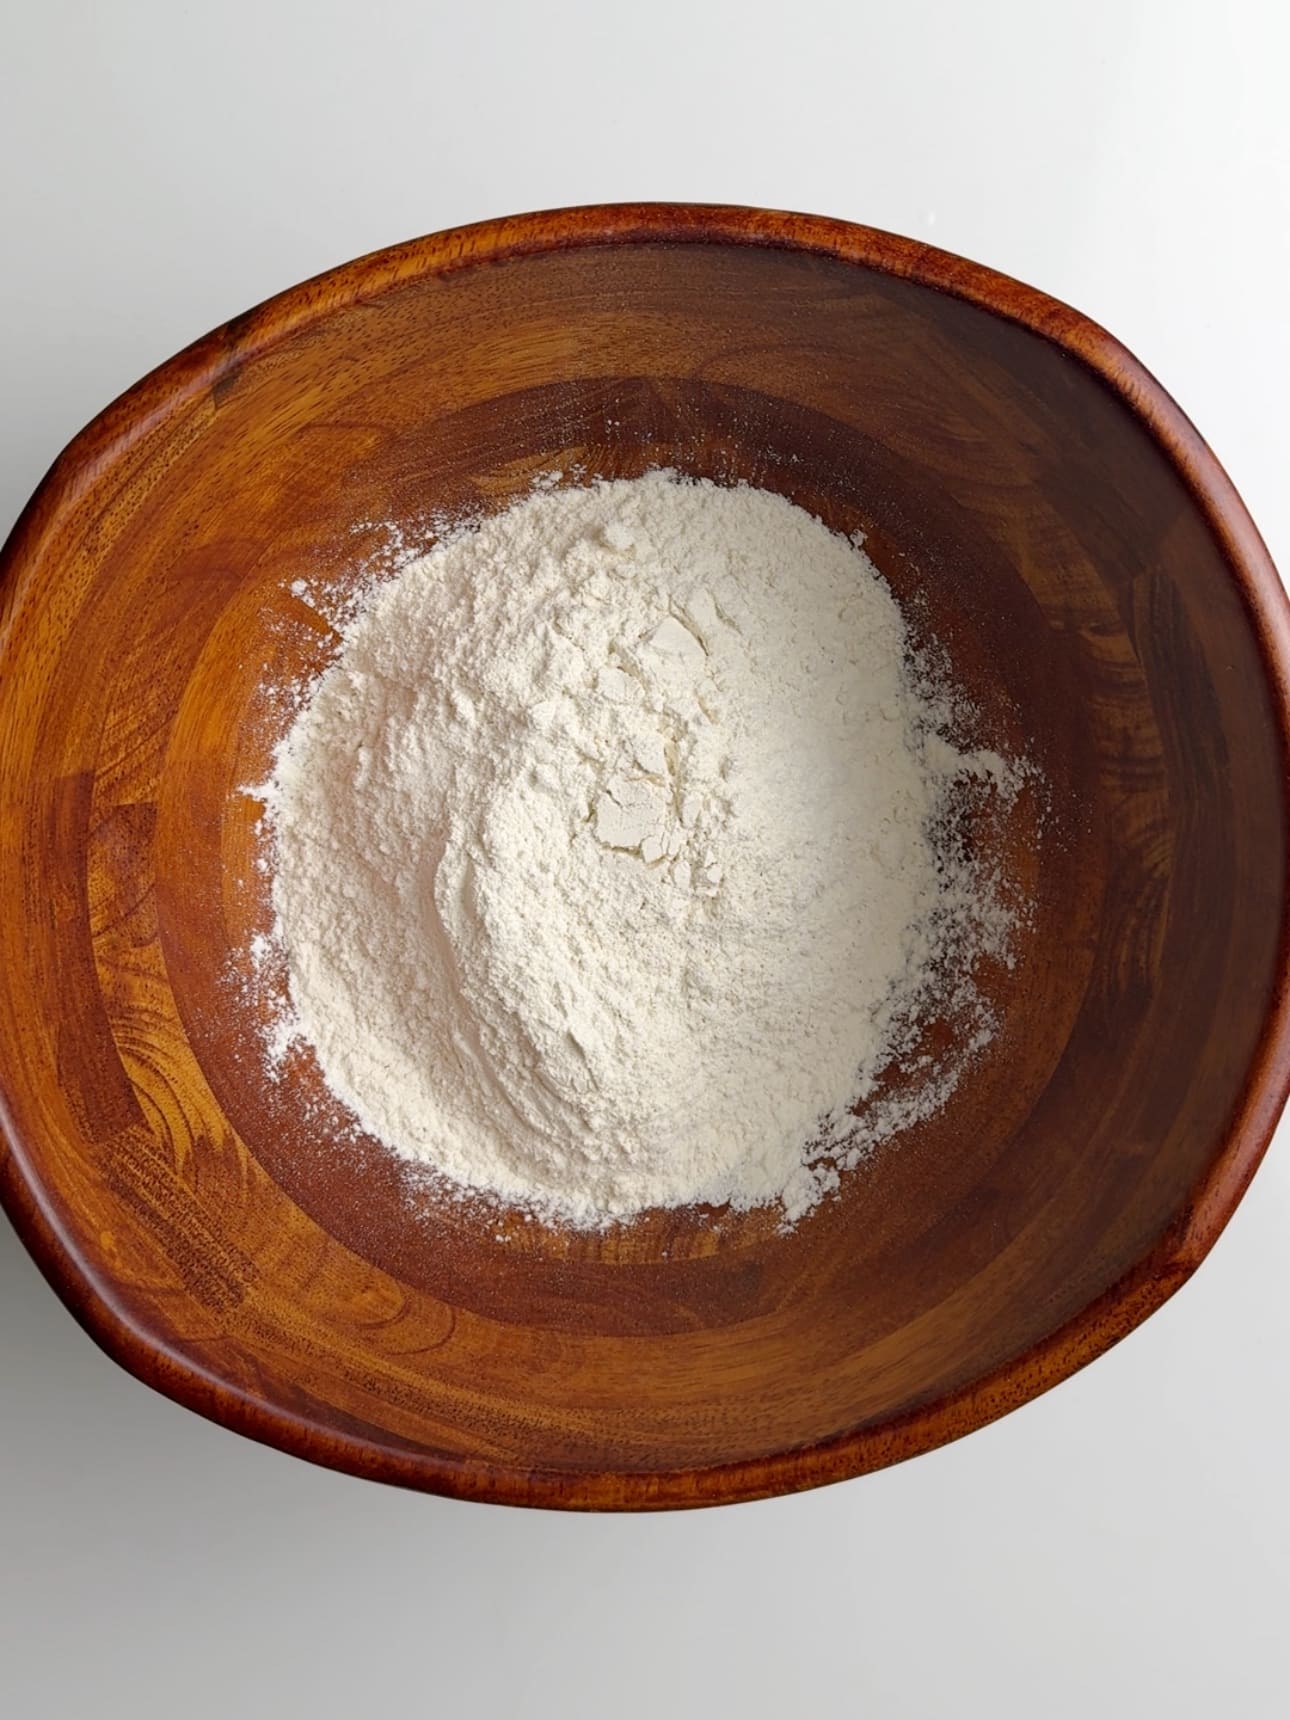
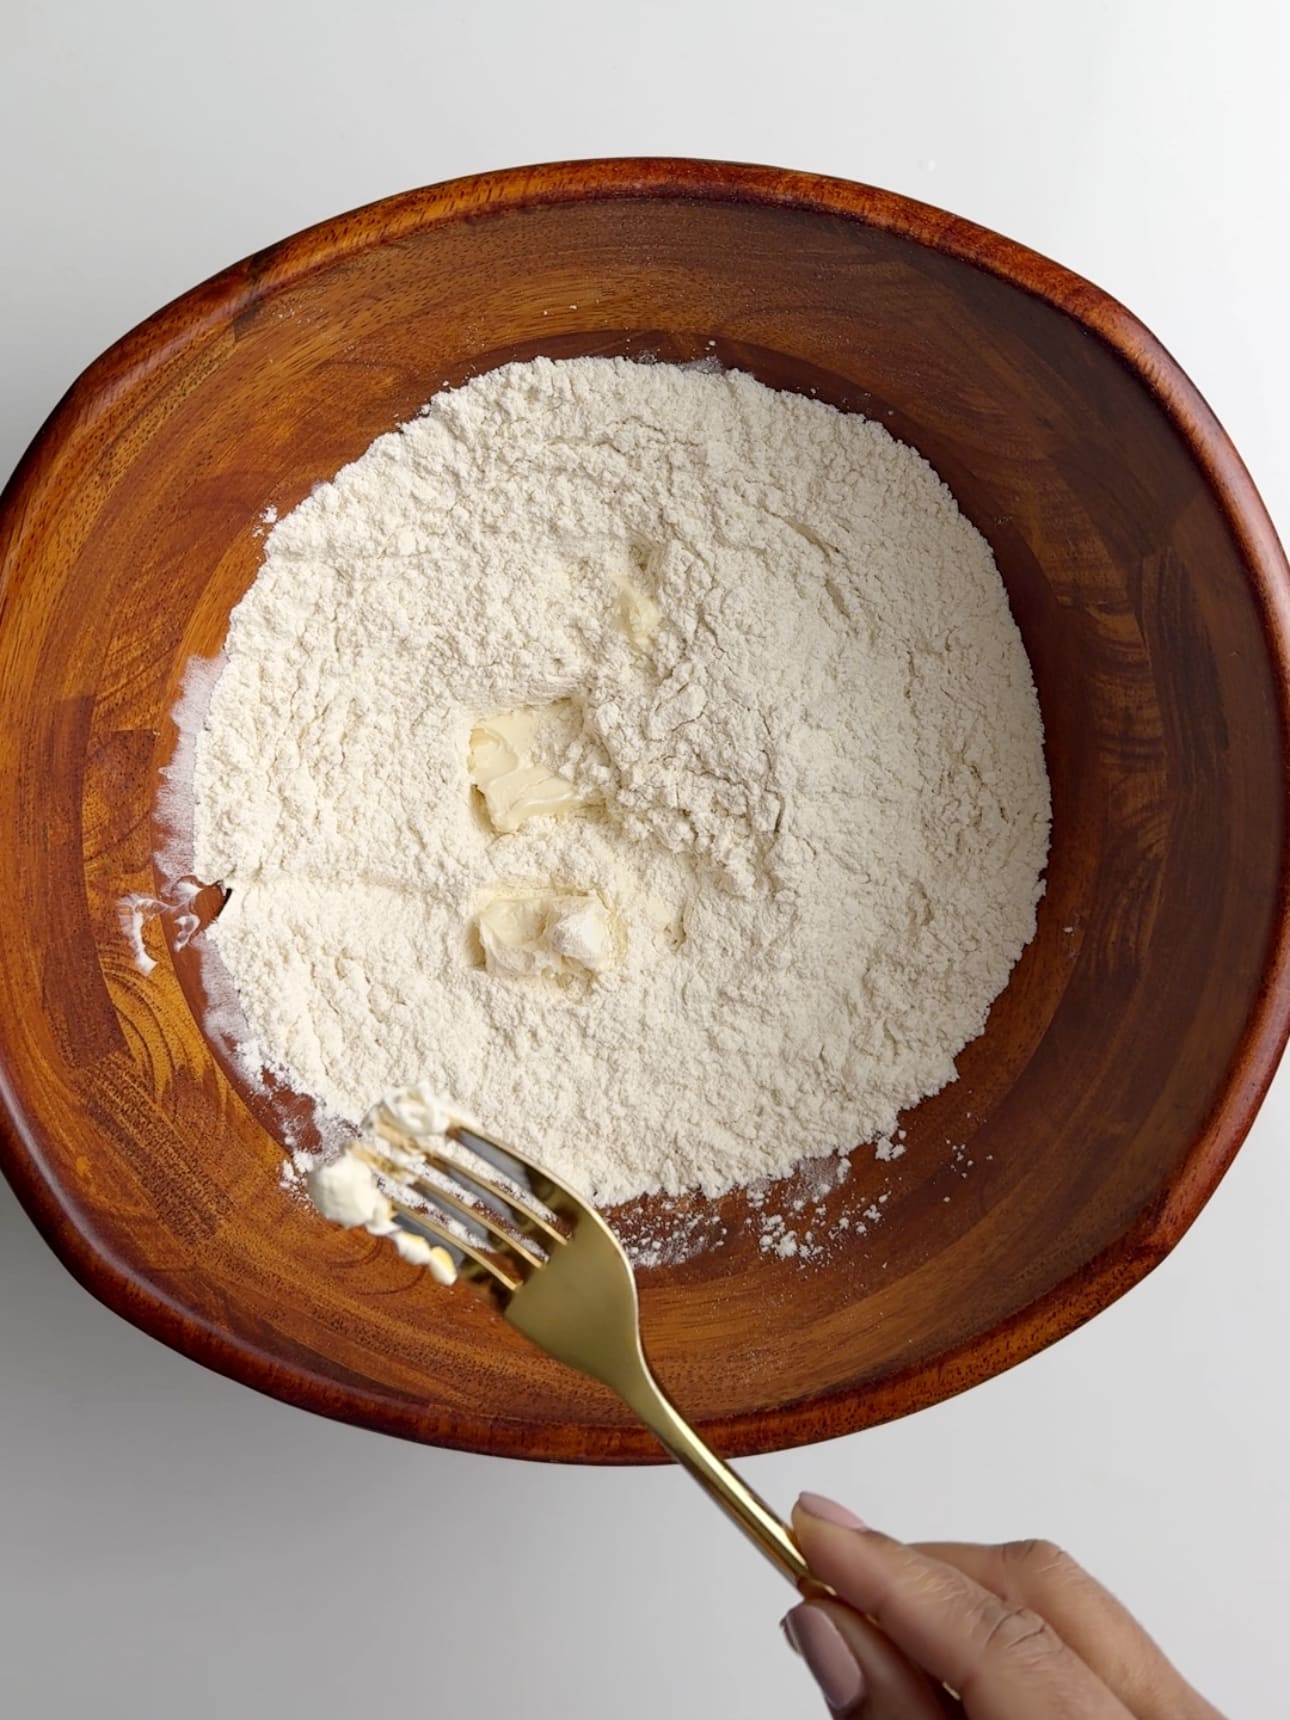
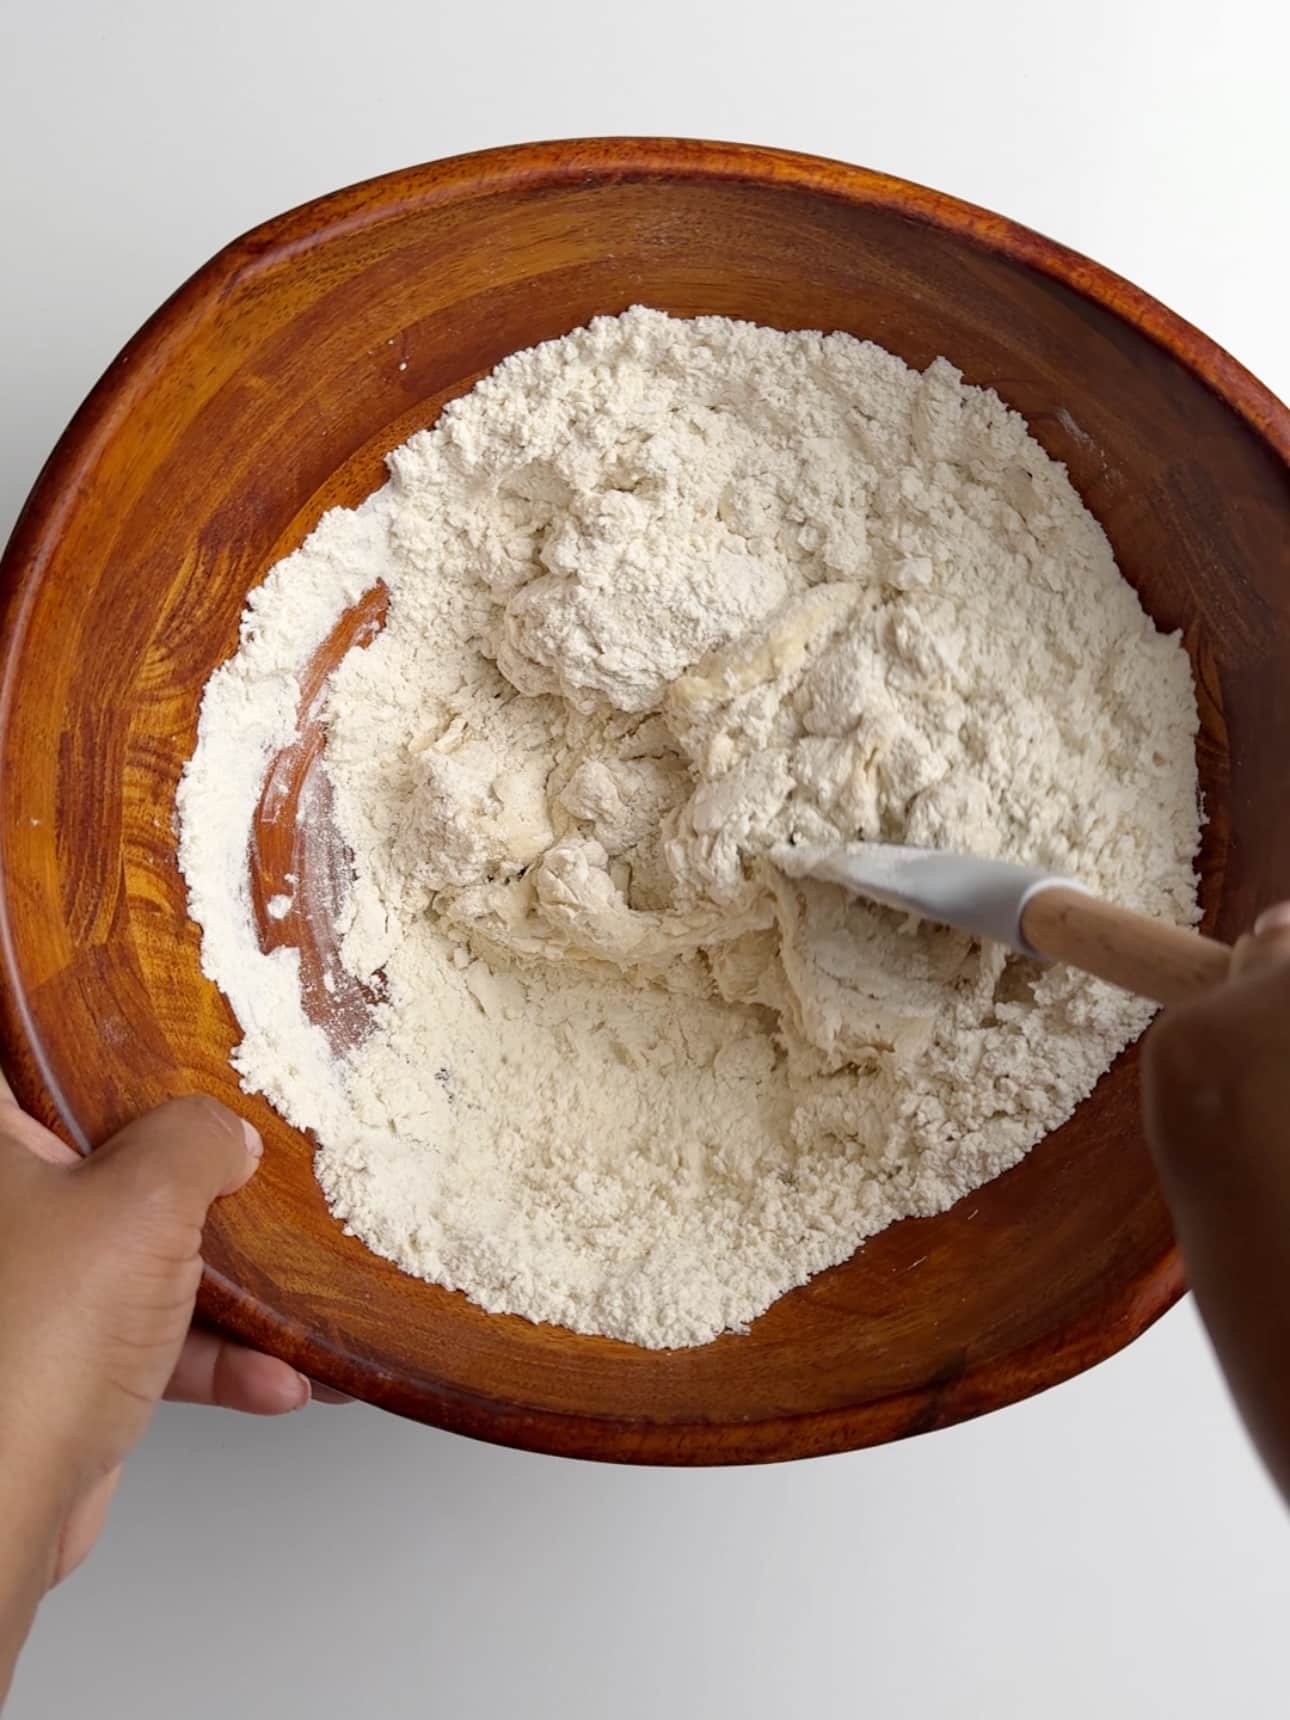
While the yeast is blooming, add the flour and salt to a large mixing bowl and mix to combine. Using a fork or your finger tips cut the room temperature butter into the flour.
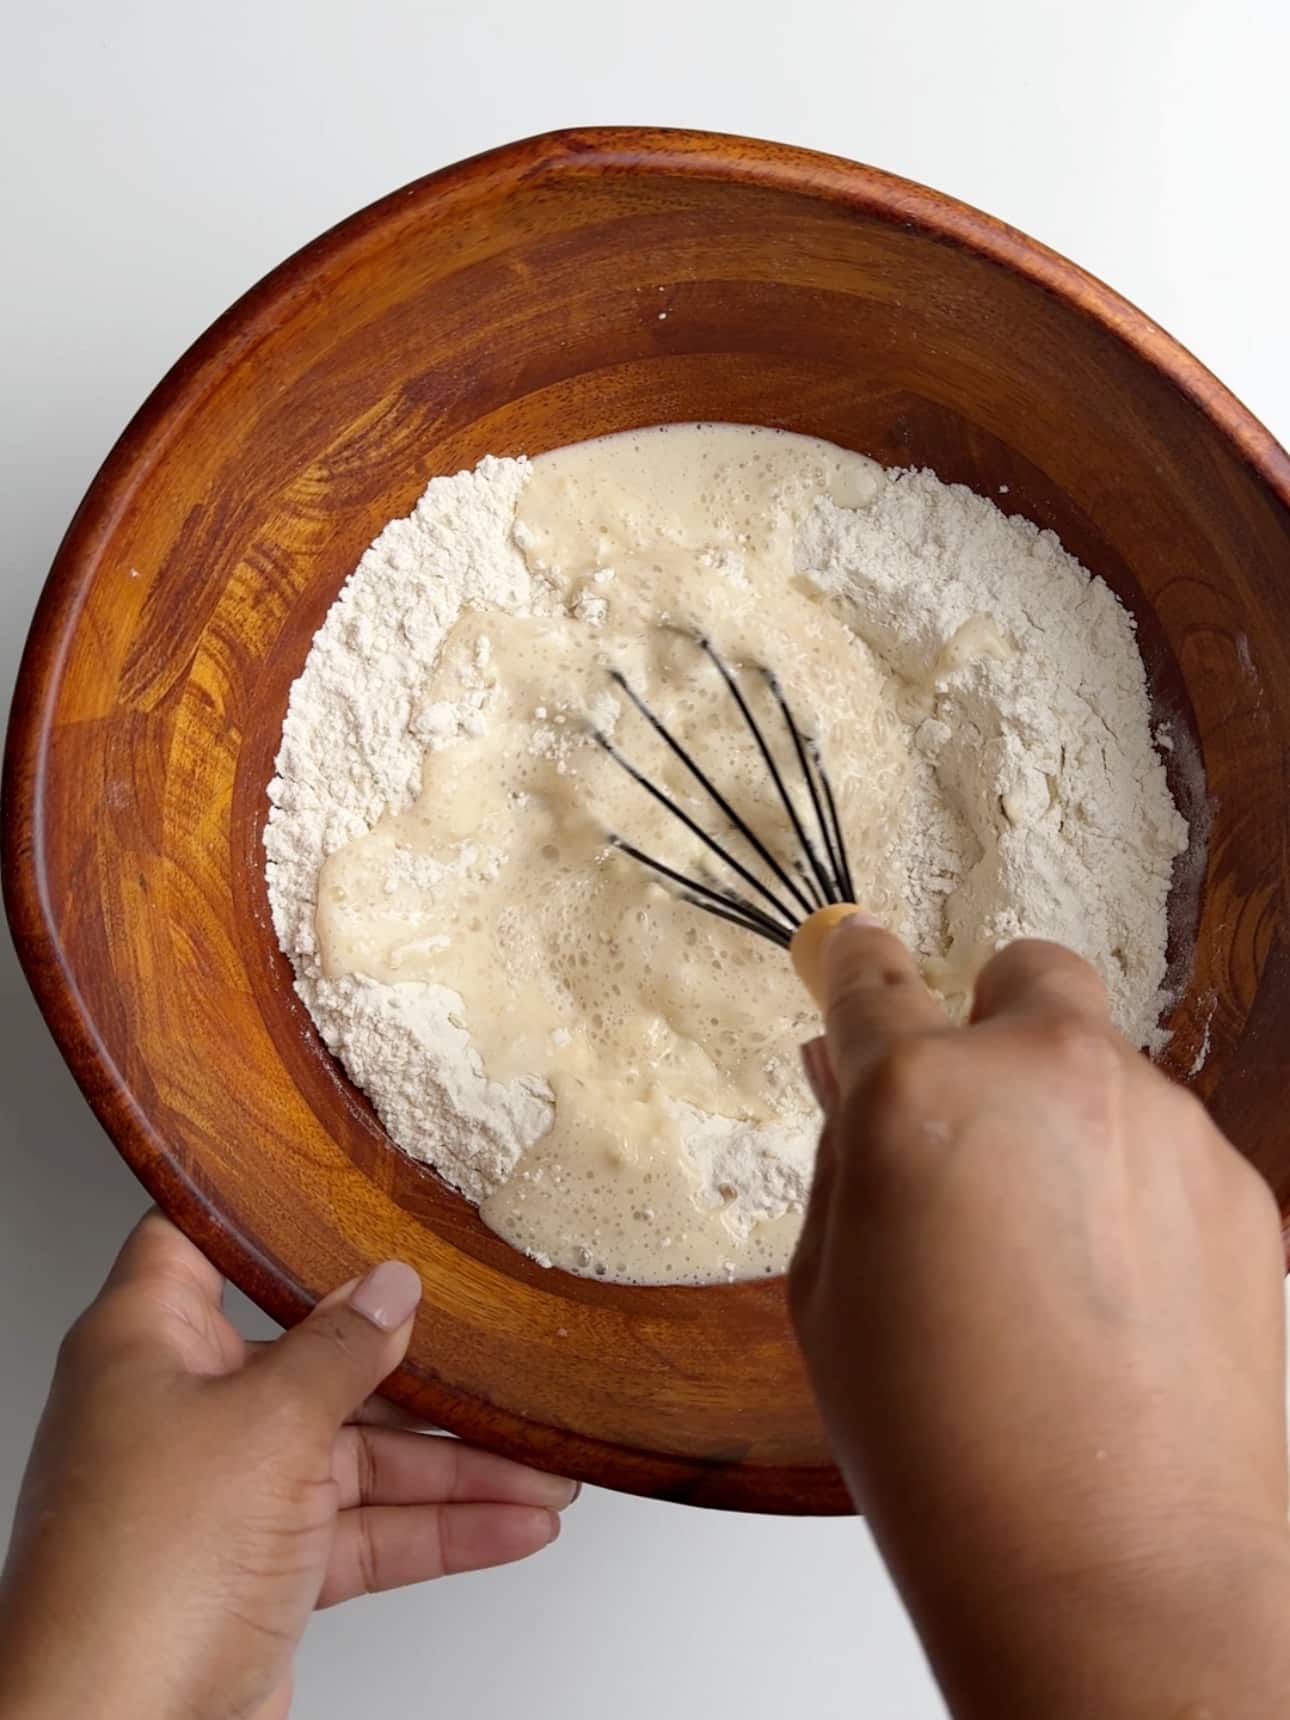
Then make a well in the center of the flour and add the bloomed yeast. Using a whisk, mix until there is a pancake like consistency.
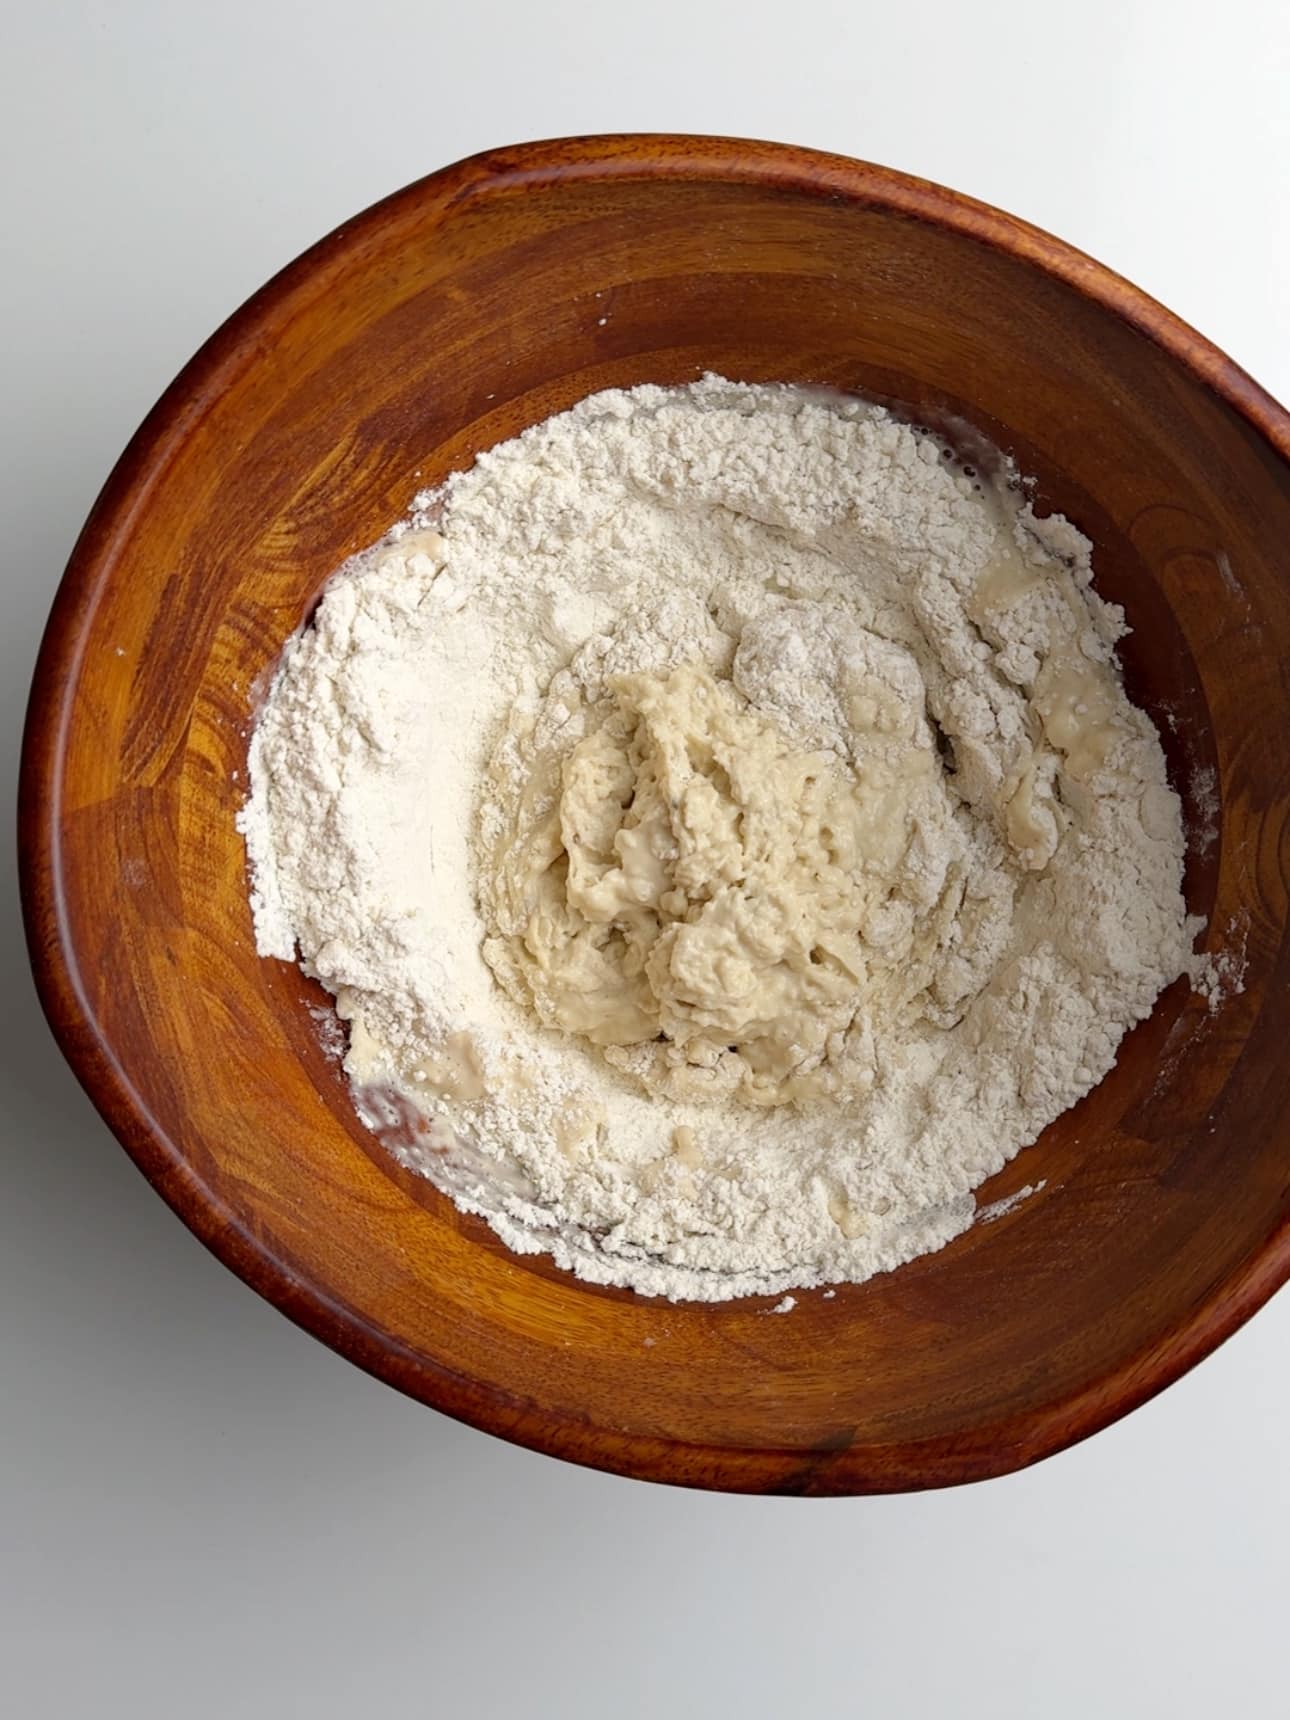
Switch to a rubber spatula or your hands and pulling flour from the edges, mix in to make a soft dough.
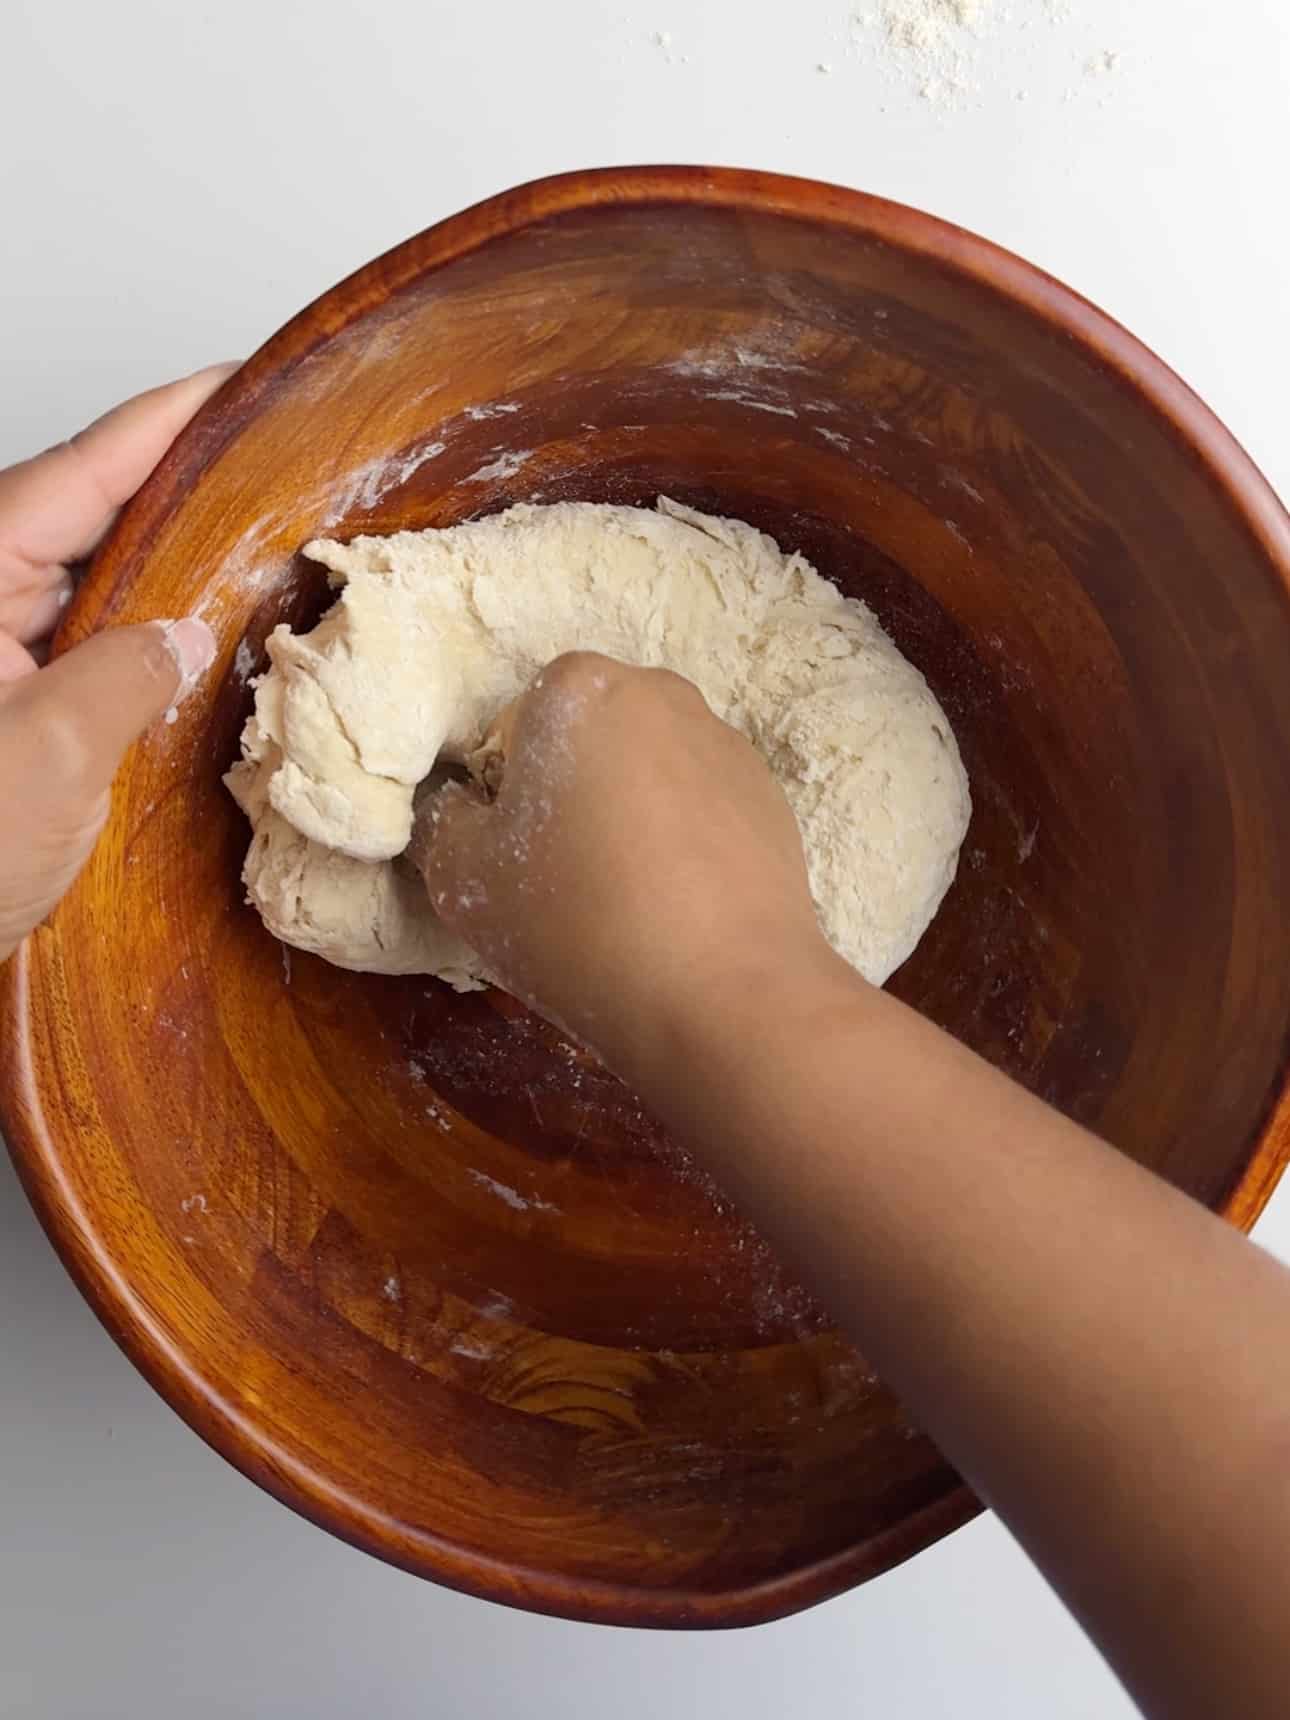
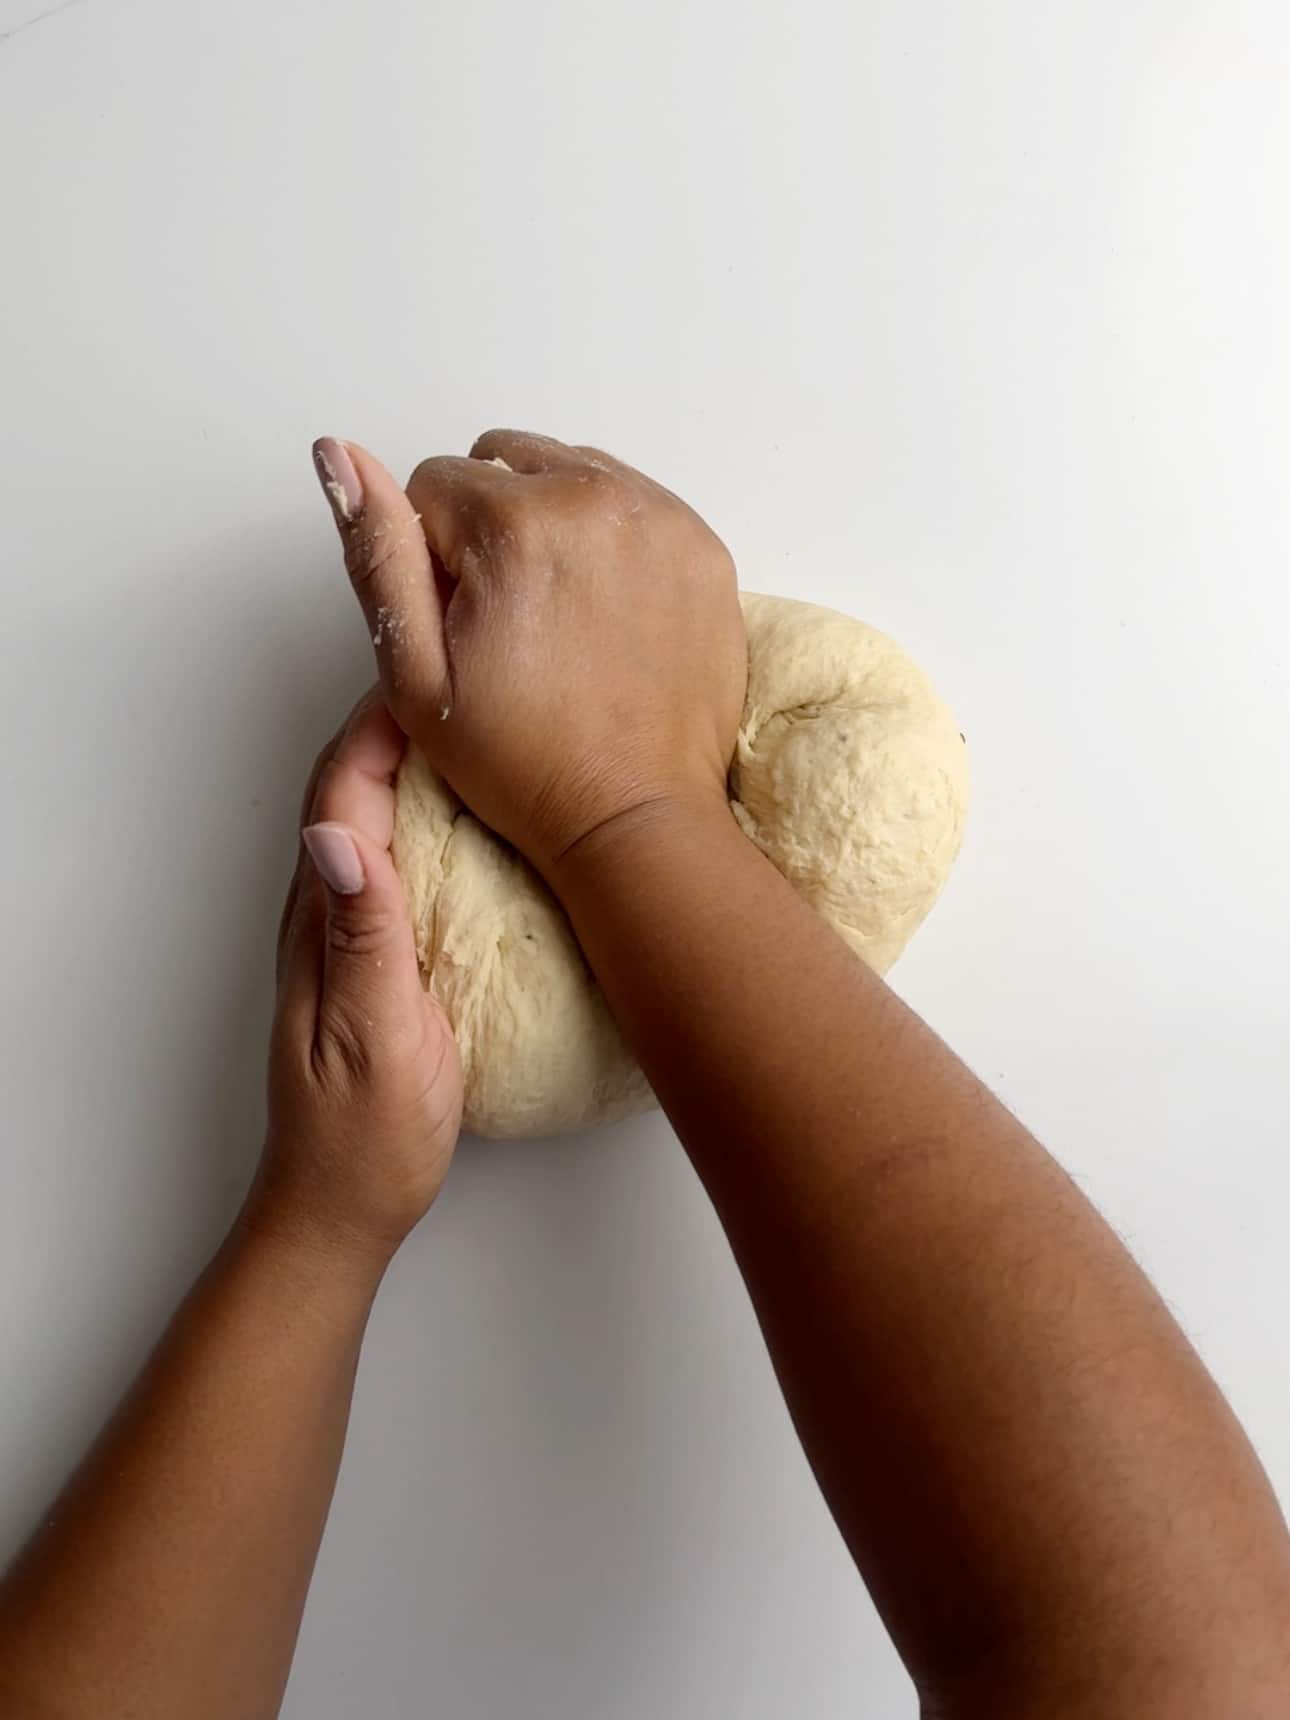
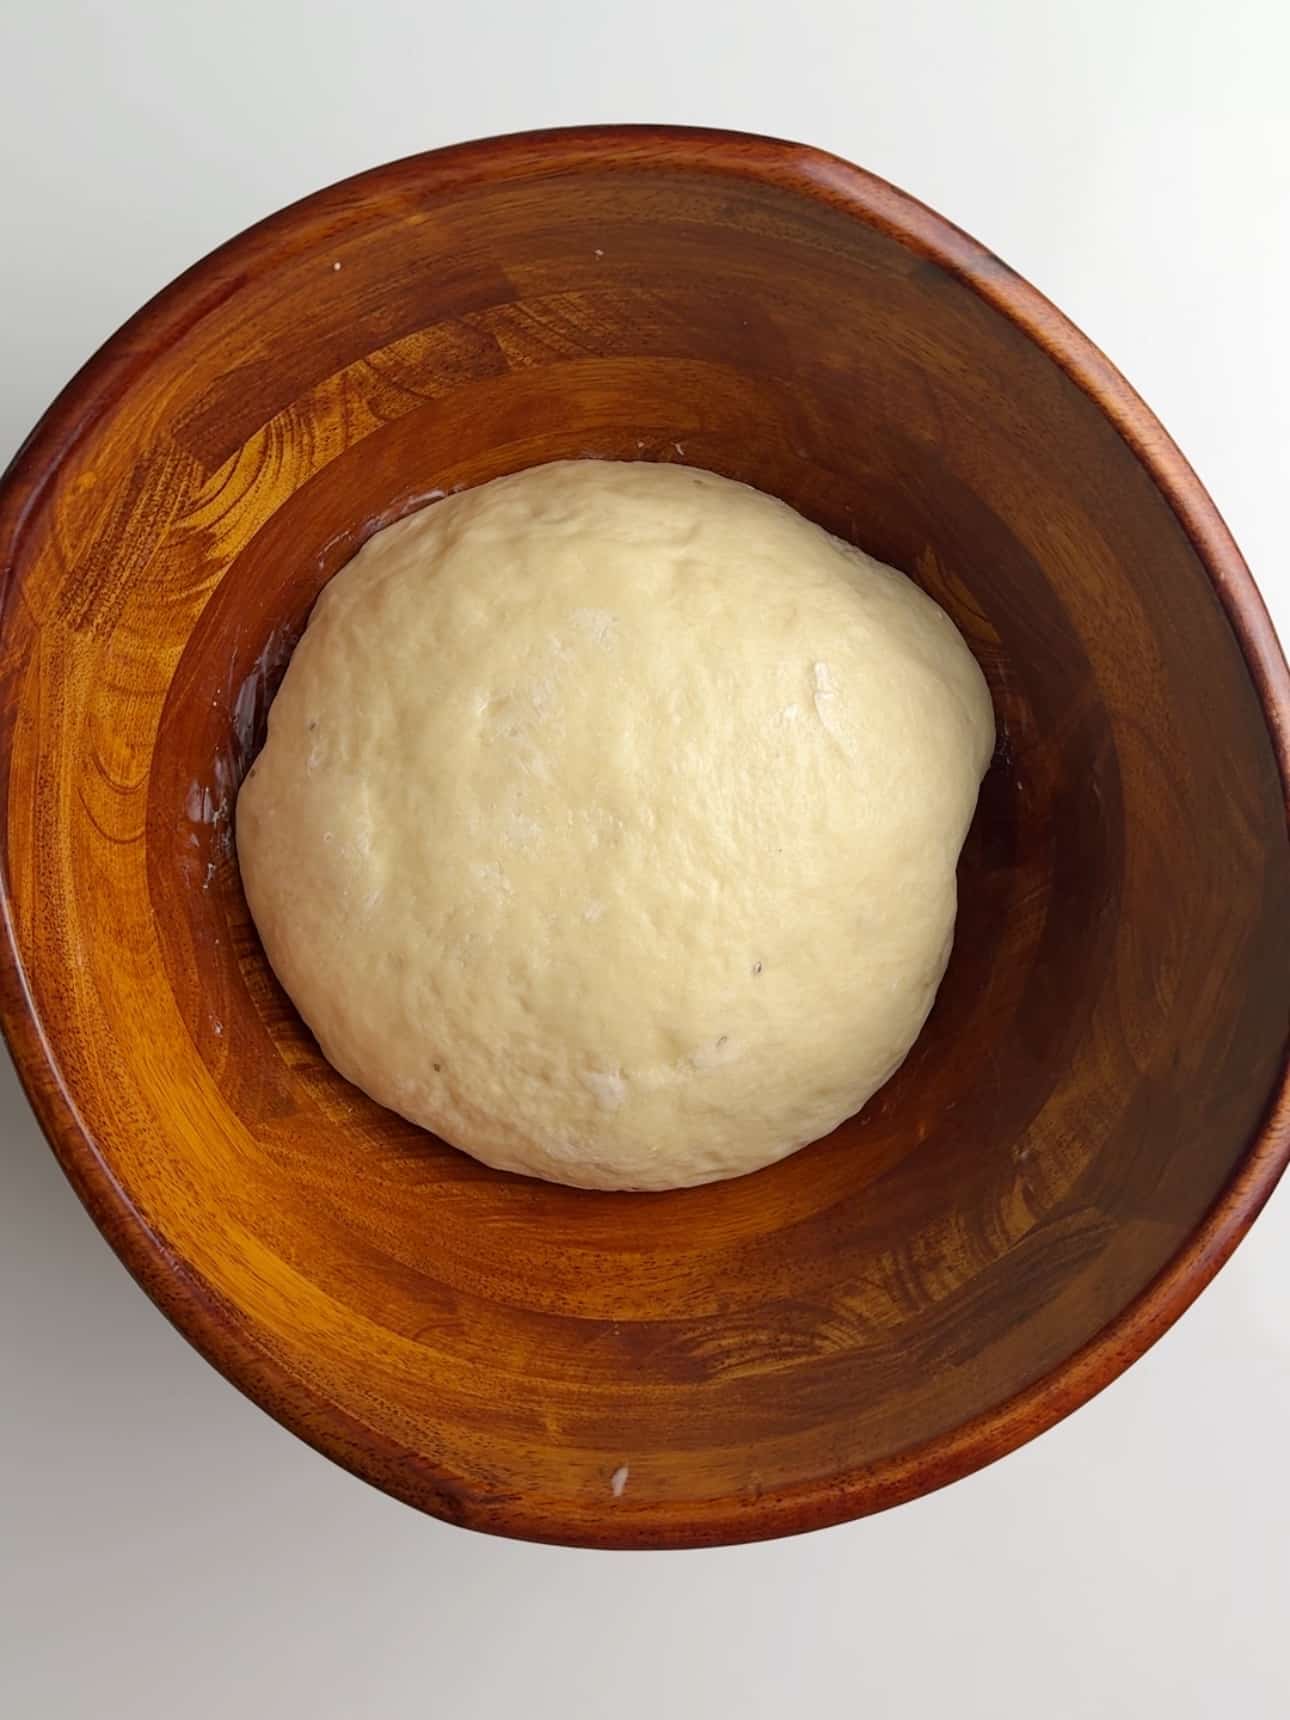
Turn the dough onto a floured surface and knead into a smooth ball or until it bounces back when touched.

Proof the Dough for Plait Bread
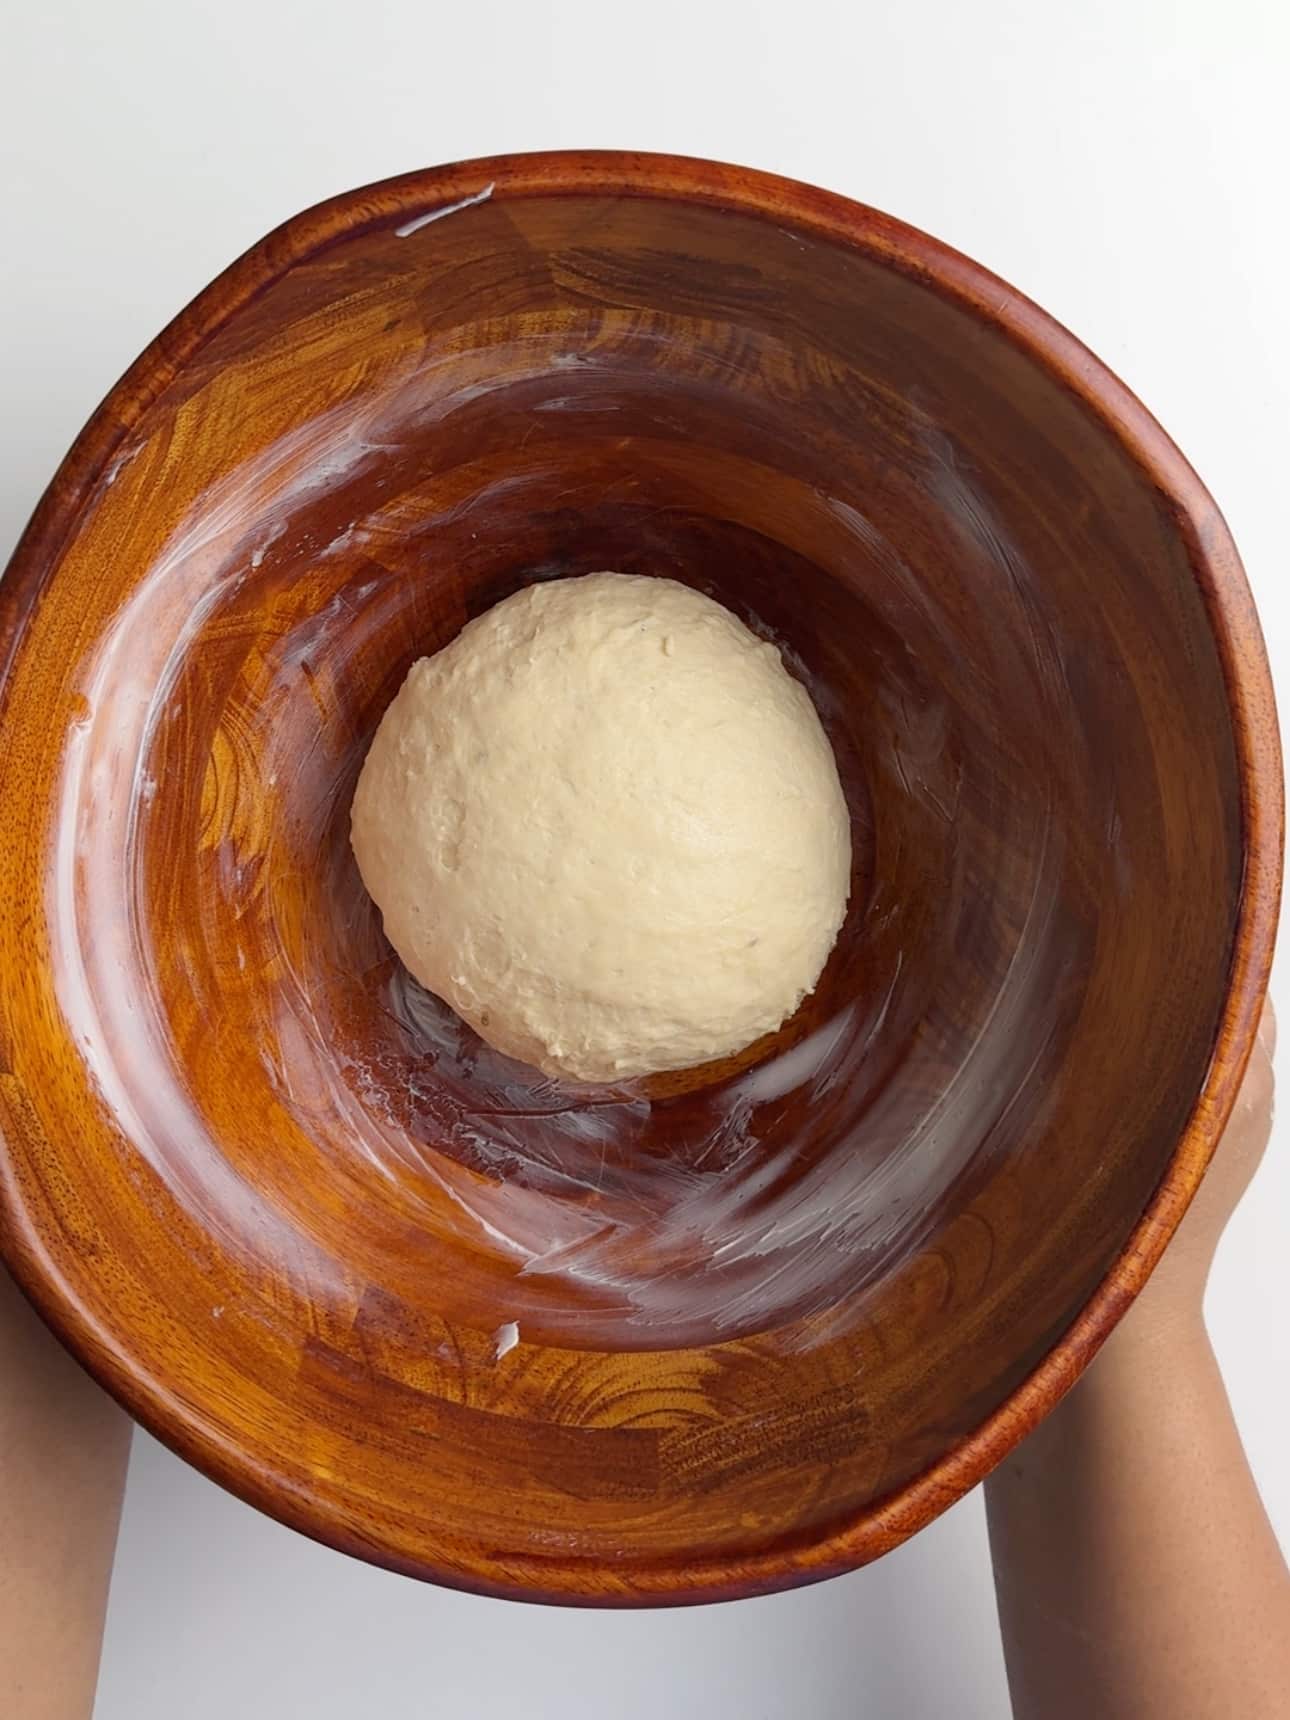
For great plait bread, proof twice. During the first proof, I sometimes put my plait bread dough in a warm oven. Warm the oven up to 200 °F then turn it off. Place your kneaded dough in a greased bowl, cover and let it rest in the warm oven for 45 minutes. This gives the bread a really good rise.
Leave the bread at room temperature for the second proof and let it proof for a full hour. This is a braided bread and any forced proofing will cause the bread to rip.
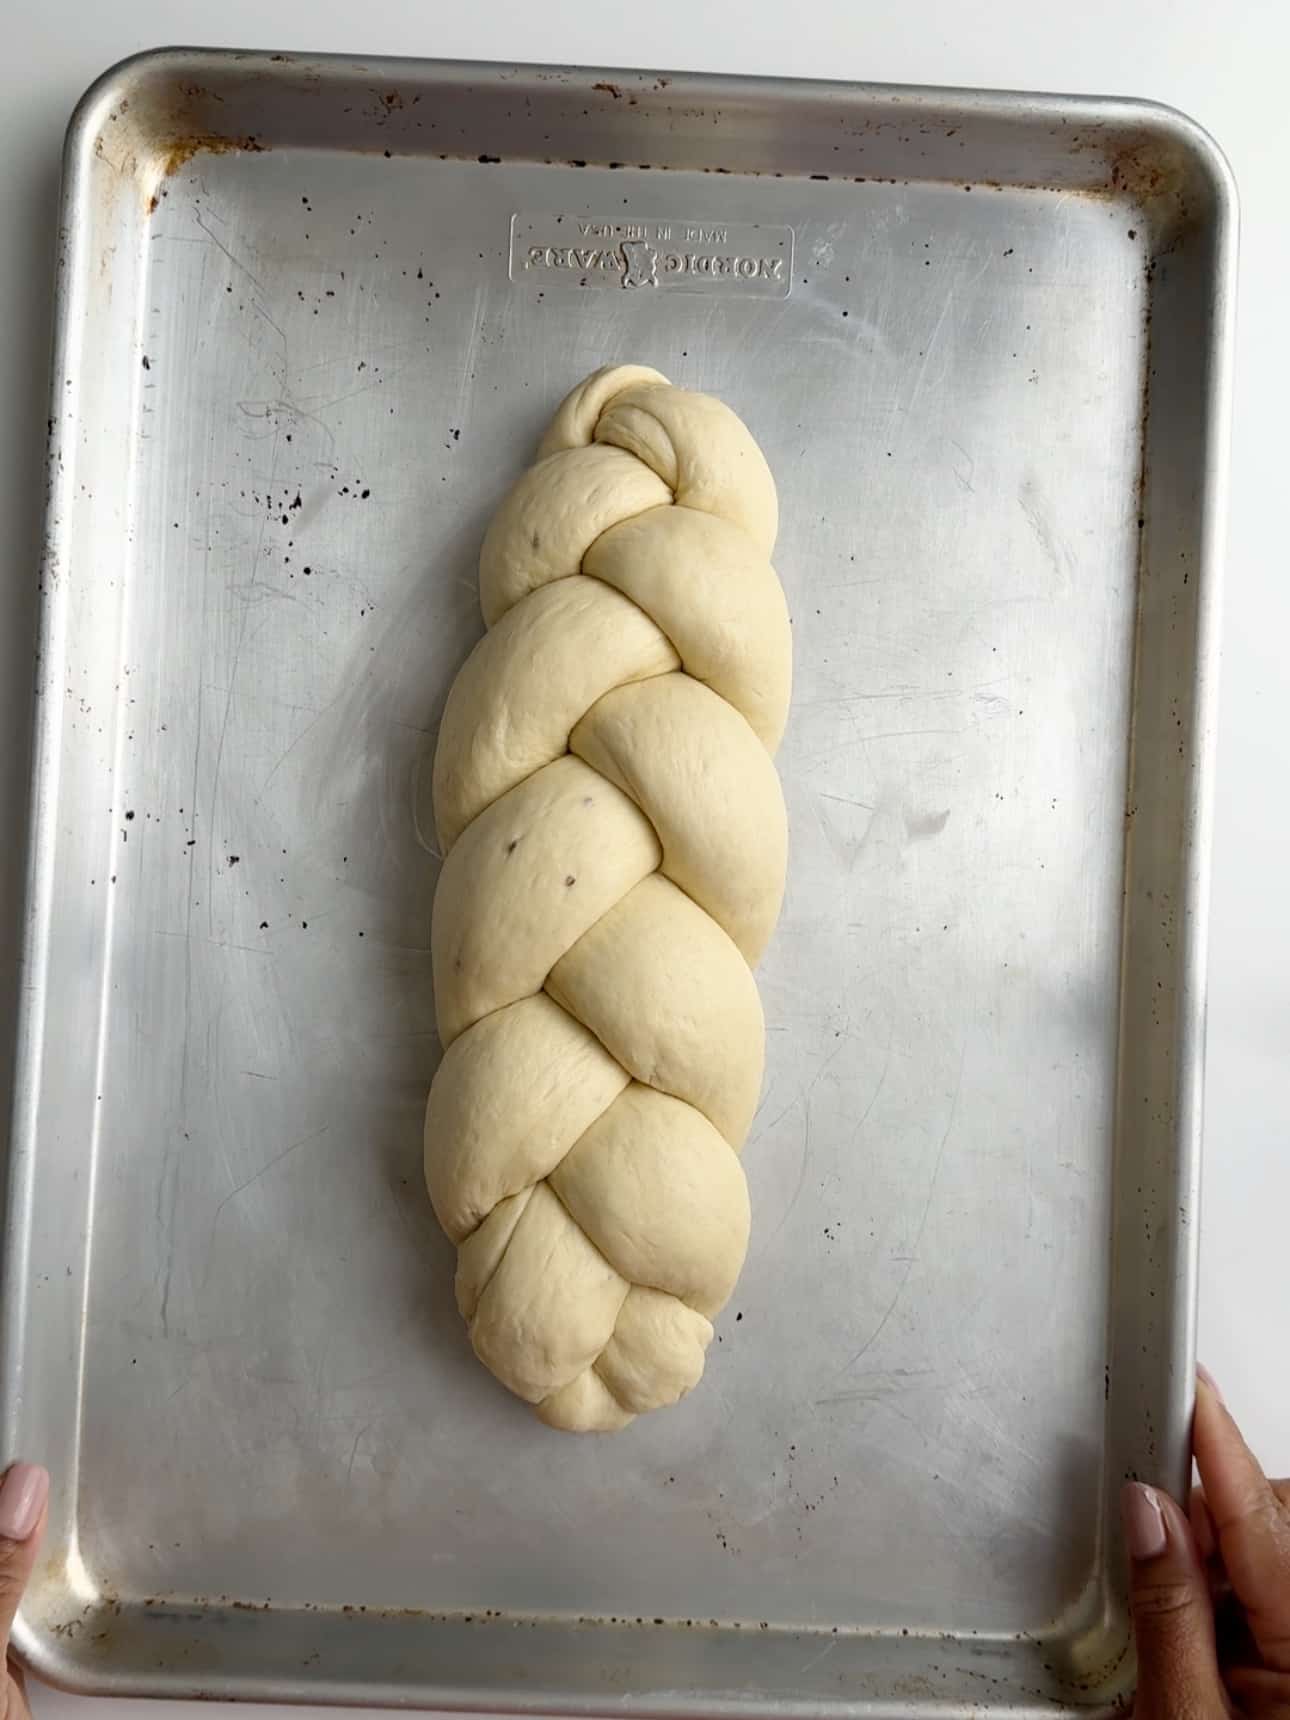
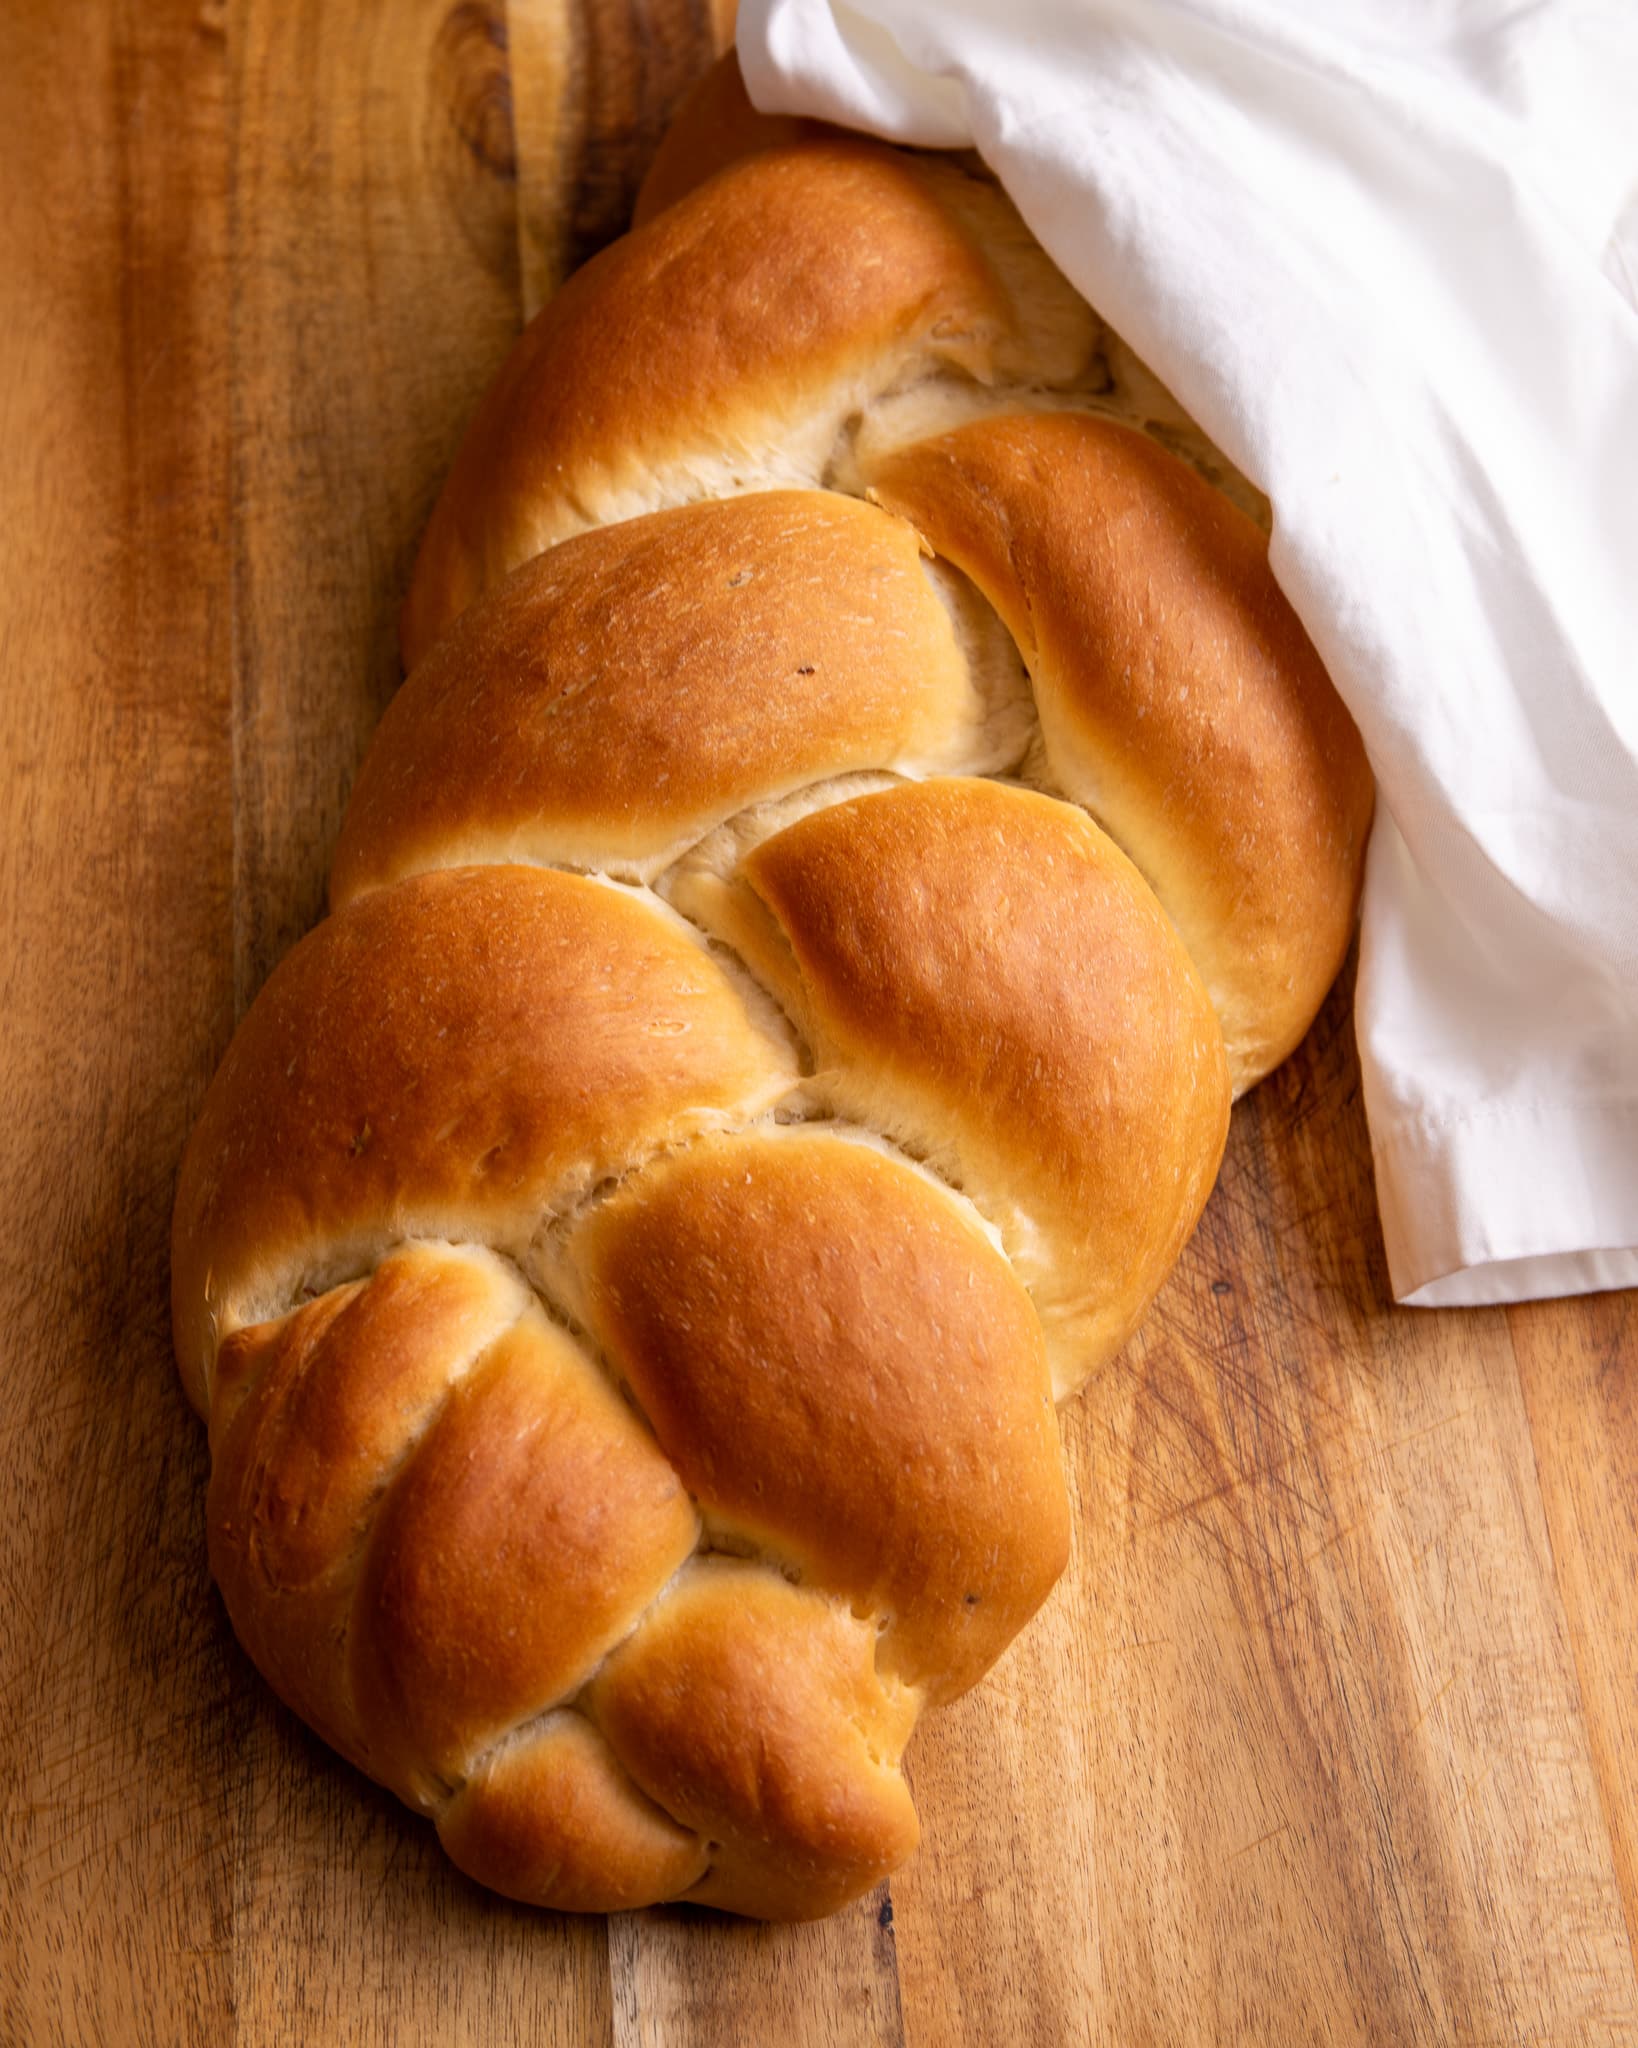
How to braid Plait Bread
Plait bread has a signature three strand braid, also called a plait in Guyana. Some people top that with a single strand, and some people leave it without. There is no right or wrong way, just depends on how your family does it.

Three strand braiding
Braiding the bread takes practice but once you get the hang of it, it’s quite simple. After proofing the dough, punch down then knead into a dough ball.
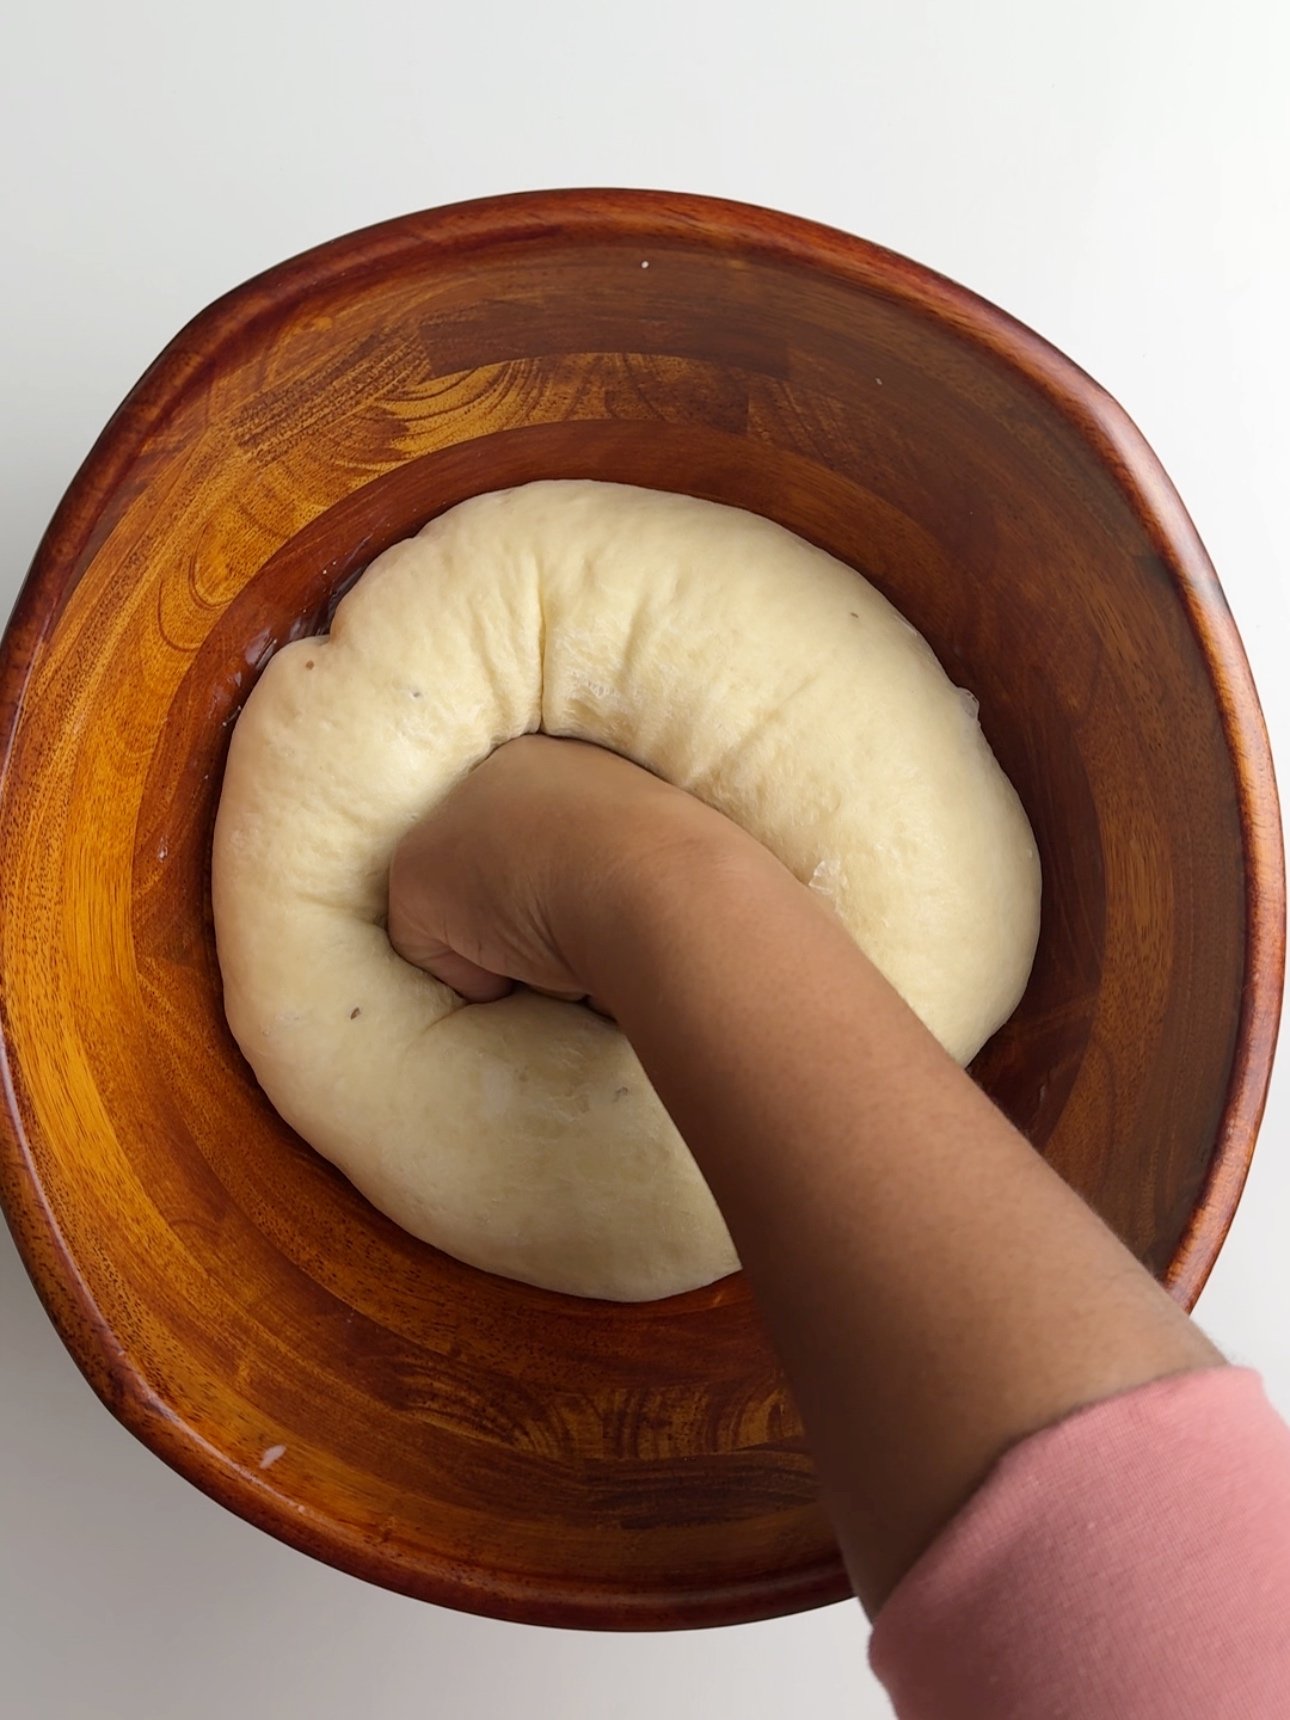
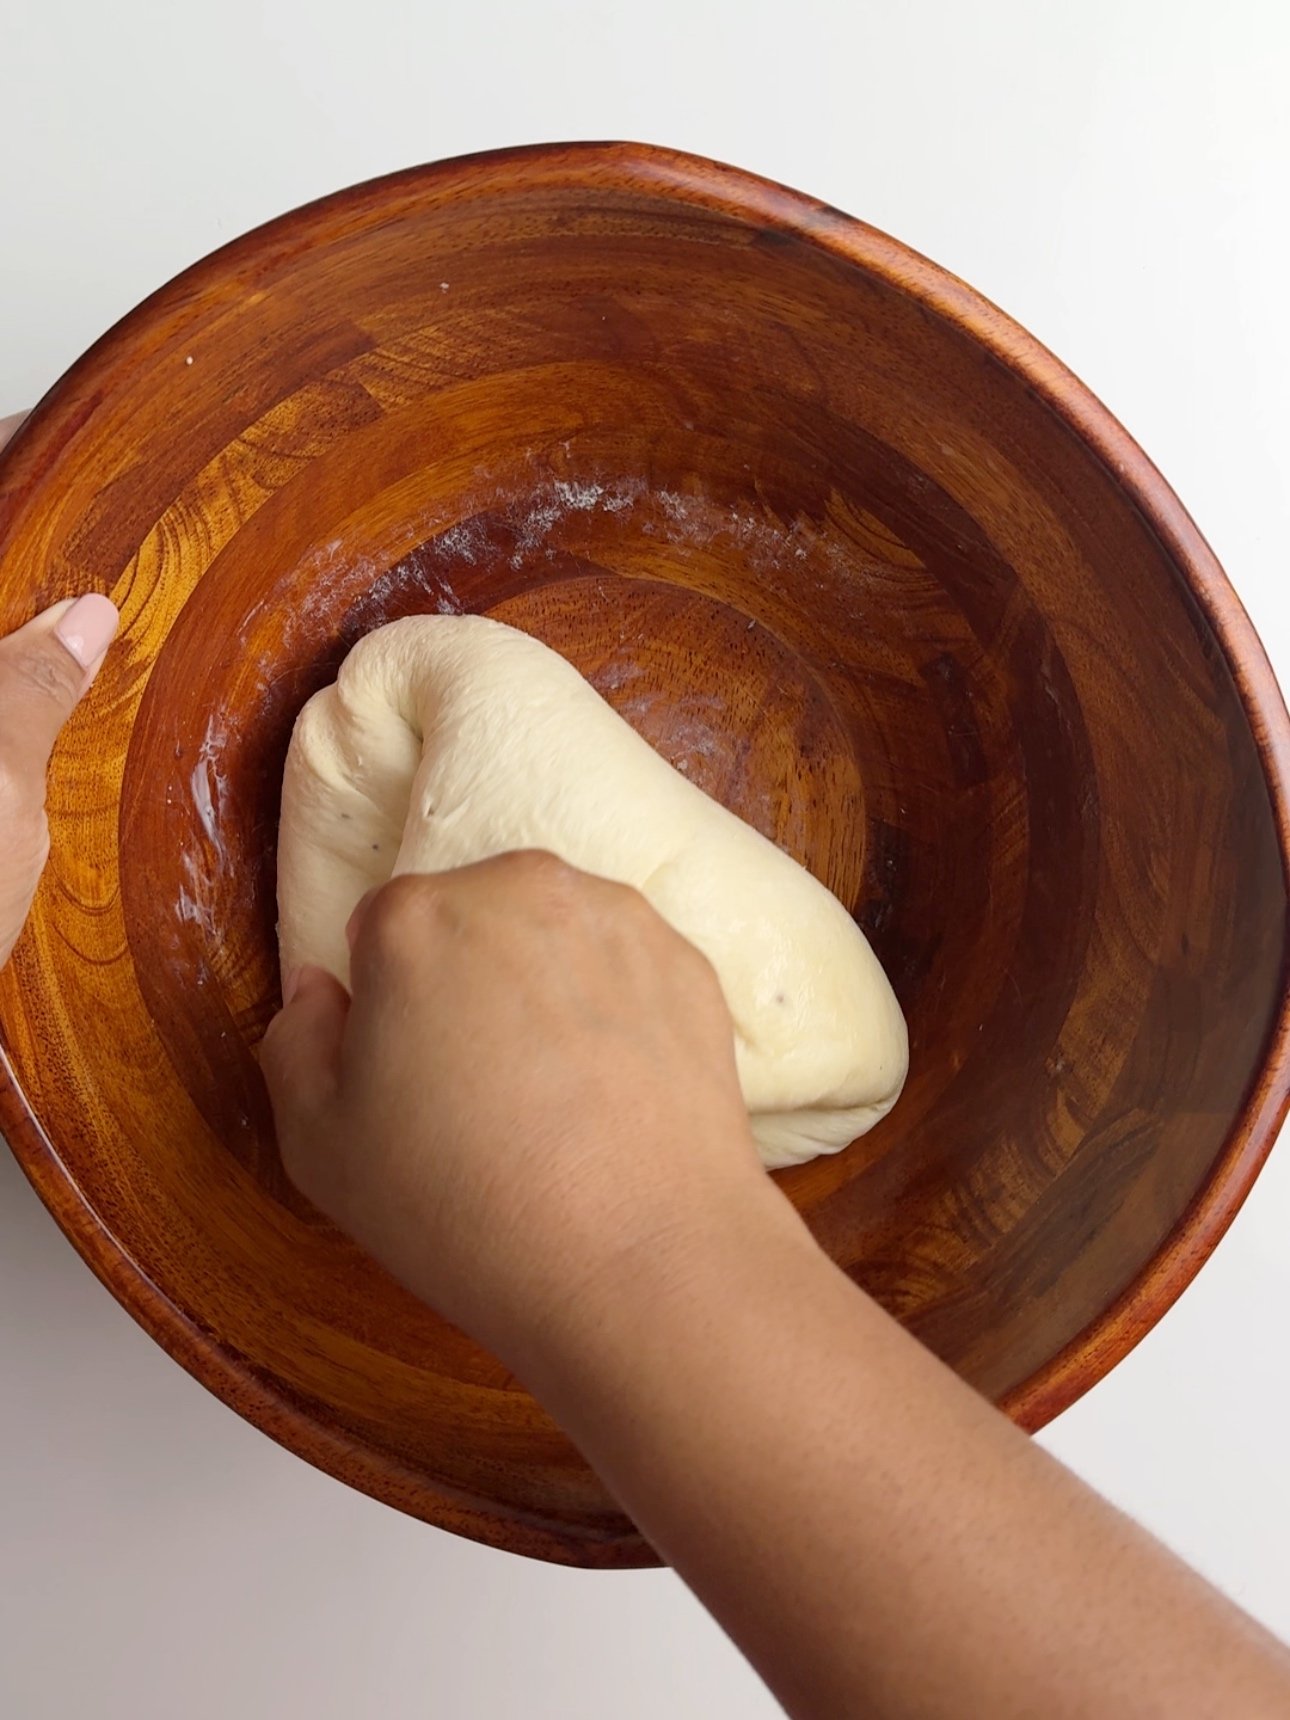
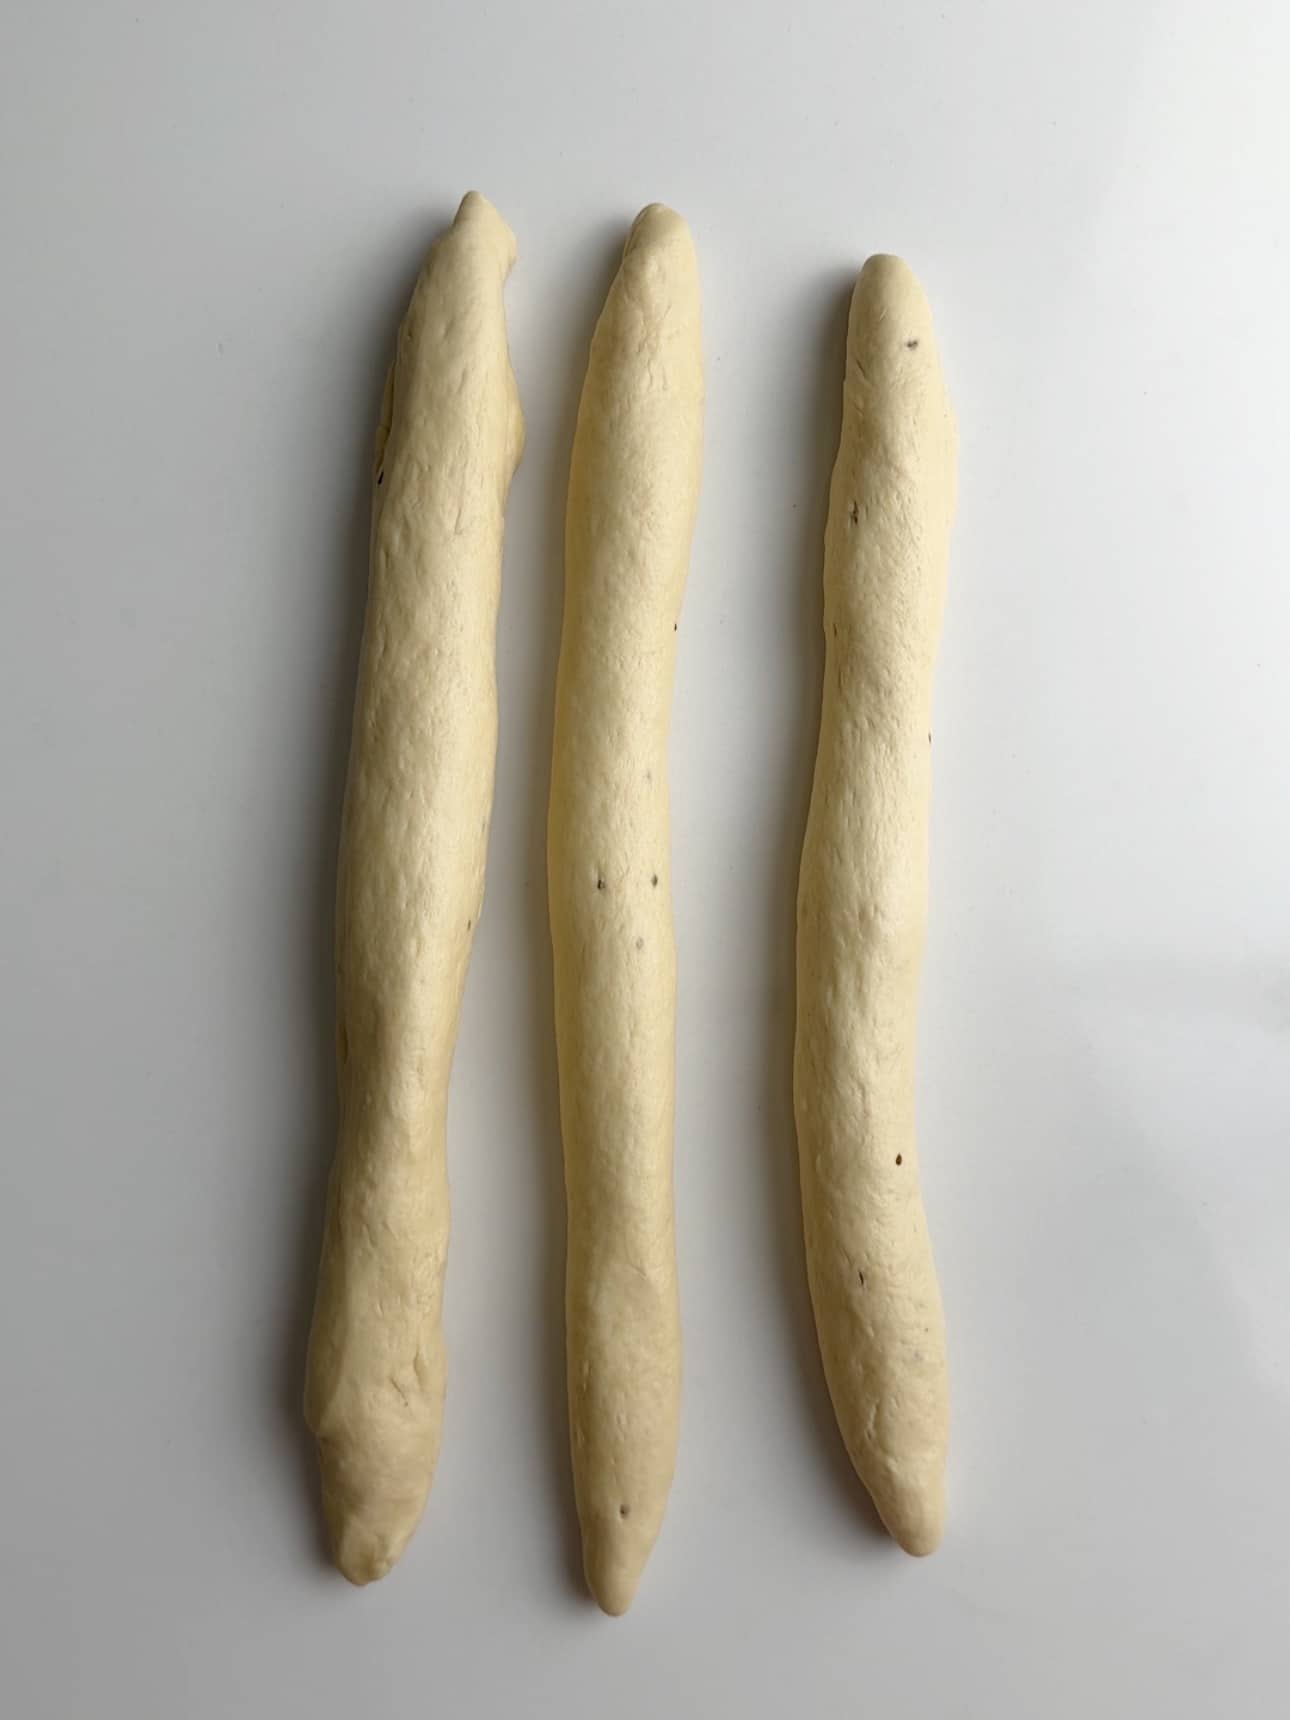
Divide the dough into three or four if you are adding a strand on the top.

Then take each of the large strands and tuck the cut ends into the back to seal it (see below). This helps to create a smooth strand.
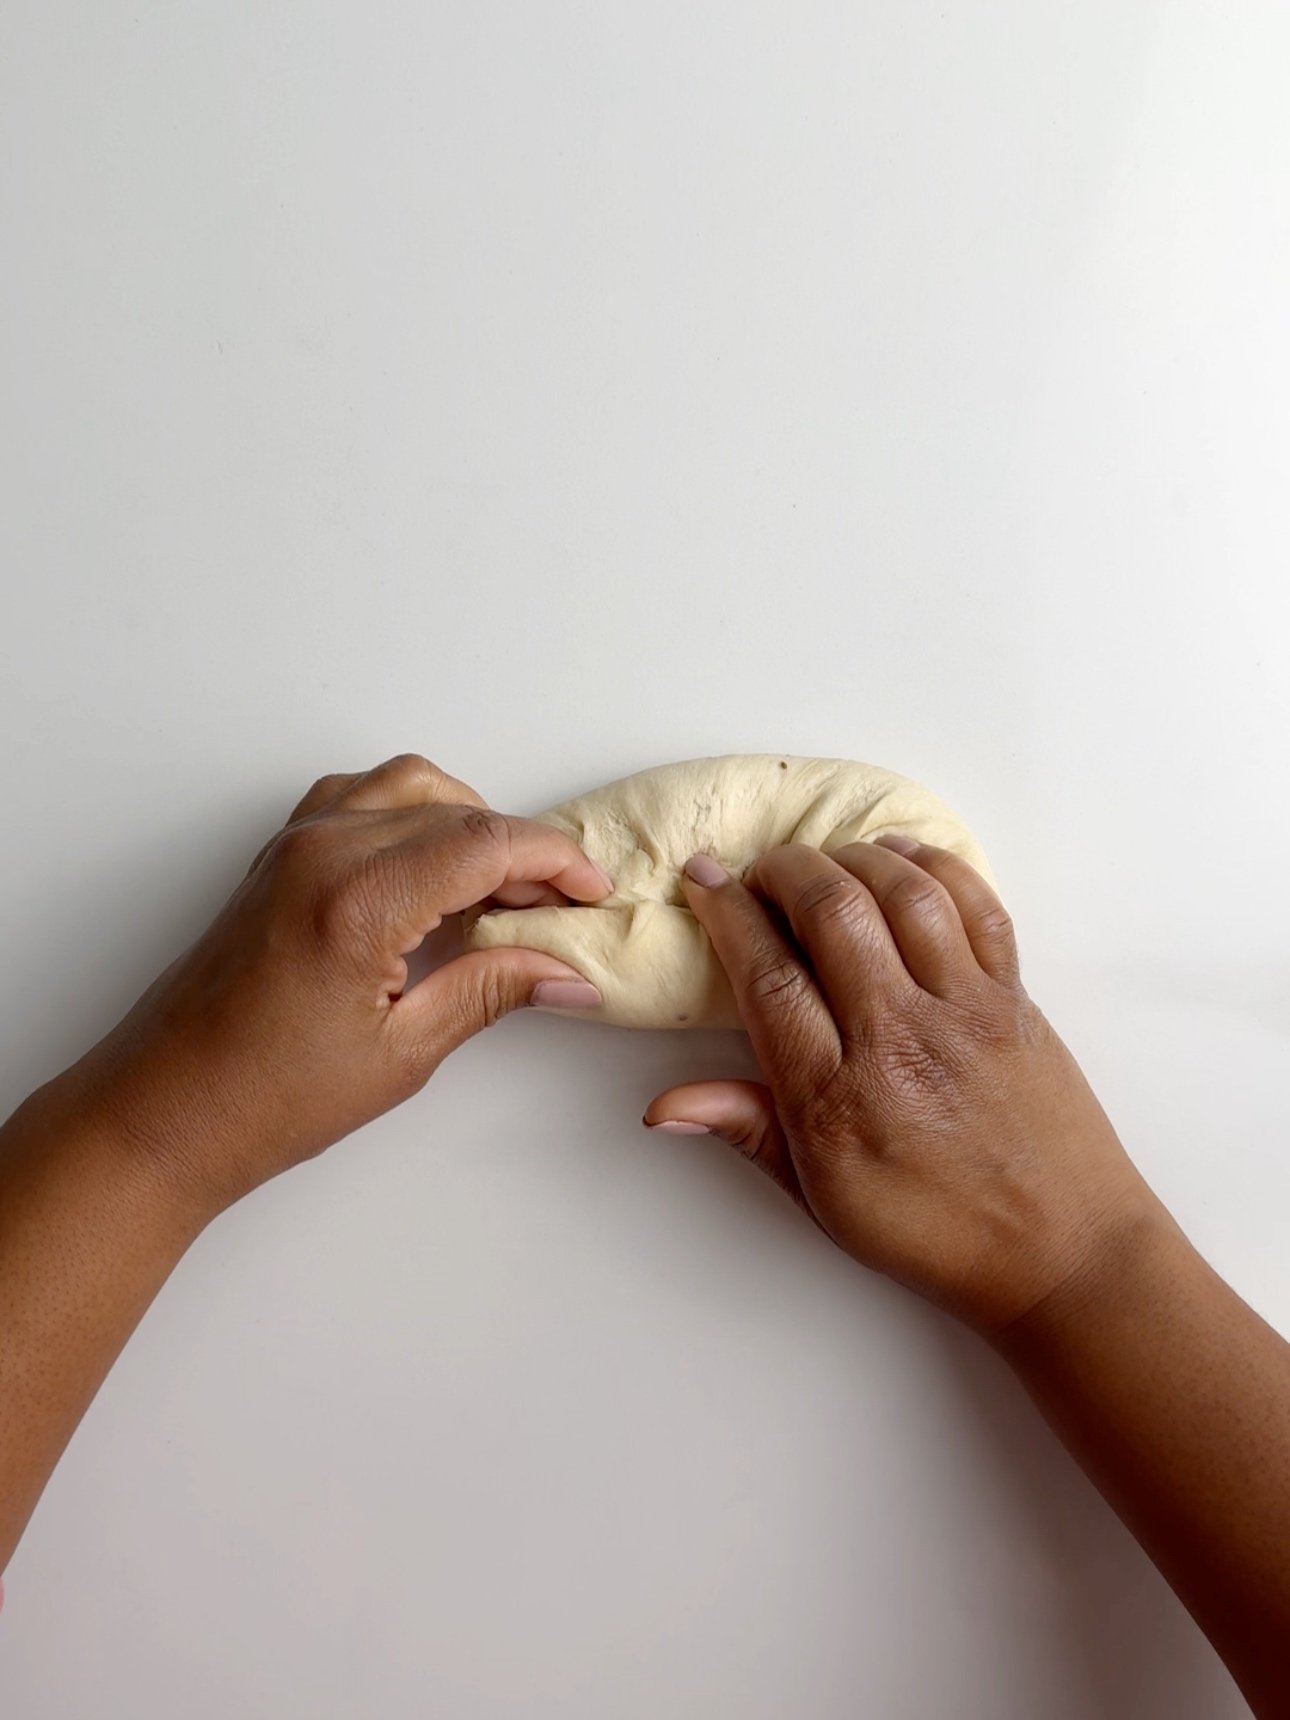
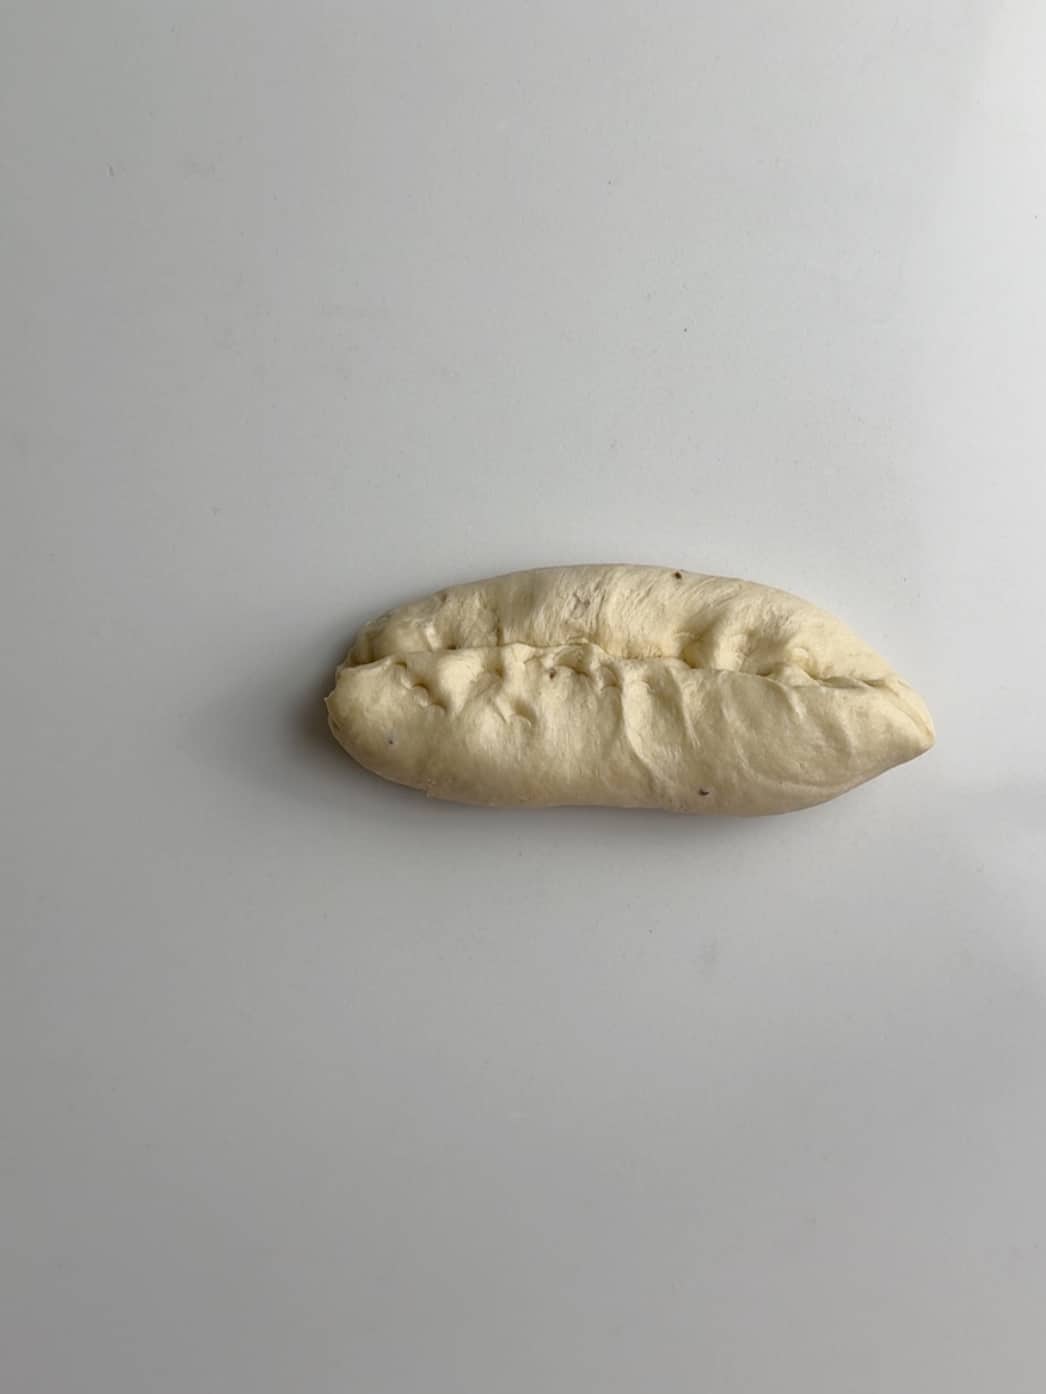
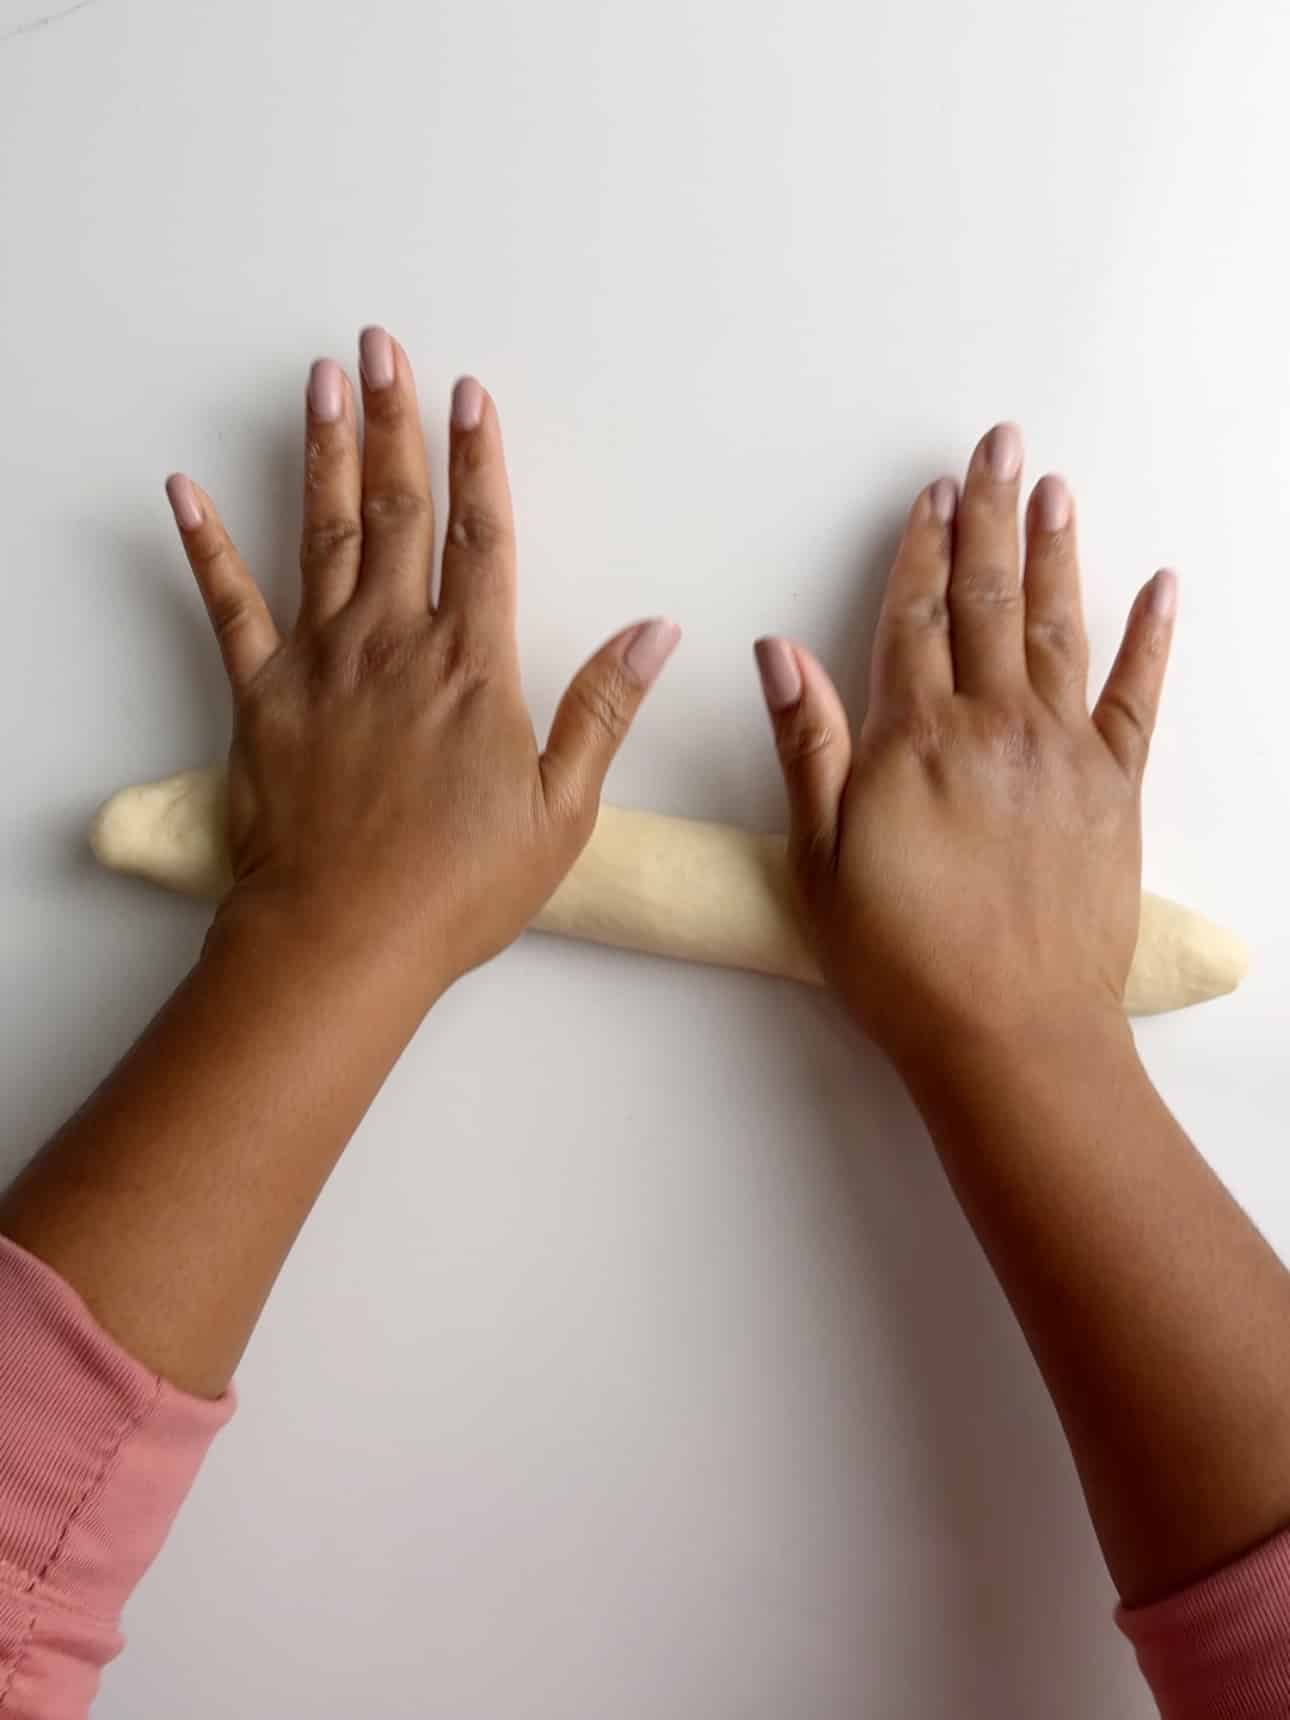
Then roll the dough into a long. Keeping the tucked in ends at the bottom and taking care to smooth out any lines or wrinkles.
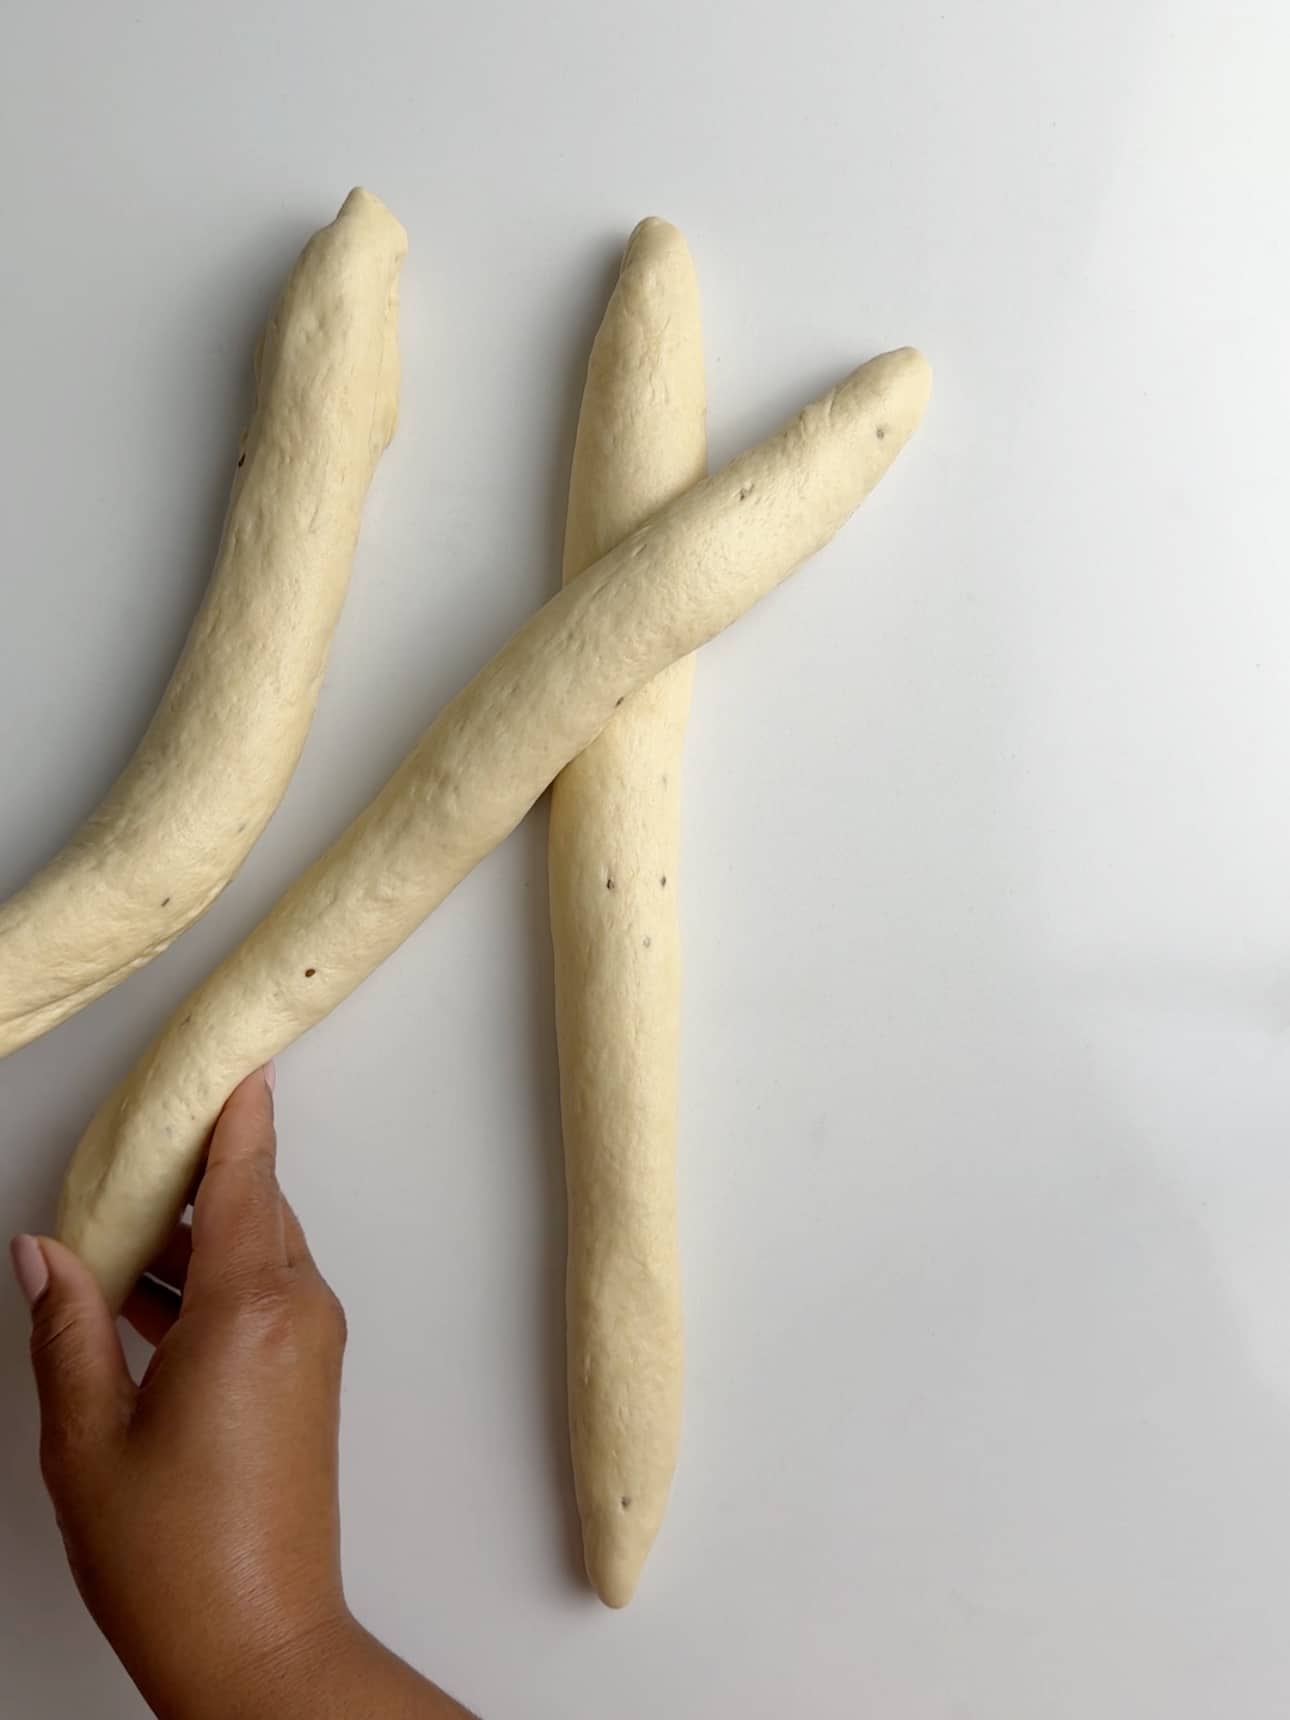
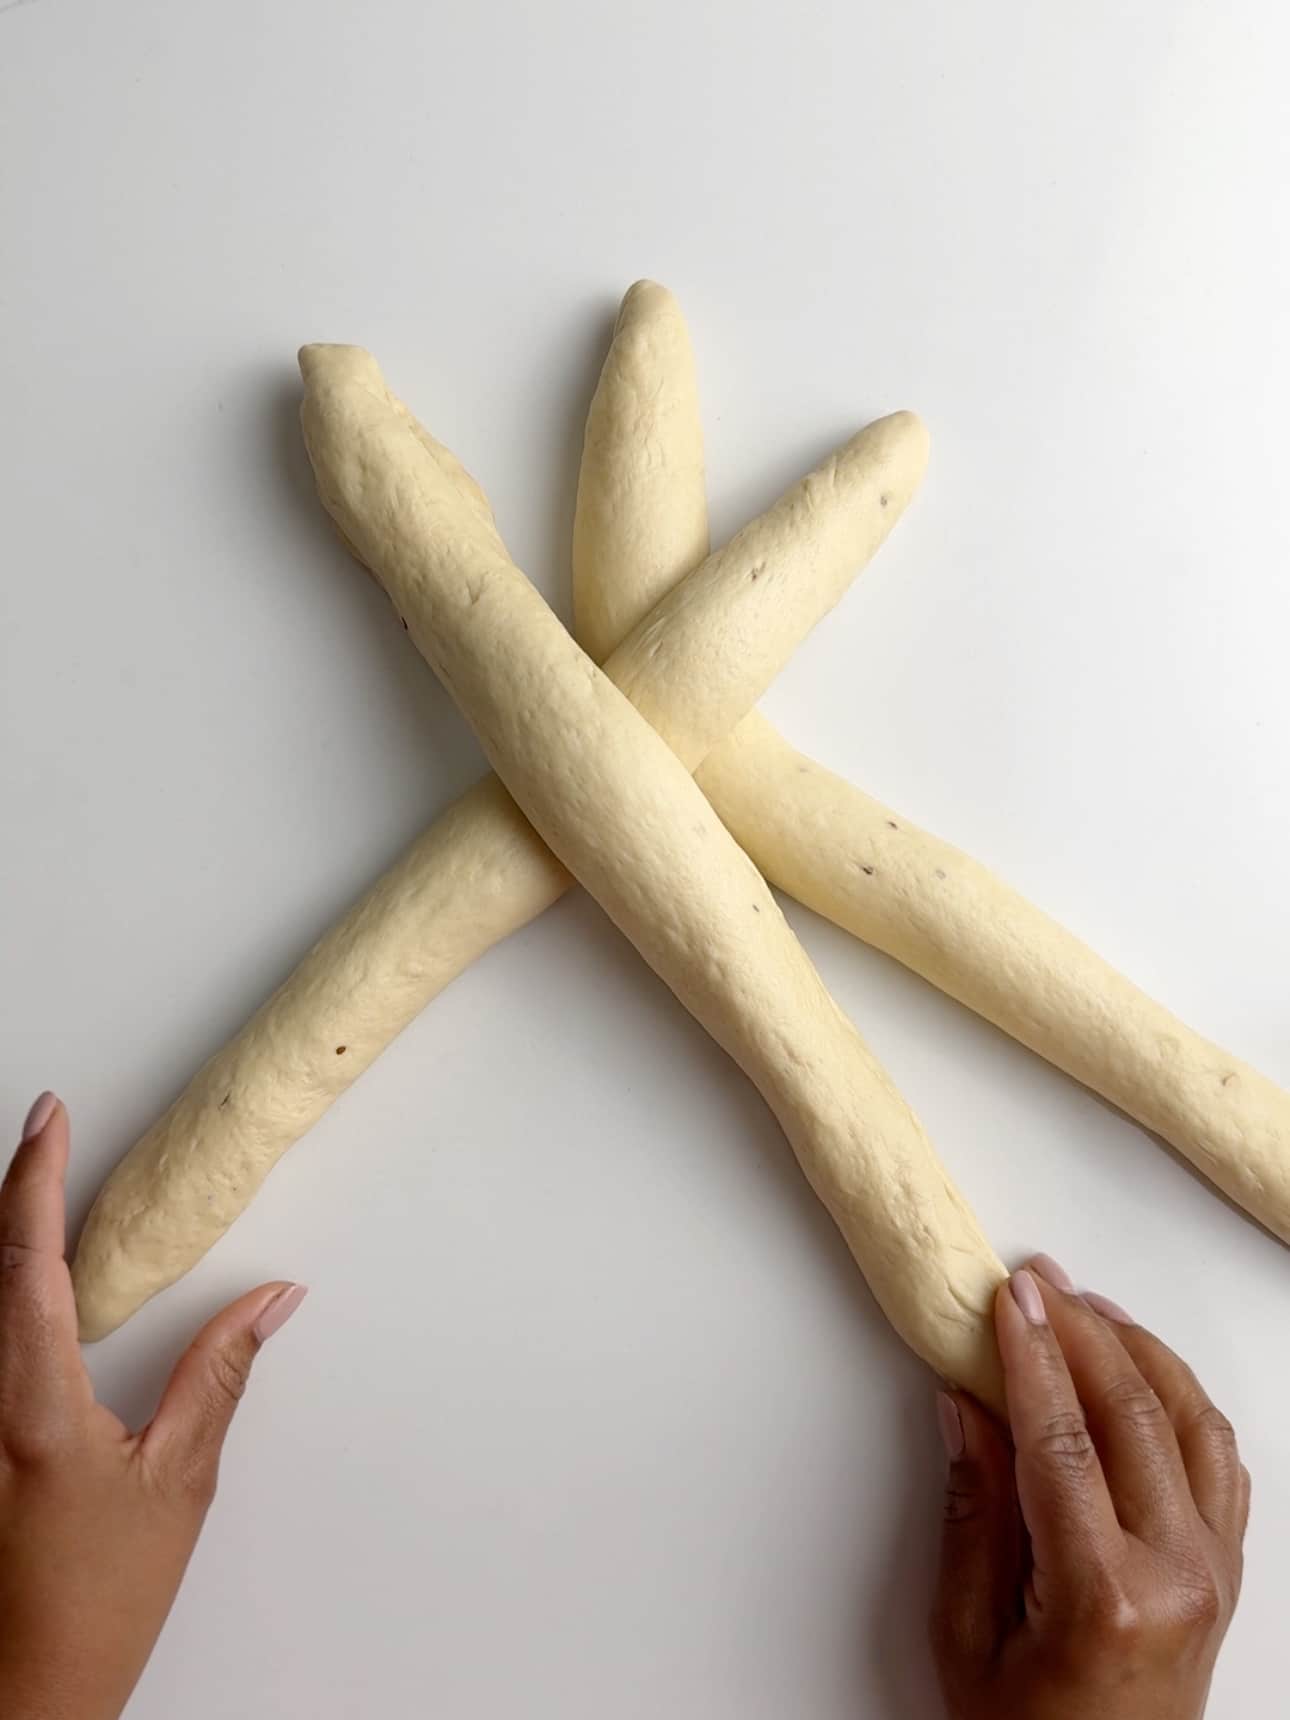
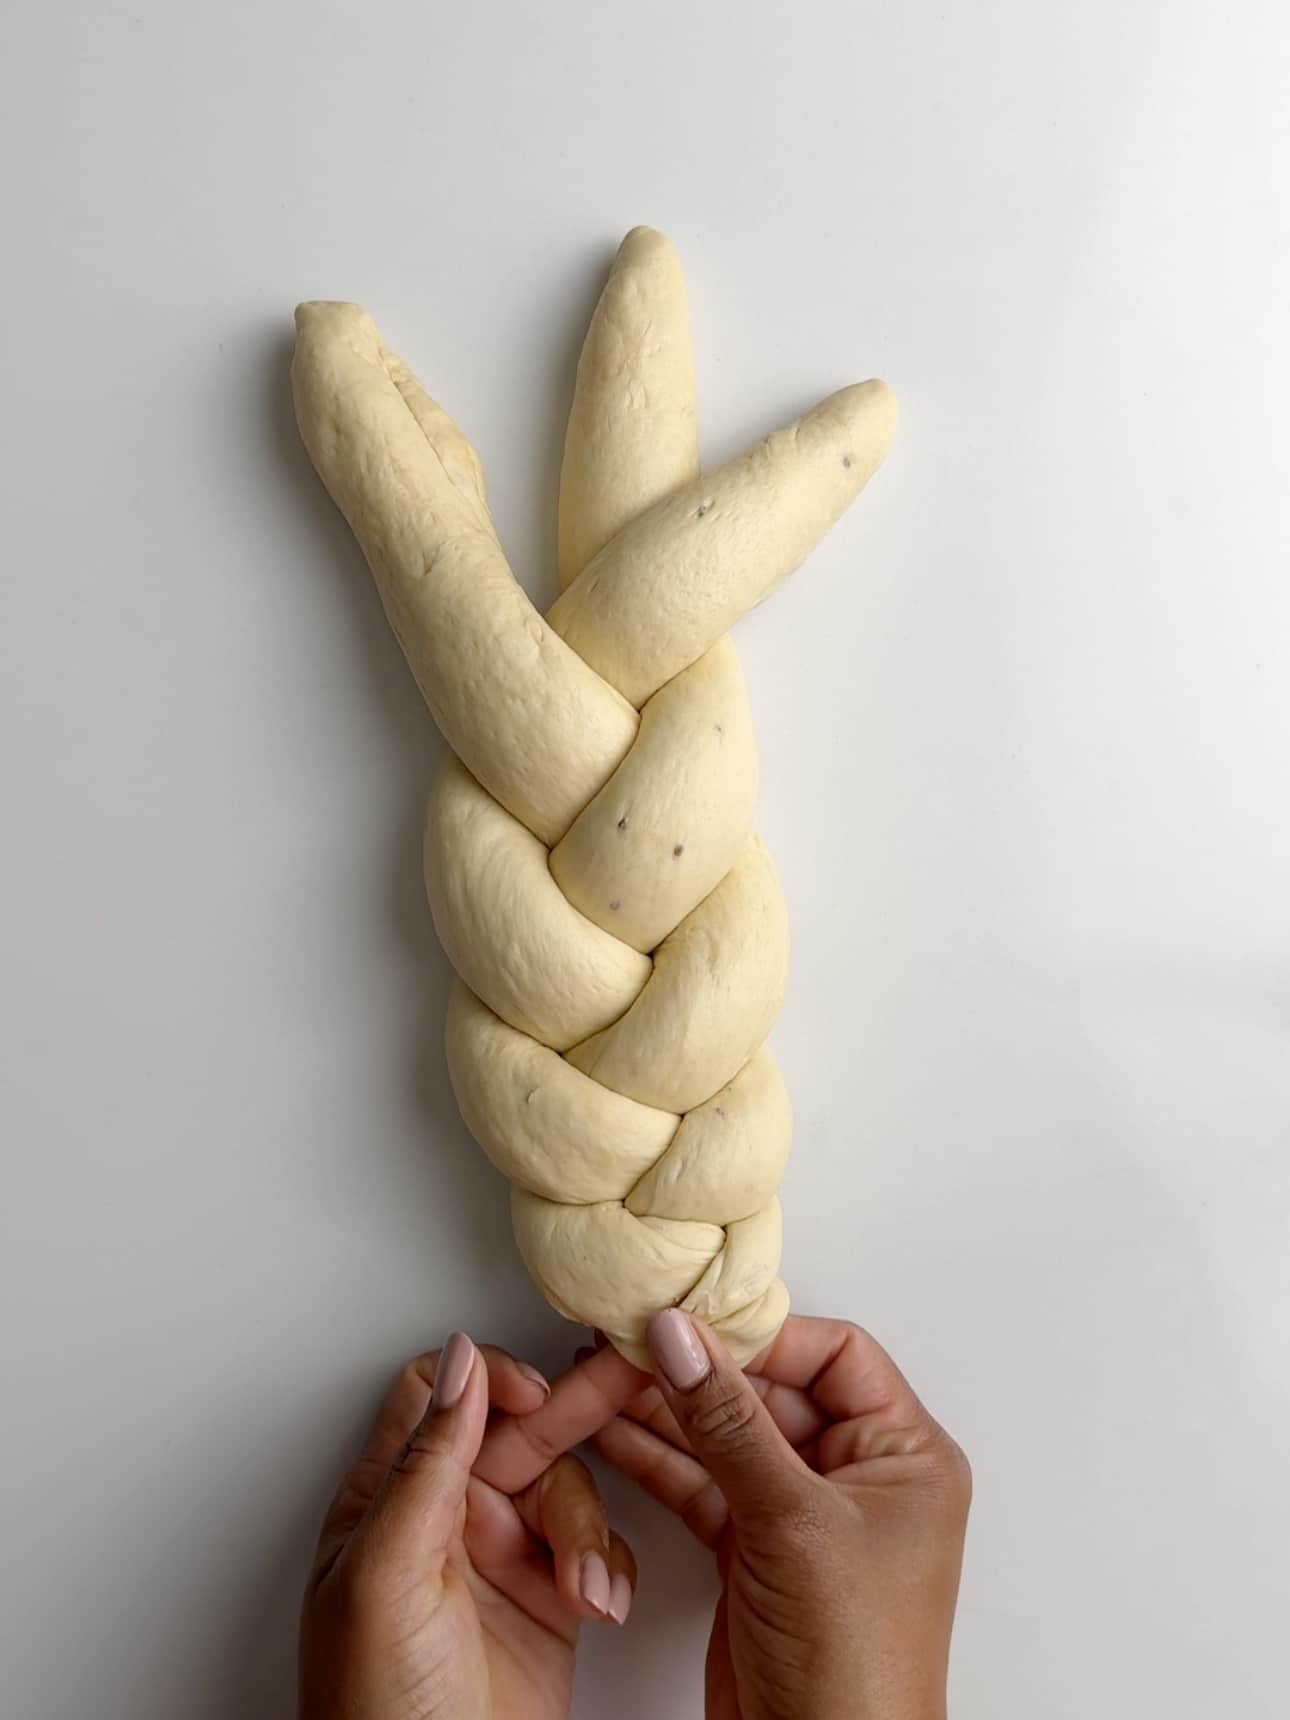
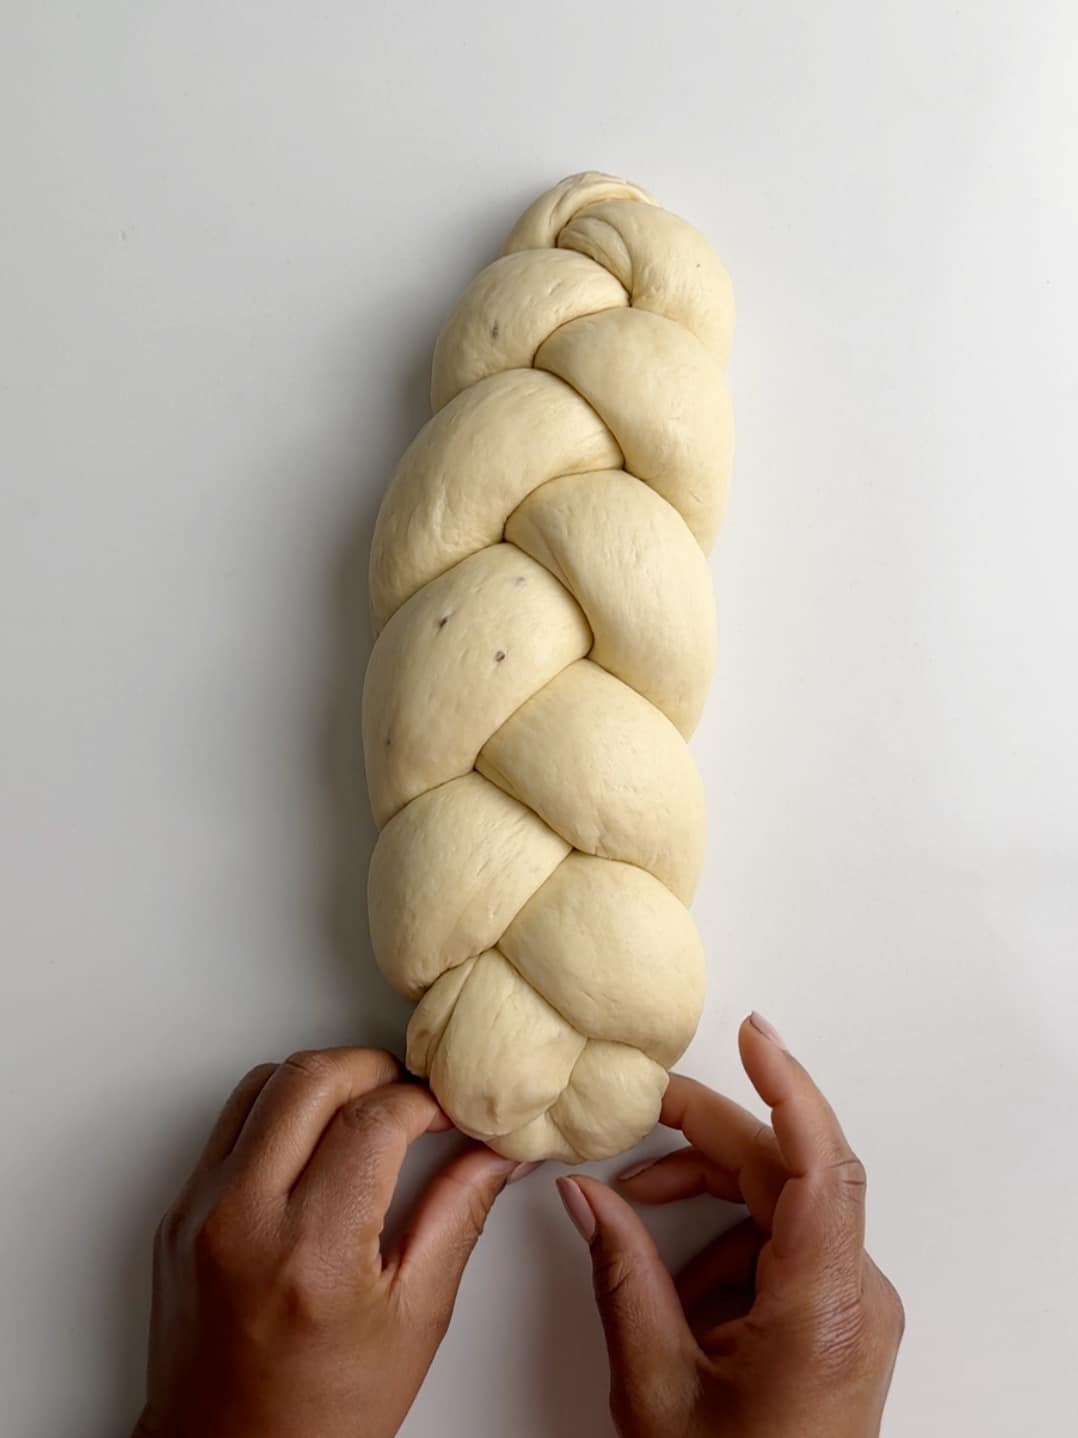
To braid plait bread place the three strands on a flat surface. Start in the middle and bring the right strand to the middle.
Then bring the left strand to the middle and repeat to the end.
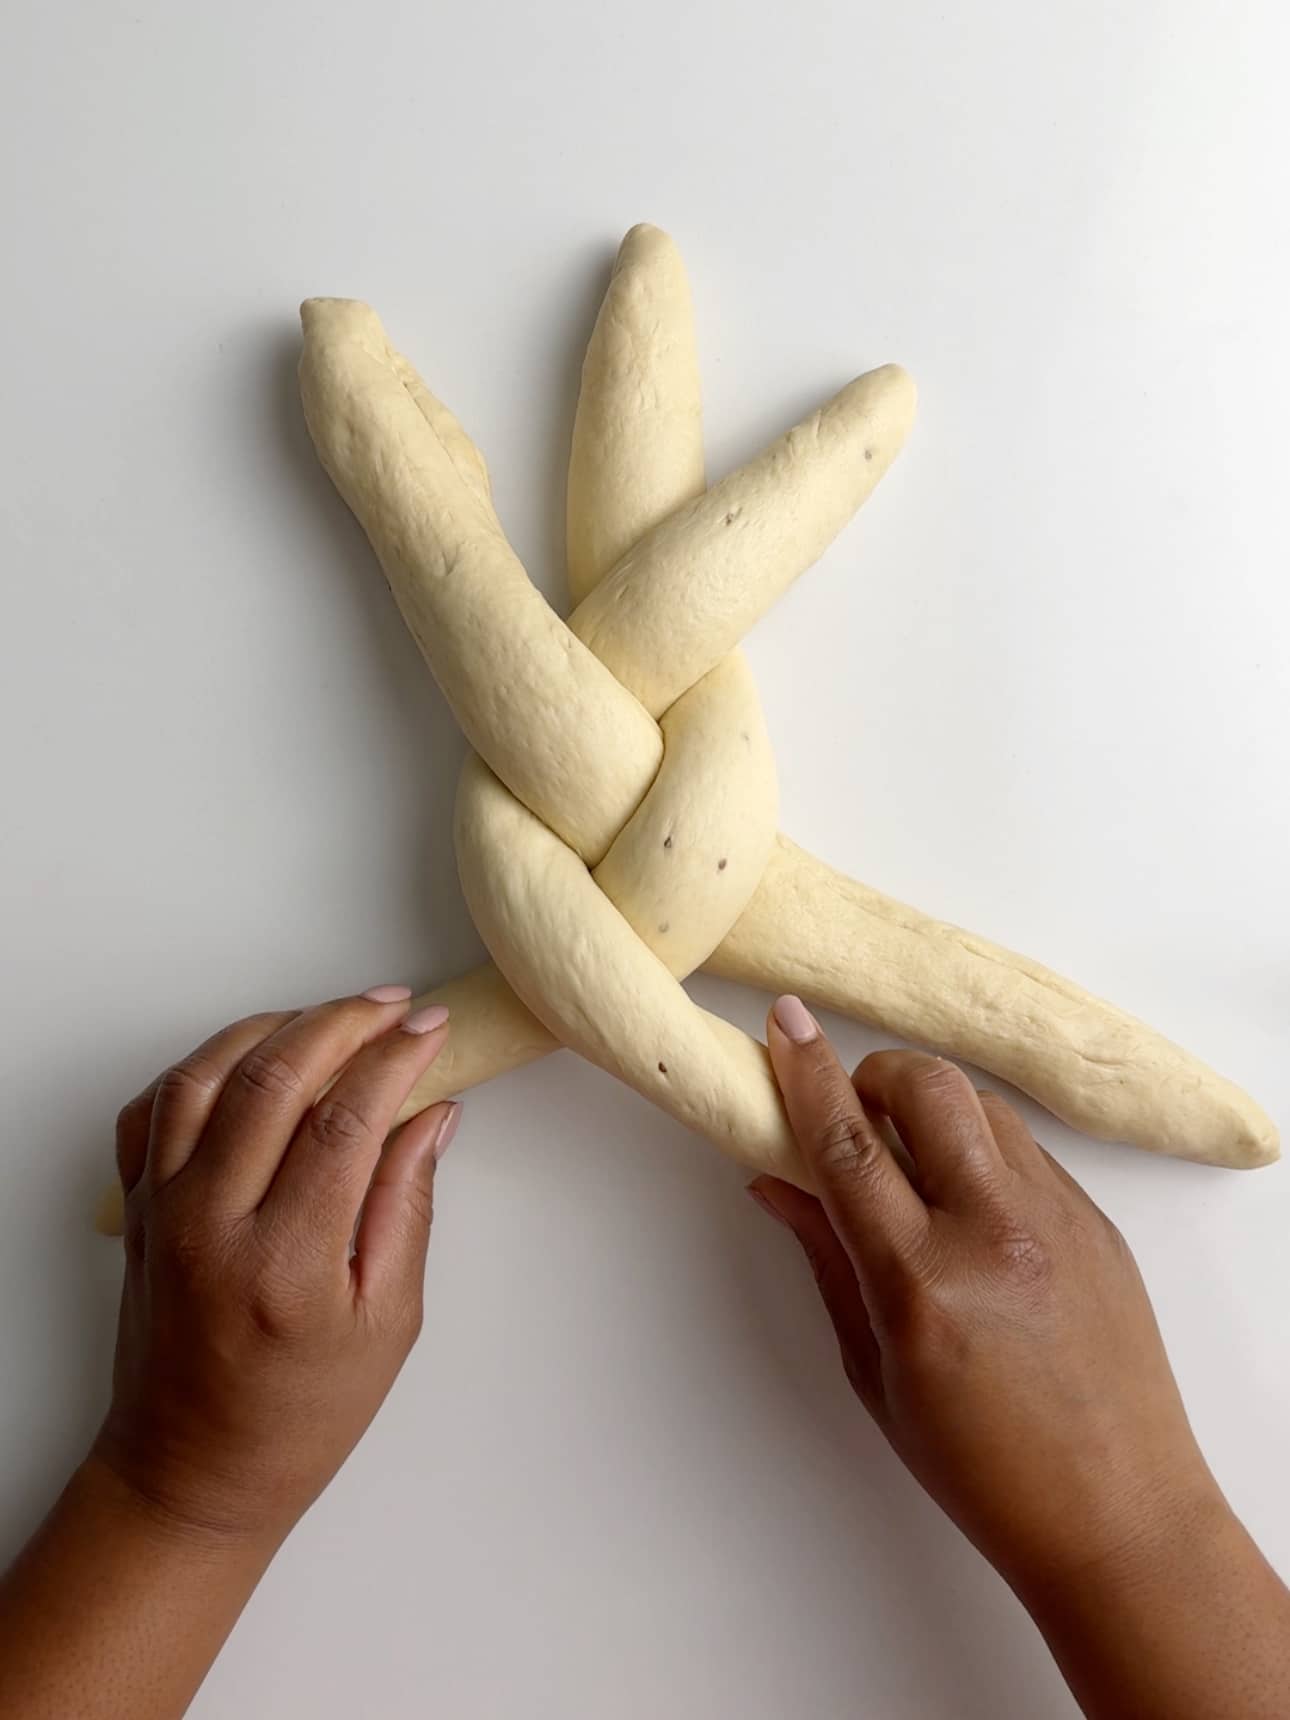
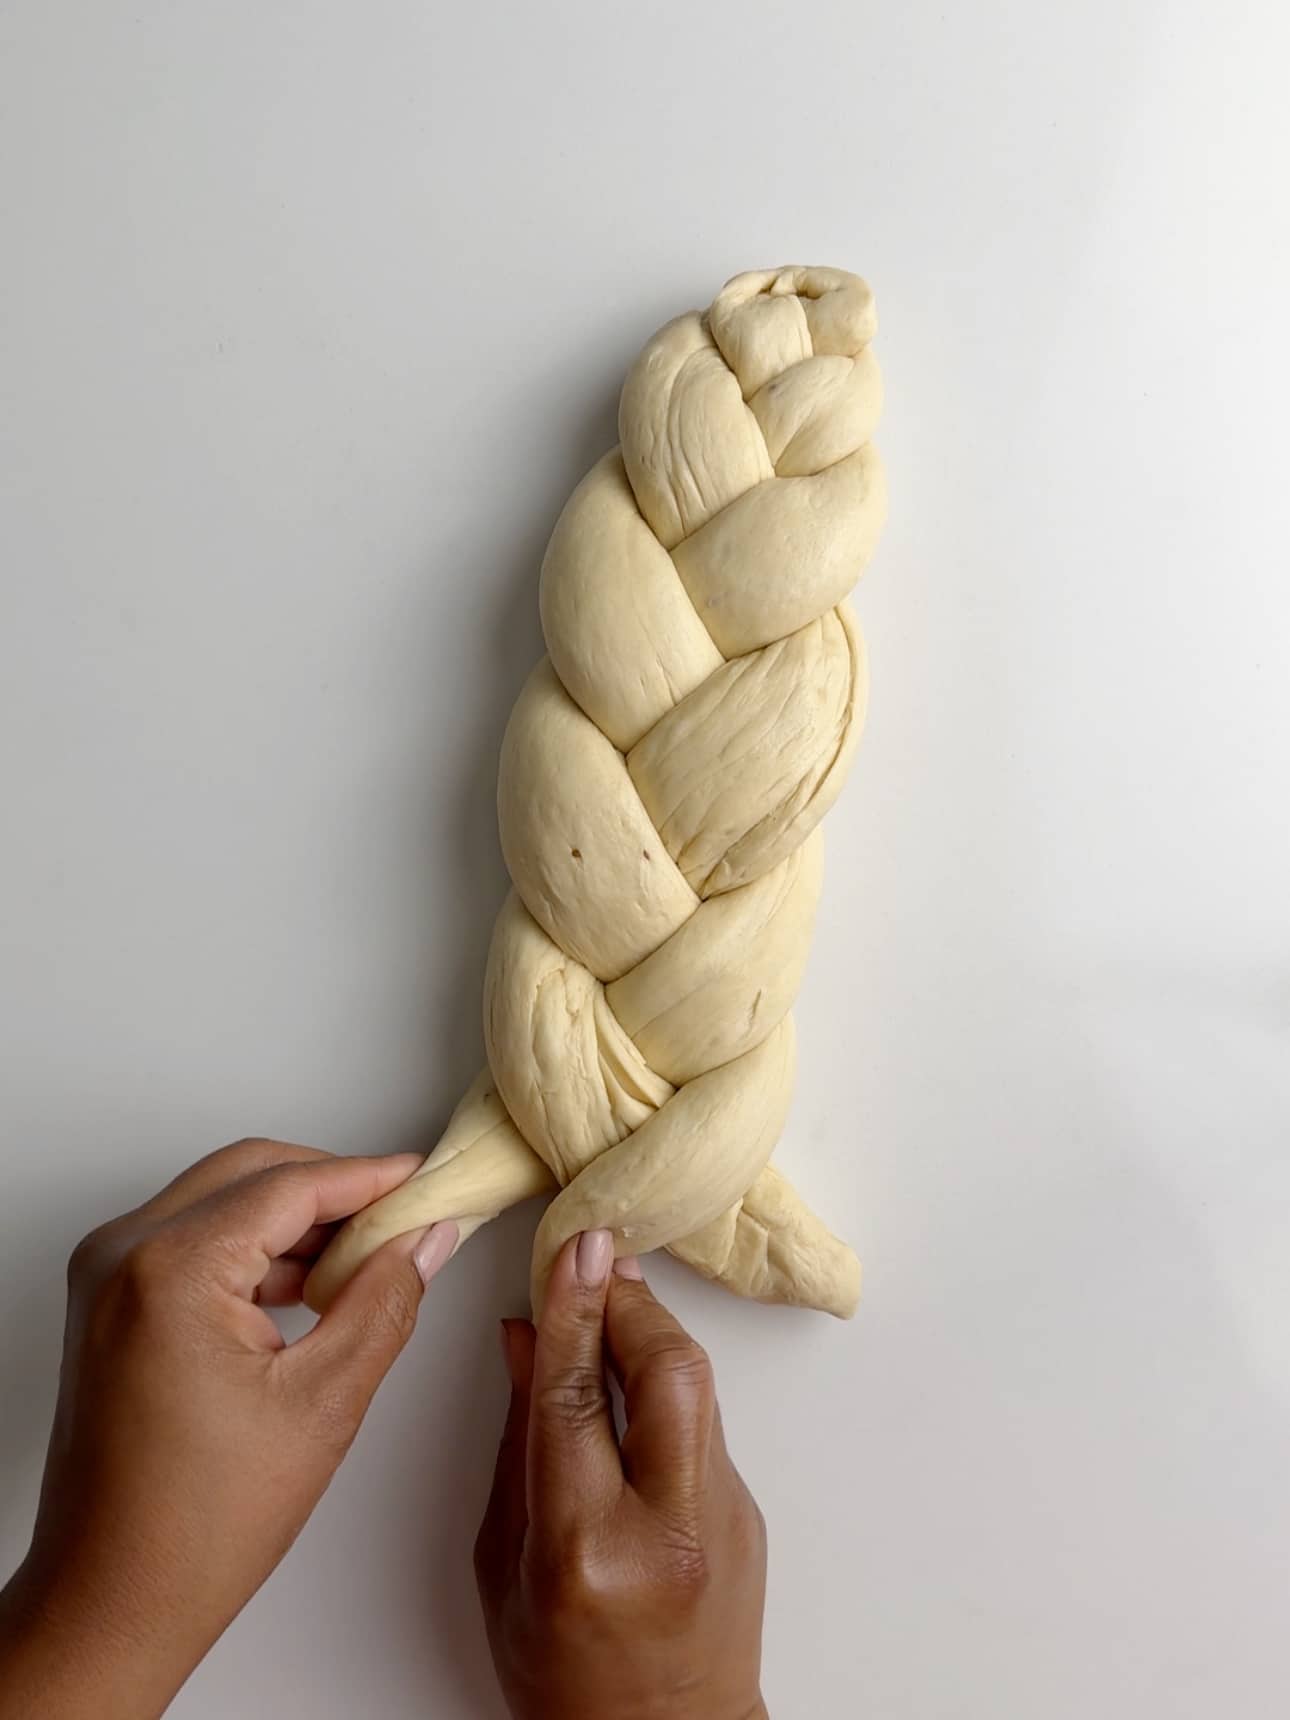
Braid all the way to the end, as far as you can go and when you get to the end tuck the ends under.
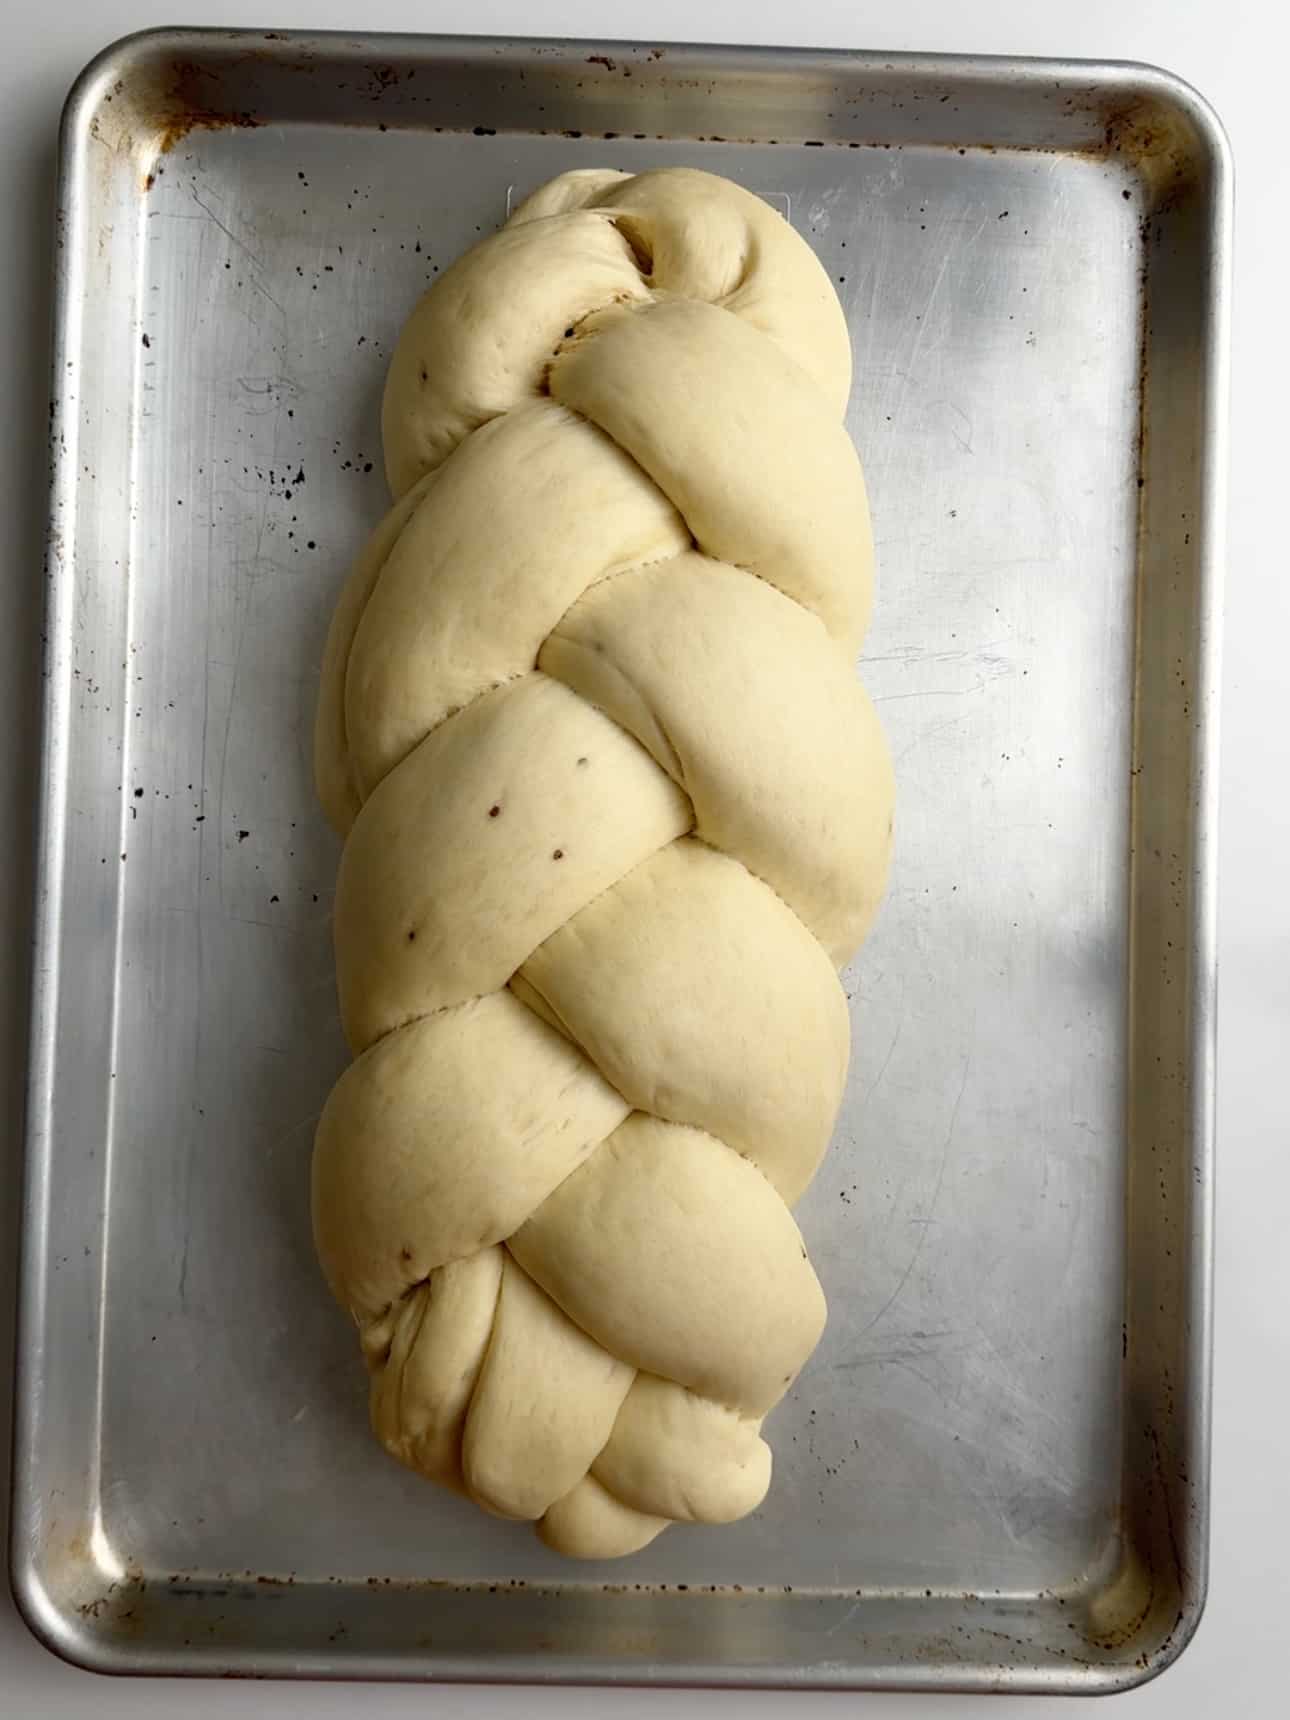
Then flip the loaf over, bring the open end towards you. And braid with the same right to center, left to center method. Go to the end, then tuck the end on top of the loaf. Remember this is now the bottom of the bread.
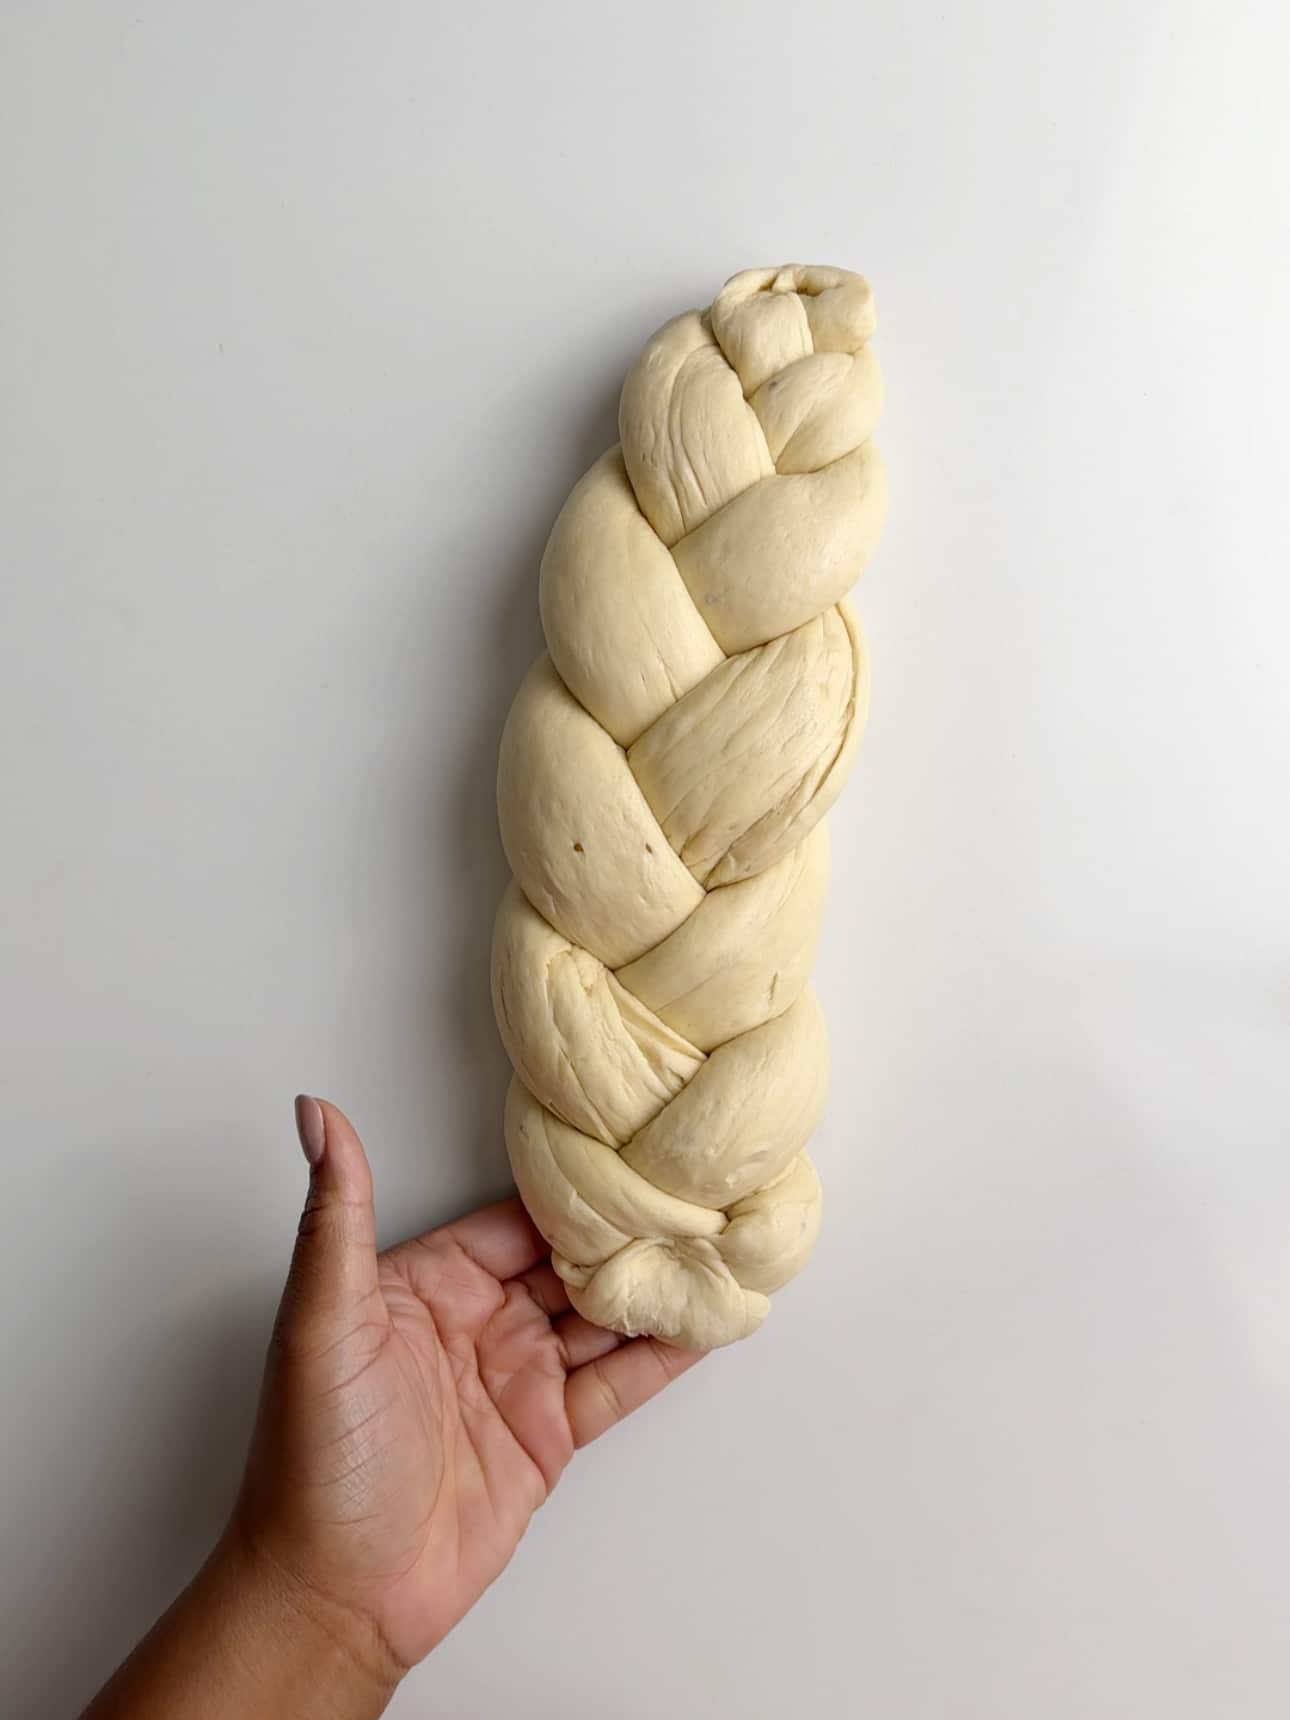
Then gently flip your braided loaf over.
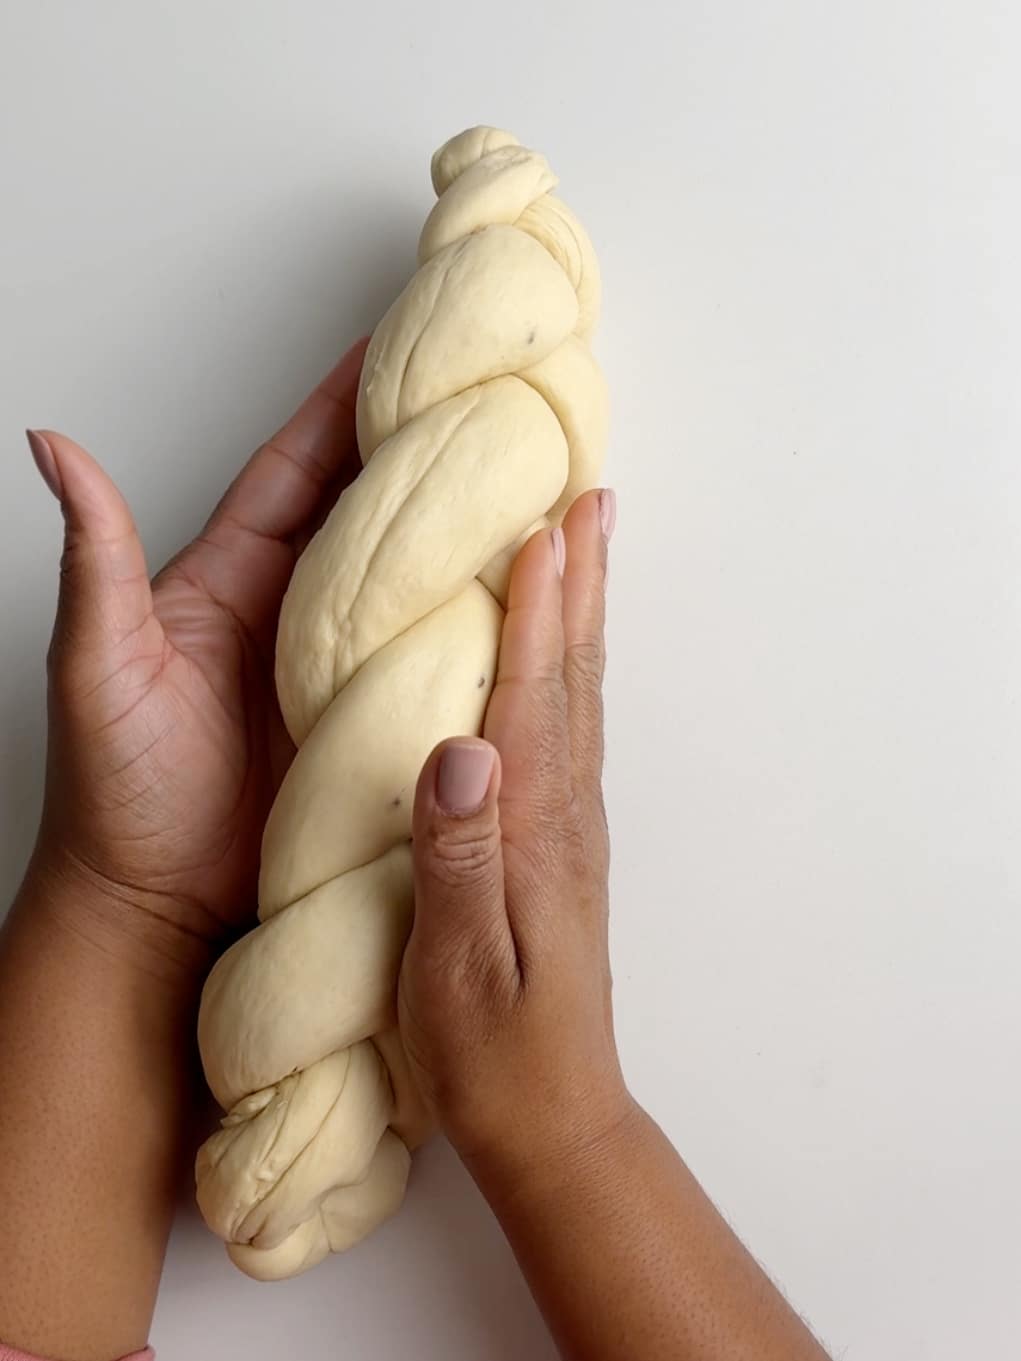
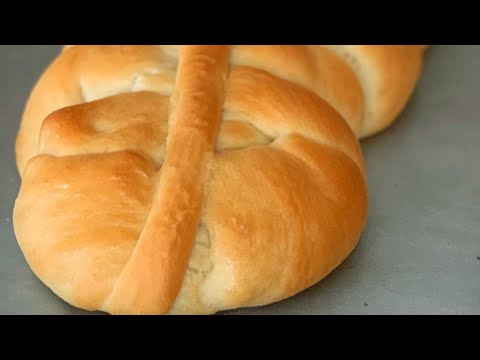
If you are adding a topper to the bread, roll out a very thing strip of dough, making sure it is long enough to add to loaf and tuck under both ends.
Baking Plait Bread
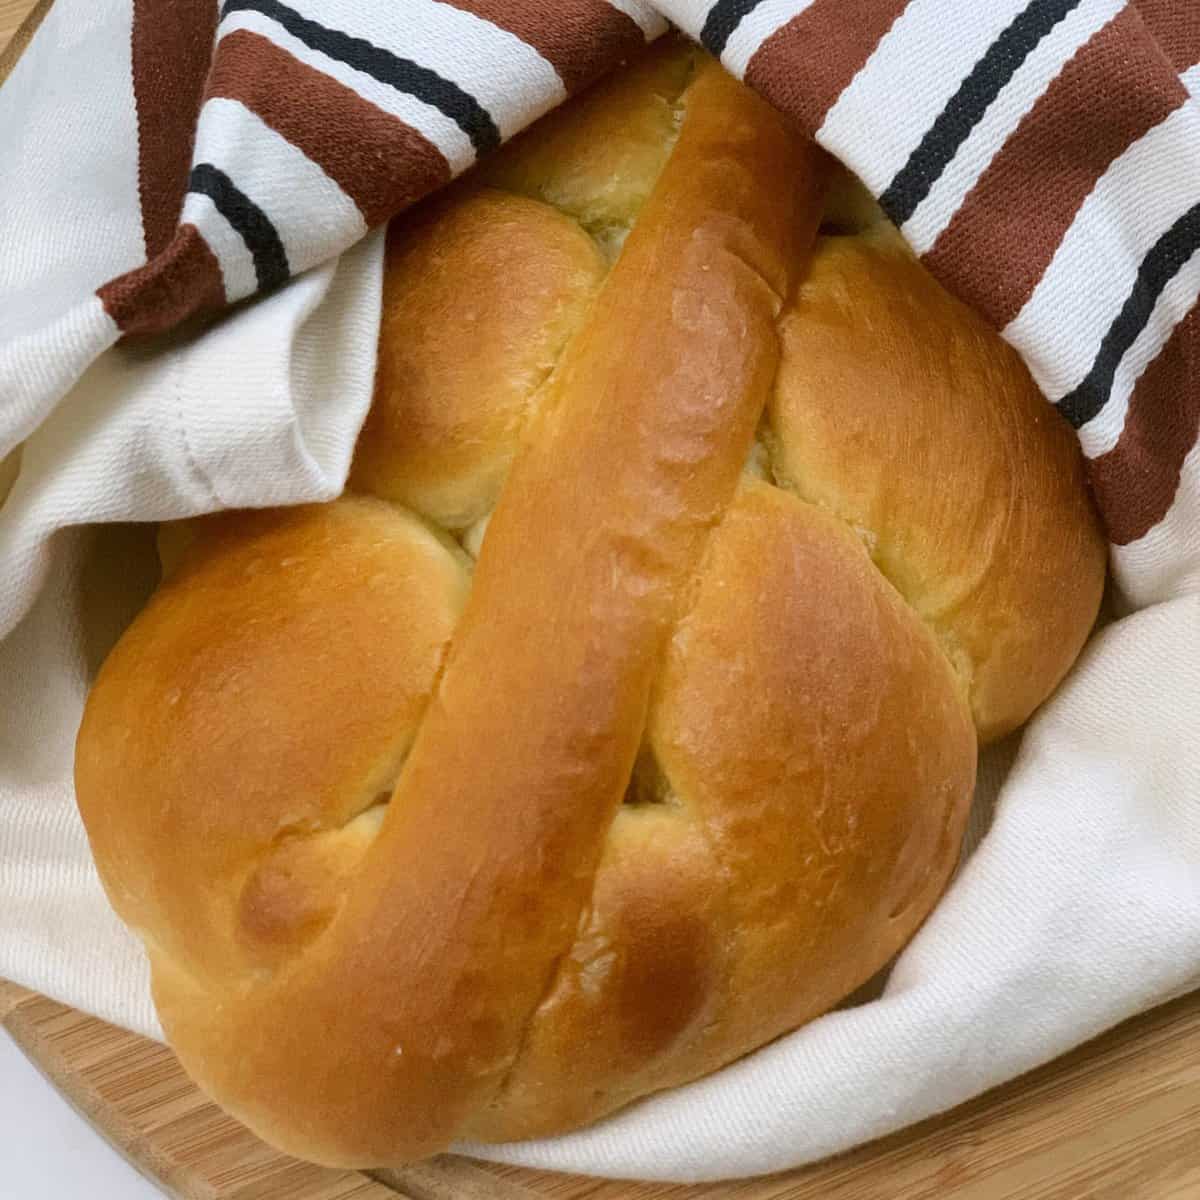
After braiding the bread, allow it to proof for an hour at room temperature. Then preheat your oven to 350°F. Bake the bread for 25 minutes. Then rub with butter, immediately after you take it out of the oven and move to a cooling rack. Cover the bread with a clean kitchen towel while it cools to prevent it from drying out.

The Step by Step Video Tutorial
Substitutions & Variations
- Aniseed (Anise Seed) Bread: A lot of Guyanese people love to add anise seeds to their bread. See below for how to incorporate anise seeds to your bread.
- Vegan. Make this Guyanese bread vegan by using vegan butter.
- Sugar. You can use white granulated sugar instead of brown sugar but I prefer the taste of Demerara sugar or sugar in the raw in this recipe.
- Same Recipe without Plaits. If you are not a fan of plait bread, use this recipe to make two loaves of bread instead. After the first rise, punch down and knead the dough into a ball, then divide the dough ball in half and roll into two logs. Place on a greased baking sheet or in two loaf pans and let the dough rise again before baking.
- Wholewheat Plait Bread. If you prefer wholewheat bread try this Guyanese Style Wholewheat Plait Bread recipe. It is an oldie but yields delicious results.
Guyanese Aniseed (Anise seed) Bread
To make Guyanese Aniseed Bread add 1 teaspoon of anise seeds to 1 1/4 cups of boiling water and allow to sit until the water cools down (about 110°F). Then follow the steps for making plait bread dough, using this water to bloom the yeast.
Equipment
- Whisk: This is used to combine wet ingredients and dry ingredients.
- Rubber Spatula: To scape the bowl and incorporate all the ingredients.
- Mixing Bowl: To contain the dough.
- Baking Sheet: For baking the plaited bread.
Storage
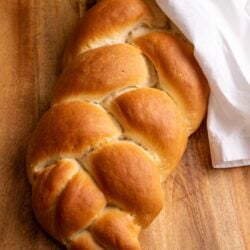
After the bread has completely cooled, place the loaf in a plastic bread bag to keep it soft and fresh. If you don’t have a bread bag you can wrap it with a clean kitchen towel to keep it from drying out.
Store it in a cool dry place for 2-3 days. Placing it in the fridge can make it stale prematurely.
Tips for the Best Plait Bread
- Have patience. This is not a quick bread. It needs time to rise, punch down and rise again before baking. But it is absolutely worth it!
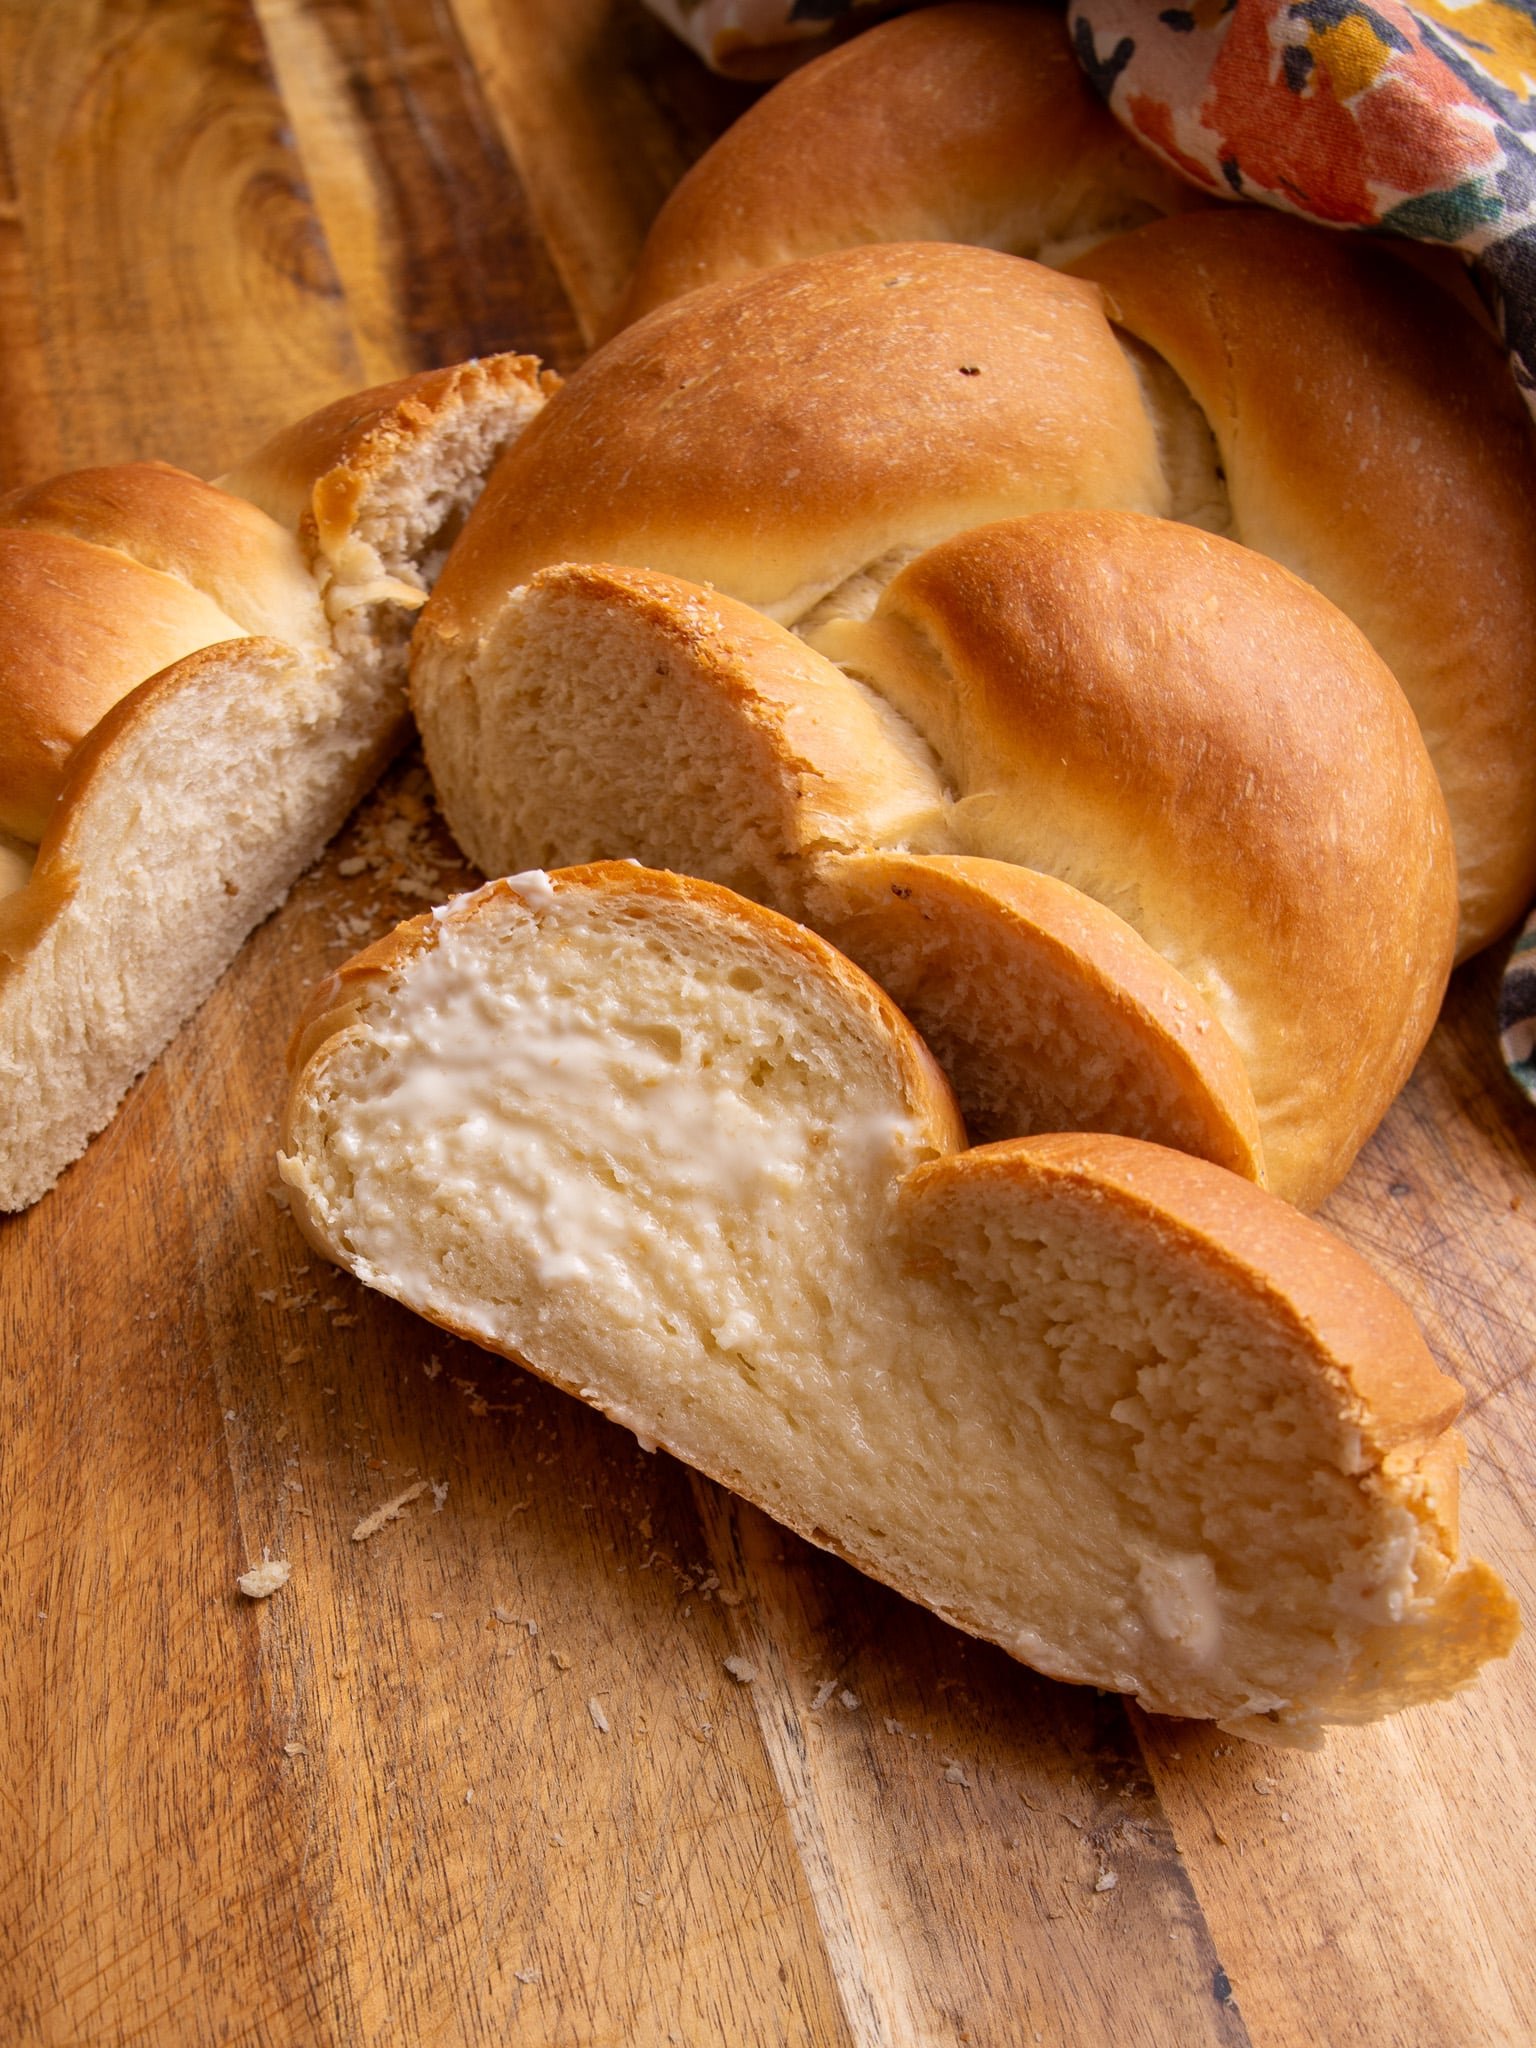
- This bread is perfect for French toast (if it lasts long enough to get stale) or tawa toast: toasting it on a hot skillet with butter!
- To speed up the dough rising process, place covered dough in a warm oven (turn oven on to 200°F for 10 minutes, then shut it off). This is great to speed up the first proof, but should not be used for the second proof or your plait will rip apart.
- For best results let the second proof happen at room temperature and let it proof for the full hour.
- If the dough gets sticky add a little flour.
- Plait the bread tightly because it will loosen as it proofs
- This bread is cooked uncovered but if it looks like it is browning too quickly, cover it with aluminum foil.
FAQ
The two breads may look alike but they have different ingredients. Unlike challah bread, plait bread does not contain milk or eggs.
If your dough isn’t soft, your bread will not be soft and fluffy. Hydration is very important. Make sure your dough is not dry. Also knead your dough until it is spring to the tough.
Guyanese plait braid is influenced by Portuguese laborers who came to Guyana in the 1830s.
After braiding your loaf, allow the bread to rest at room temperature for a full hour before baking and preheat your over before adding the loaf. This prevents the bread from ripping apart. 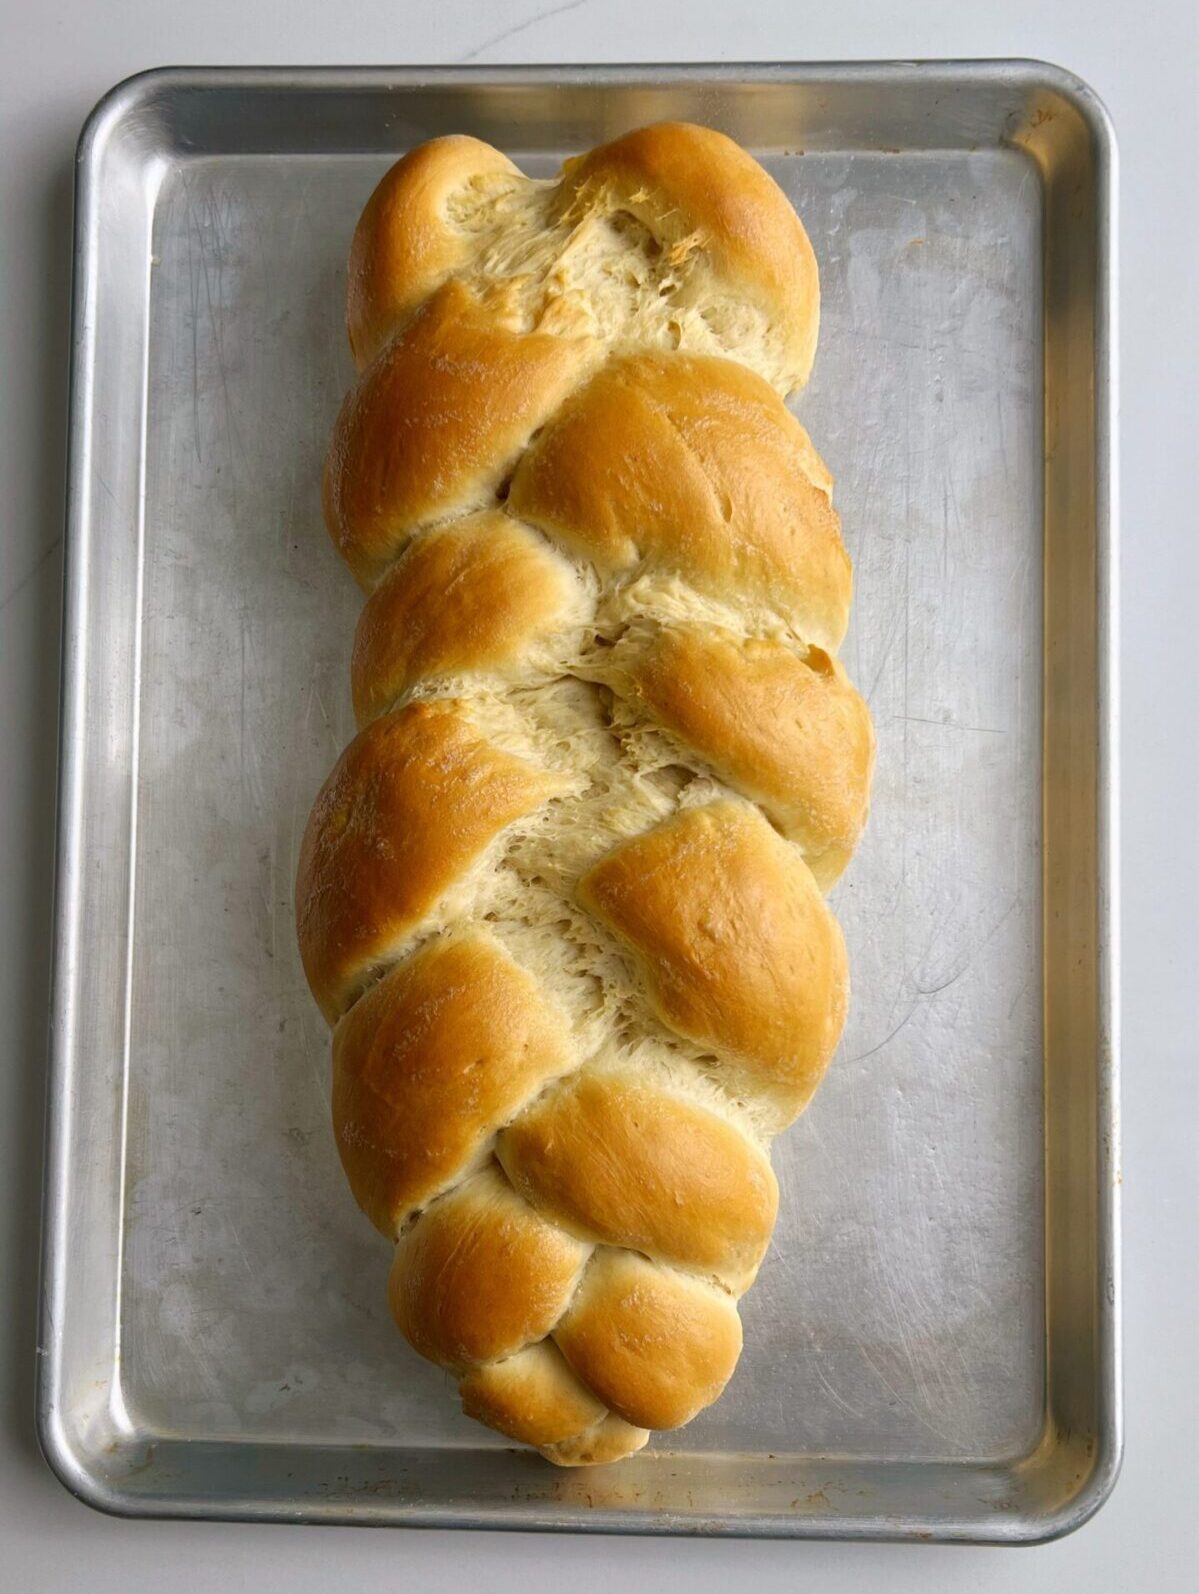
Plait Bread
Equipment
- Whisk
- Rubber Spatula
- Mixing Bowl
- Baking Sheet
Ingredients
- 1 1/4 cup warm water (110 °F)
- 1/4 cup brown sugar
- 1 tablespoon dry active yeast
- 3 1/2 cup all purpose flour (plus more for dusting)
- 1/4 teaspoon salt
- 1/4 cup room temperature butter (plus 1 tablespoon for basting after baking)
Instructions
- In a small bowl combine the warm water and sugar. Mix until the sugar dissolves, then add the yeast and give it a stir. Cover with a towel and set aside in a warm place to bloom.
- In a large mixing bowl, combine the flour and salt and mix well. Then using a fork or your finger tips mix the butter into the flour until the mixture looks crumbly.
- Next, form a well in the center of the flour and butter mixture then add the bloomed yeast. Using a whisk mix together to slowly form a pancake batter consistency, this is best achieved using a whisk. Then use your hands or a rubber spatula to pull the rest of the flour into the mixture to form a soft dough ball.
- Turn the dough onto a floured surface and knead for 5 minutes into a smooth ball or until the dough bounces back when pressed with a finger.
- Place the dough ball into a greased bowl, cover with a towel and allow to rise until it doubles in size. This takes about 45 minutes to 1 hour.
- When the dough doubles in size, punch down and knead again into a smooth ball. Then if adding the topper to the bread, cut a 2 inch piece of dough off from the ball and set aside.
- Divide the remaining dough into 3 equal parts. Tuck the cut ends of each piece of dough into the bottom (see photos above) and roll into long logs about 12 to 15 inches long.
- Next starting in the middle, braid the three pieces into a braid by going right over to center, then left over to center (step by step images are in the write up above). Go all the way to the end and tuck the ends into the bottom.
- Then flip the loaf over bringing the open ends to you and repeat the steps for braiding the open end. Then tuck the ends into the top. If this is confusing following the images under the section on "How to braid Plait Bread" above.
- If using the topper, roll the 2 inch piece of dough that was set aside earlier into a long strip, place the strip on top of the braided loaf tucking the ends under the loaf, then place the loaf on a greased baking sheet. Cover and let rise for at least an hour at room temperature.
- When ready to bake Preheat oven to 350 °F. Add the bread to the middle shelf of the oven and bake for 25 minutes or until it is golden brown. Remove from the oven and brush with 1 tablespoon of butter, move to a cooling rack and cover with a clean kitchen towel.
How to make the Dough in the Stand Mixer
- Follow the steps above to bloom the yeast and set aside.
- Then add the flour, butter and salt to your stand mixer bowl and using a whisk or paddle attachment, mix to combine.
- Next add the bloomed yeast to the dry ingredients in the stand mixer bowl and using a whisk attachment, mix for a few seconds to form a pancake like mixture. You do not need to mix all of the flour into the mixture just about a 1/3.
- Switch to a dough hook, making sure to remove any batter from the whisk attachment first. Then place the stand mixer on speed 2 and let it run for about 10 minutes. The mixture should come together in a dough ball that clings to the dough hook.
- Turn the dough onto a lightly floured surface and shape into a smooth dough ball. Place the dough ball into a greased bowl, cover with a towel and allow to rise until it doubles in size. This takes about 45 minutes to 1 hour.
- Then see above for instructions on how to shape and bake.
Notes
- When doubling this recipe do not double the yeast, or you will be left with a very yeasty bread. When tripling the recipe use 1 1/2 tablespoons of yeast. Most people get better results by making separate batches instead of doubling or tripling the recipe.
- To speed up the dough rising process, place covered dough in a warm oven (turn oven on to 200°F for 10 minutes, then shut it off). This is great to speed up the first proof, but should not be used for the second proof or your plait will rip apart.
- For best results let the second proof happen at room temperature and let it proof for the full hour.
- After my bread cools I place it into a bread bag to keep it fresh. If you don’t have a bread bag you can wrap it with a clean kitchen towel to keep it from drying out.
- To make Guyanese Aniseed bread 1 teaspoon of anise seeds to 1 1/4 cups of boiling water and allow to sit until the water cools down (about 110°F). Then follow the steps for making plait bread dough, using this water to bloom the yeast.
Nutrition
The information listed in the recipe card is an estimate provided by an online nutrition tool. The tool evaluates ingredient names and amounts then makes calculations based on the number of servings listed for the recipe. It is provided as a general guideline and not as a precise calculation. For precise nutrition information please feel free to add the ingredients to your preferred nutrition calculator or consult a doctor or licensed nutritionist.
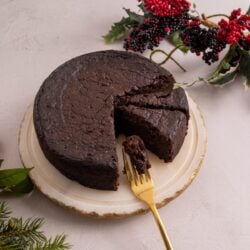 Non-alcoholic Guyanese Black Cake
 Pumpkin Flan
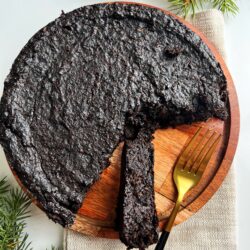 Almond Flour Black Cake
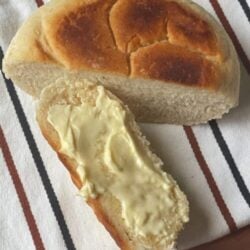 Gluten Free Pot Bread
Akita F. Says
Now i’m the bread making queen in my family! The baking spirit that my grandmother and great aunts have skipped my mom. So Althea tutorials are bringing a long lost tradition back to my family!
Def would recommend watching the video AND reading all directions. Some written and visual directions do not match. But my bread came out great. Gonna make it a 2nd time and take some to my grandparents home so they don’t have to buy for the holidays.
Sisiscarlett Says
Perfect Guyanese bread. I followed the recipe and was rewarded with fluffy flavoursome bread perfect for my pepper pot.
Thank you so much.
Butters Says
Thank you!! I tried the recipe. The bread was soft and flavorful. Easy to follow recipe. I have to practice on the plait.
Plaitbread plaiter Says
I decided to make my own plait bread and your receipe had the best reviews. It was my first time making bread and your receipe was easy to follow and all of the ingredients were found in my cupboard. At one point I thought I did something wrong as the dough was sticky but, I must have been encouraged by your grand mother to keep working with the dough and I did. Wow what an amazing bread! The pepperpot is on the stove now. I can’t wait to eat them both.
Thank you for sharing your receipe.
Sandie Anderson Says
Thank you! Thank you! Thank you! So far I made the pepper pot, plait bread, and my garlic pork is still holding. So we are set for Christmas morning breakfast…smile. I am working on the ingredients for Christmas dinner. I appreciate that you have made these recipes easy to follow and the food is delicious, as this is my first time making all of these goodies. Enjoy a lovely holiday season and happy 2022.
Althea Brown Says
Yay. You’re welcome. Seasons greetings and enjoy all the Yumm ones
Mary Permaul Says
Thank you so much for this recipe. My grandmother’s name was also Inez (Jackman) and we also lived in West Ruimveldt prior to migrating to the US. I lost my grandmother 3 years ago and making this bread really made me feel like I was reconnecting with her. I have been trying to perfect Guyanese dishes in the past few years in hopes of passing my heritage and traditions on to my boys. I am a mom of a 8 year old and 2 year old. This was my first time trying to make bread and it came out amazing. I need to work on my plaiting skills but I’ll get there. I also plan to try your pepperpot recipe this week for the first time. Just ordered that instant pot as you recommended. Happy Holidays to you and your family and thank you again! ????
Althea Brown Says
Thank you so much for sharing this. I’m so glad the bread worked out for you and I’m excited to hear about the pepperpot.
Farahmhamid Says
I love all your recipes but your plait bread is my favourite and always a winner! ♥️
Antoinette Griffith Says
I understand the value of words, so I don’t use them frivolously. Hear me when I say Althea is a treasure!!!
I’ve been following her since 2014, and in my opinion, whether you’ve grown up eating these traditional Guyanese staples and have some small measure of how to put a meal together or are from another country looking to broaden your home menu; Althea gives you fail proof recipes to get it done.
Although I am not Guyanese, I was taught to cook by a much beloved Guyanese woman in my life. However, the truth is I rarely had to actually “knock pots!” Unfortunately, as often happens in life, Mater’s passing showed me how much I didn’t know or remember. Talk about depressed.
Until I found Metemgee on YouTube.
I’ve since cooked bakes, bread, pepperpot, and of course her “metemgee ????, amongst many other recipes. To the pleasure and joy of my Guyanese husband.
Althea, I’ve said it before, but it bears repeating:
“I know how challenging it can be to incorporate a blog into the already busy life of being a daughter, wife, mother and all the other many hats our gender wears on any given day; so I had to take a moment to say thank you.
Thank you, for your detailed Youtube videos and the informative information on your blog. Your explicit steps show your compassion (for those of us navigating new recipes) and your love and passion for GOOD food. Each recipe and post is nourishment not only for our bodies but our souls as well. Helping us to reconnect to the feel good food of old and thereby ministering to the child in each of us yearning for a taste of “home.”
Please know that both your sites are a blessing to those of us who no longer have (or never had) a Mater, or Auntie to guide our hands in the kitchen.
I hope you realize the value and impact of what you do.
Again, I say Thank You and May God Continue to Bless You as you have blessed your readers!
blessed60859212 (@vandersongriffith)
OCTOBER 17, 2014 AT 7:30 AM”
Audrey Says
Thanks so much for sharing this family recipe. I have made several Guyanese plait breads, and this recipe is the best one I have tried. It was soft, fluffy, buttery deliciousness. It didn’t even get to cool. It was gone in 15 minutes. I made the dough in my Zo. It doubled in size w/i 45 minutes. This is definitely a keeper.
Sharda Says
So soft and fluffy! Easy recipe for great tasting bread as if its straight out the bakery. And the video makes it even easier to follow. Althea, just curious as to why not add baking powder to this recipe?
Althea Brown Says
I’ve never made bread with baking powder. It’s soft and perfect without it. I like to keep things simple.
KR Says
Fantastic, fool-proof recipe. I followed the video exactly (doubled the butter!) and it’s the softest bread I’ve ever made. Thank you!
Althea Brown Says
Yumm thank you for sharing.
A . Biteye Says
I did it and it was very delicious for my first time. Simple recipe I love it. Much thanks.
Althea Brown Says
Lovely
Angela Says
Merry Christmas! Baking this bread brought back so many wonderful memories from my childhood. My only question is— at 25 mins, the bread wasn’t golden brown. Any suggestions?
Althea Brown Says
Keep baking for another 5 minutes. Some ovens are cooler than other.
Radha Says
Just made this. My house smells glorious! It’s soft and melts in your mouth. I love everything about this recipe, especially the trick to make a well with the flour and whisking in the sugar/water/yeast until it’s a manageable dough. Thank goodness this blog came into my life!
Althea Brown Says
Thank you so much for this. Love the smell of this bread baking also.
Elayne Says
After watching my grandmother, from a distance, making this bread as a child, it seemed too complicated for my analytical and Hinglish mind. However, after watching Althea’s post on Instagram, which redirected me to this blog and YouTube video, I pulled up my sleeves, grabbed that flour, yeast and sugar with gusto. The plait bread came out perfect, as soft as a pillow and more-ish (I devoured a whole loaf all to myself!!!). I was so tempted to breach all of the U.K pandemic regulations, book a flight to Guyana and pitch up a stall in Bourda market to sell the bread that I had made. Obviously, I couldn’t but I will be making another batch tomorrow because not only my belly deserves it but the recipe is easy to follow and the results are superb! Thank you 🙂
Tip: make sure you listen / read Althea’s tips – very important.
Althea Brown Says
Thank you so much. What a review! I too can eat an entire loaf of his by myself. Much love to you.
Marcia Redding Says
OMG!! This is the best recipe ever!!! I made this today and it was the only thingy sons are for most of the day, lol. A must do again before Pepperpot time to make sure I got it right. Thank you Althea!
Althea Brown Says
I’m so glad your family enjoyed the recipe. Thank you for sharing
Nadina Says
Althea, your bread recipe is the best! So easy and tasty! The kids love it! I double the recipe every time because it gets eaten like candy!
Thank you for making me feel like an accomplished bread maker!
Althea Brown Says
It’s definitely a fav in our family too. Thank you for sharing.
Lana Says
This plait bread recipe has saved me during this pandemic! Thank you so much! My family loves it!
Althea Brown Says
Thanks for sharing. Much love to you and your family.